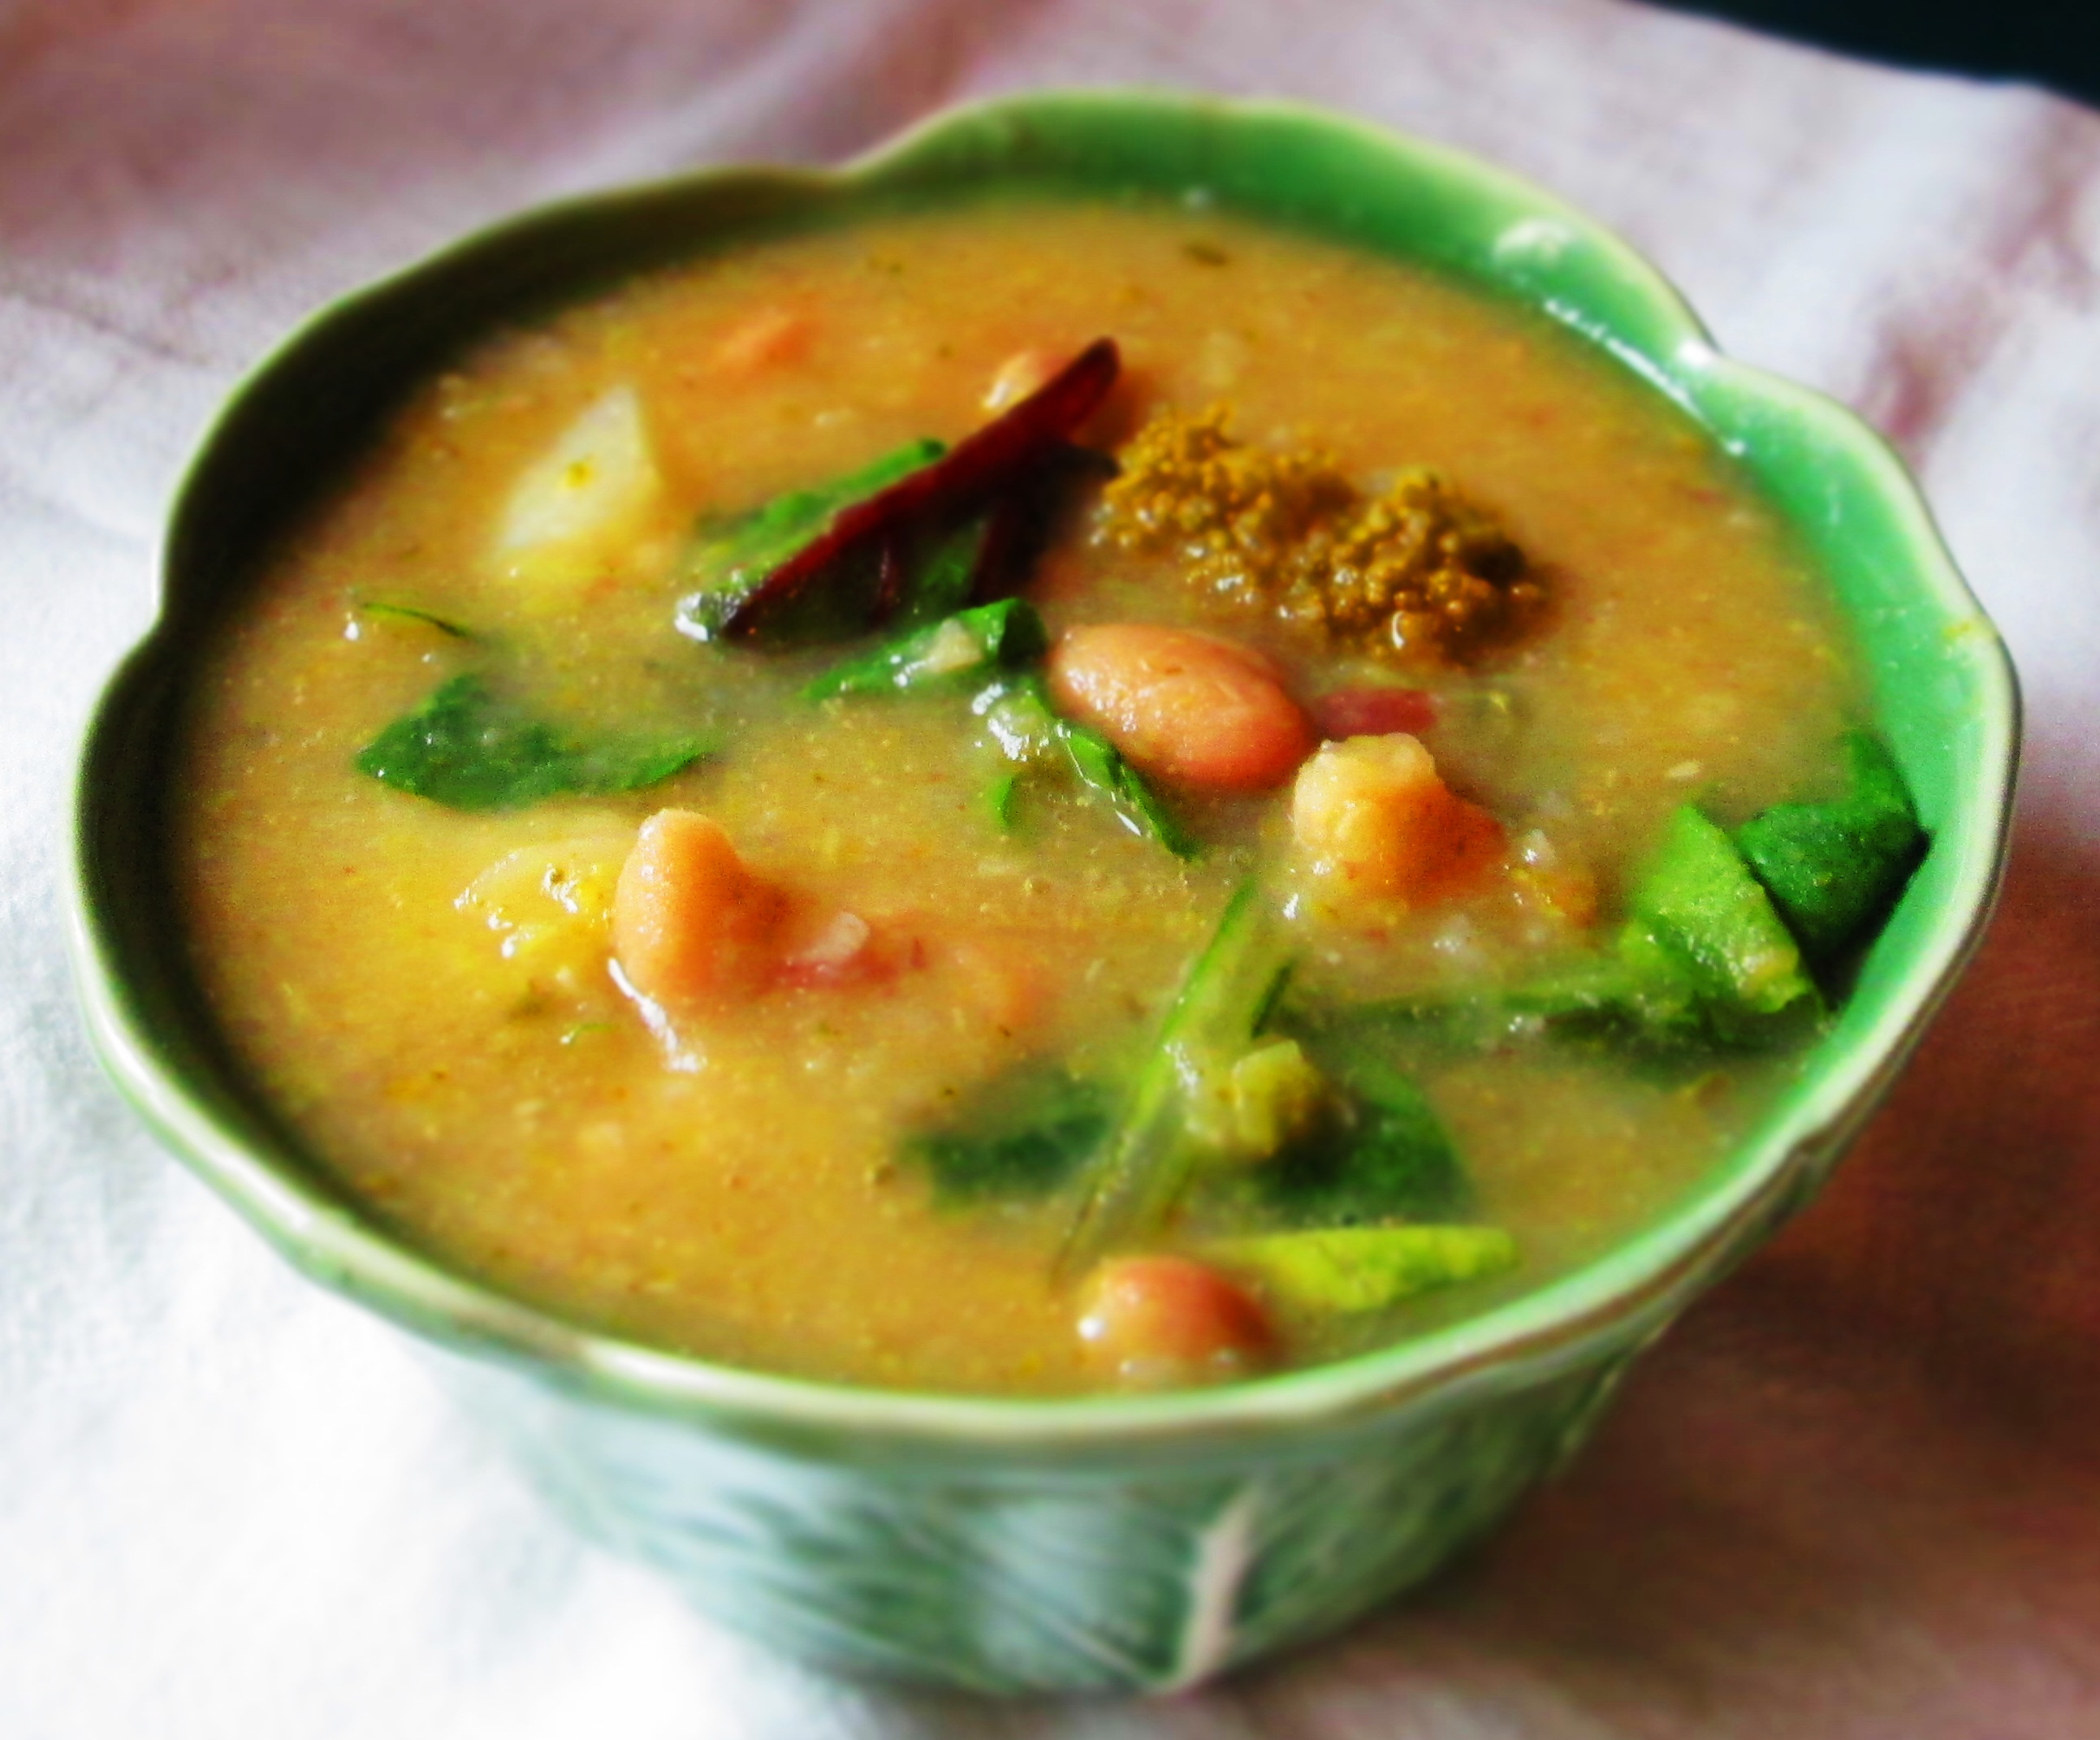
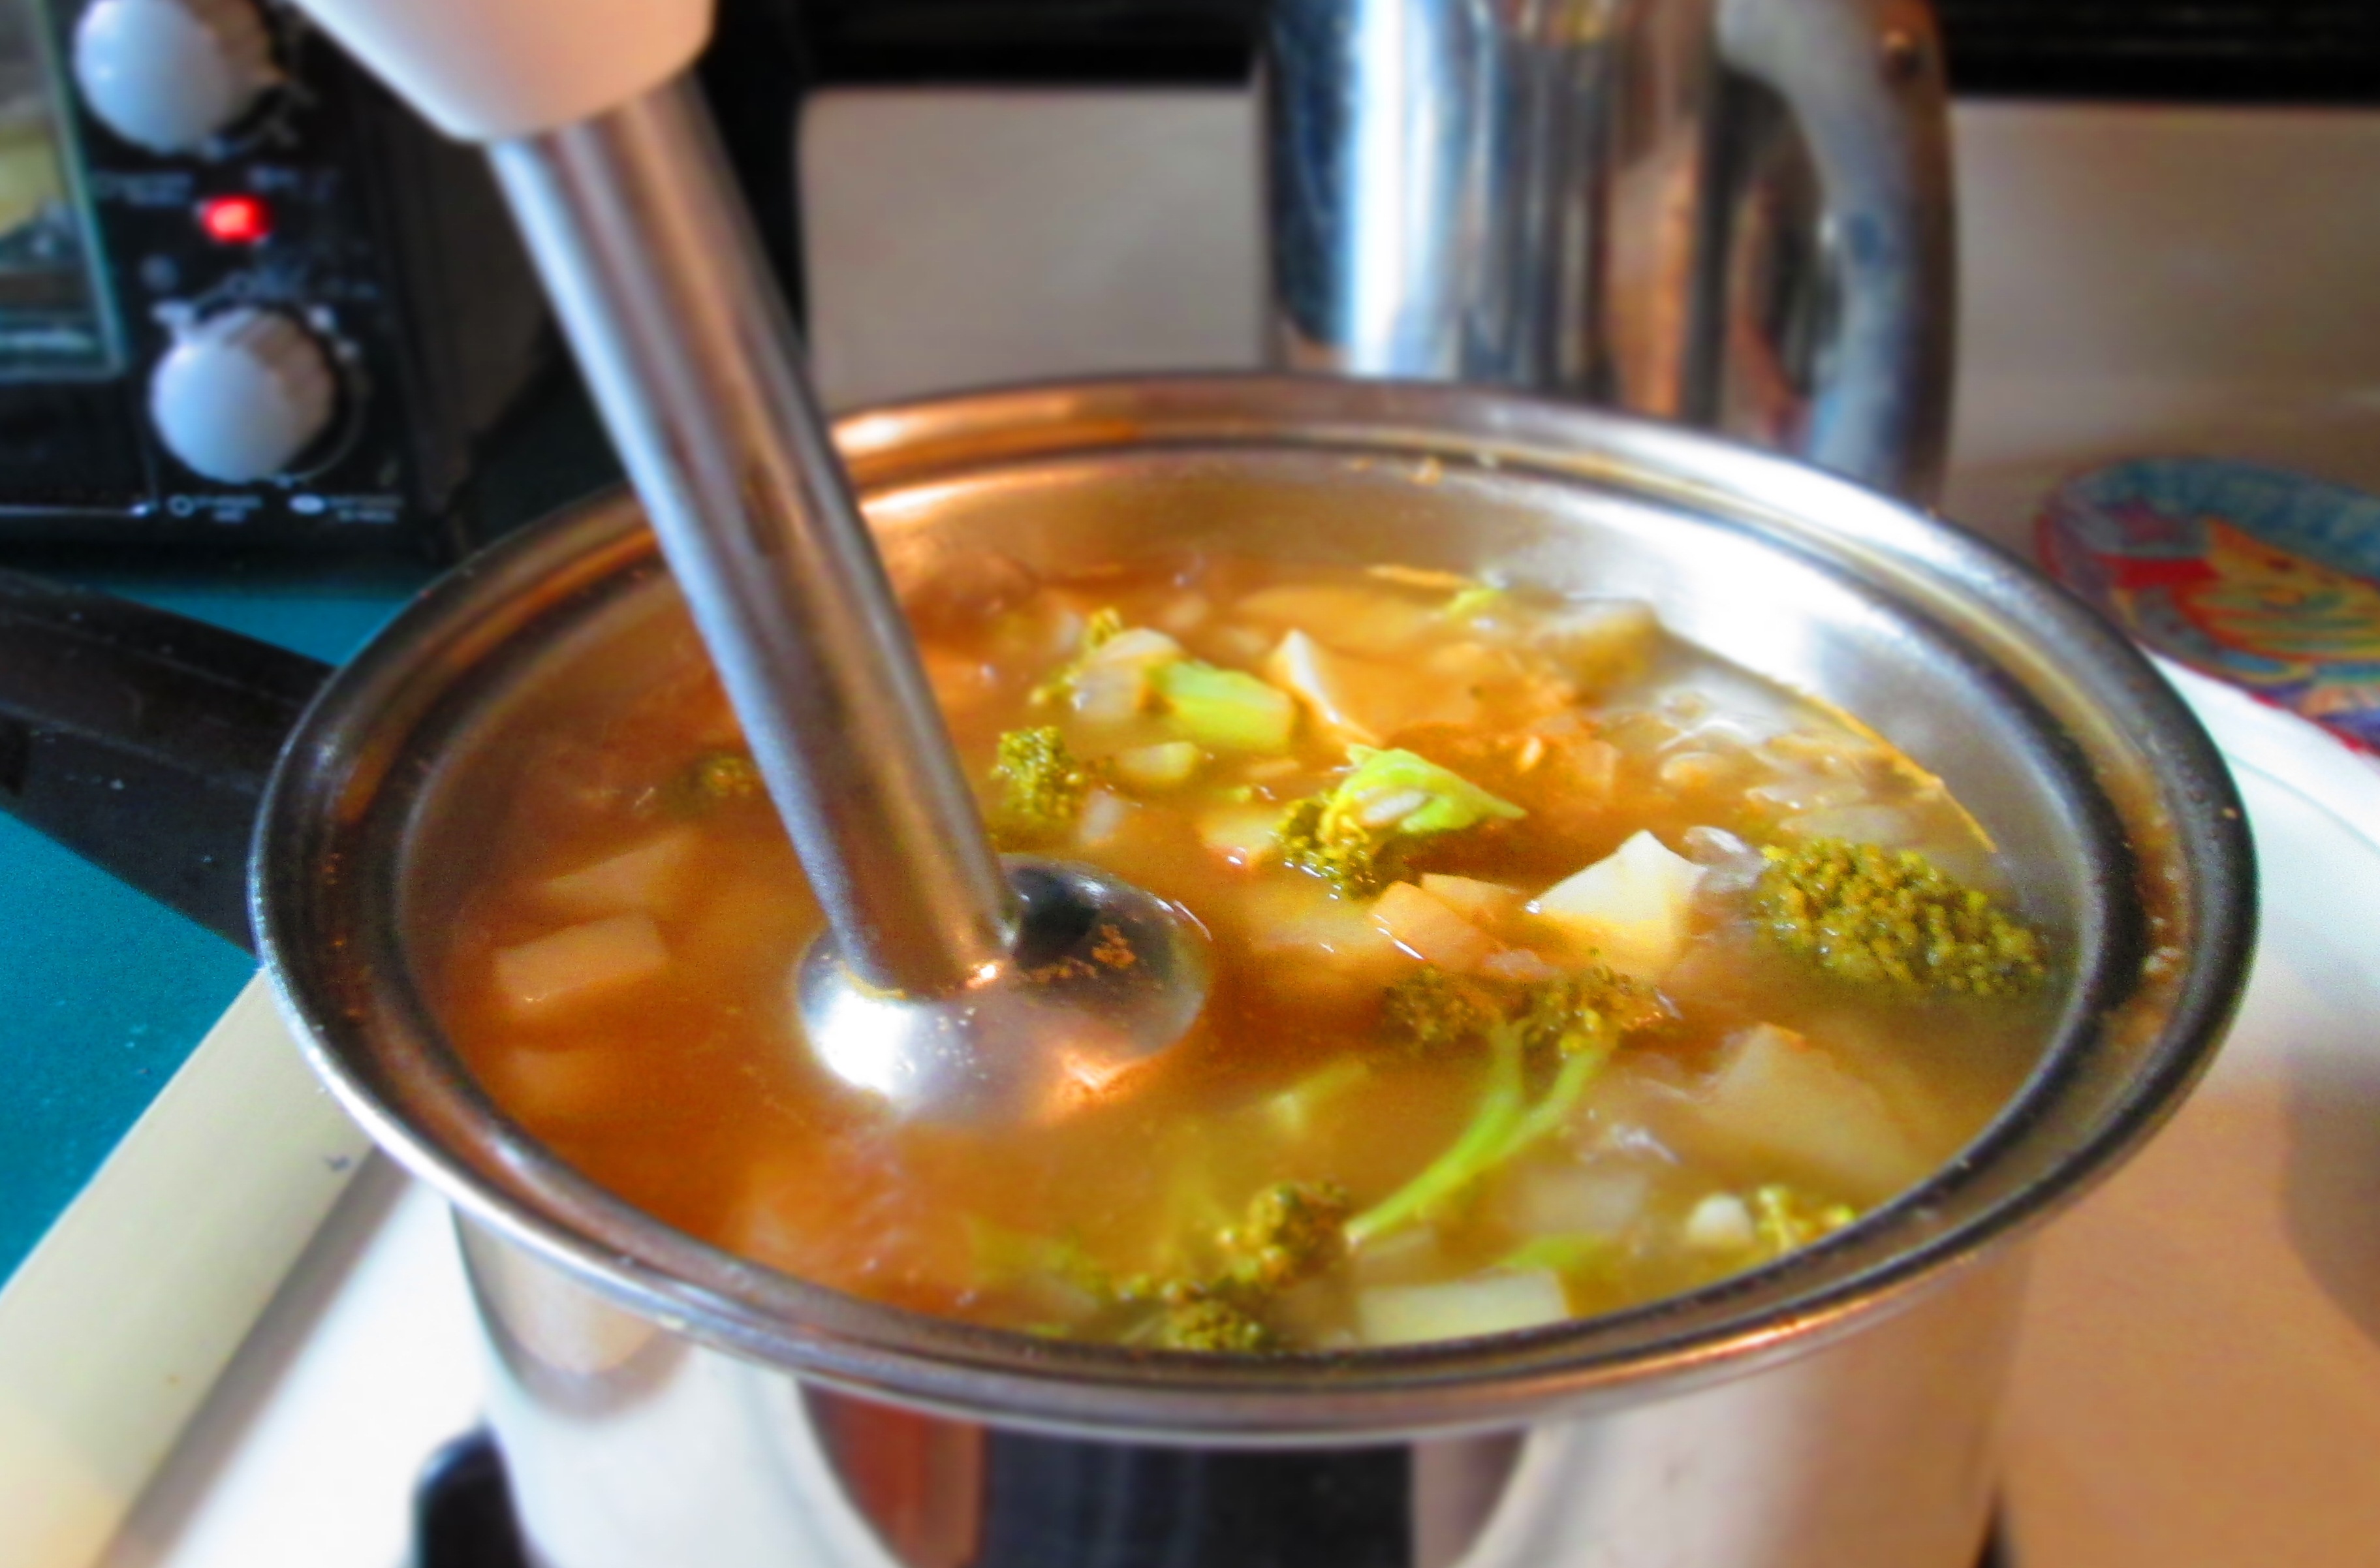
I love it when leftovers come together so beautifully that they make a healthy, delicious meal. Yep, this is another one of my everything-in-the-refrigerator concoctions. And it turned out pretty damn good.
I love soup, and it’s one of the easiest ways to utilize leftovers. In this case, I had a few potatoes, a piece of broccoli, and some leftover greens. So, this is what I came up with. I hope you give it a try and enjoy it.
Broccoli Potato Soup with Beans and Greens
2 teaspoons olive oil
½ cup chopped white onion
¾ teaspoon kosher salt
4 large garlic cloves, chopped
1 tablespoon tomato paste
3 cups chopped potatoes
4 cups vegetable broth
2 cups chopped broccoli
2 cups cooked beans
2 cups greens, washed
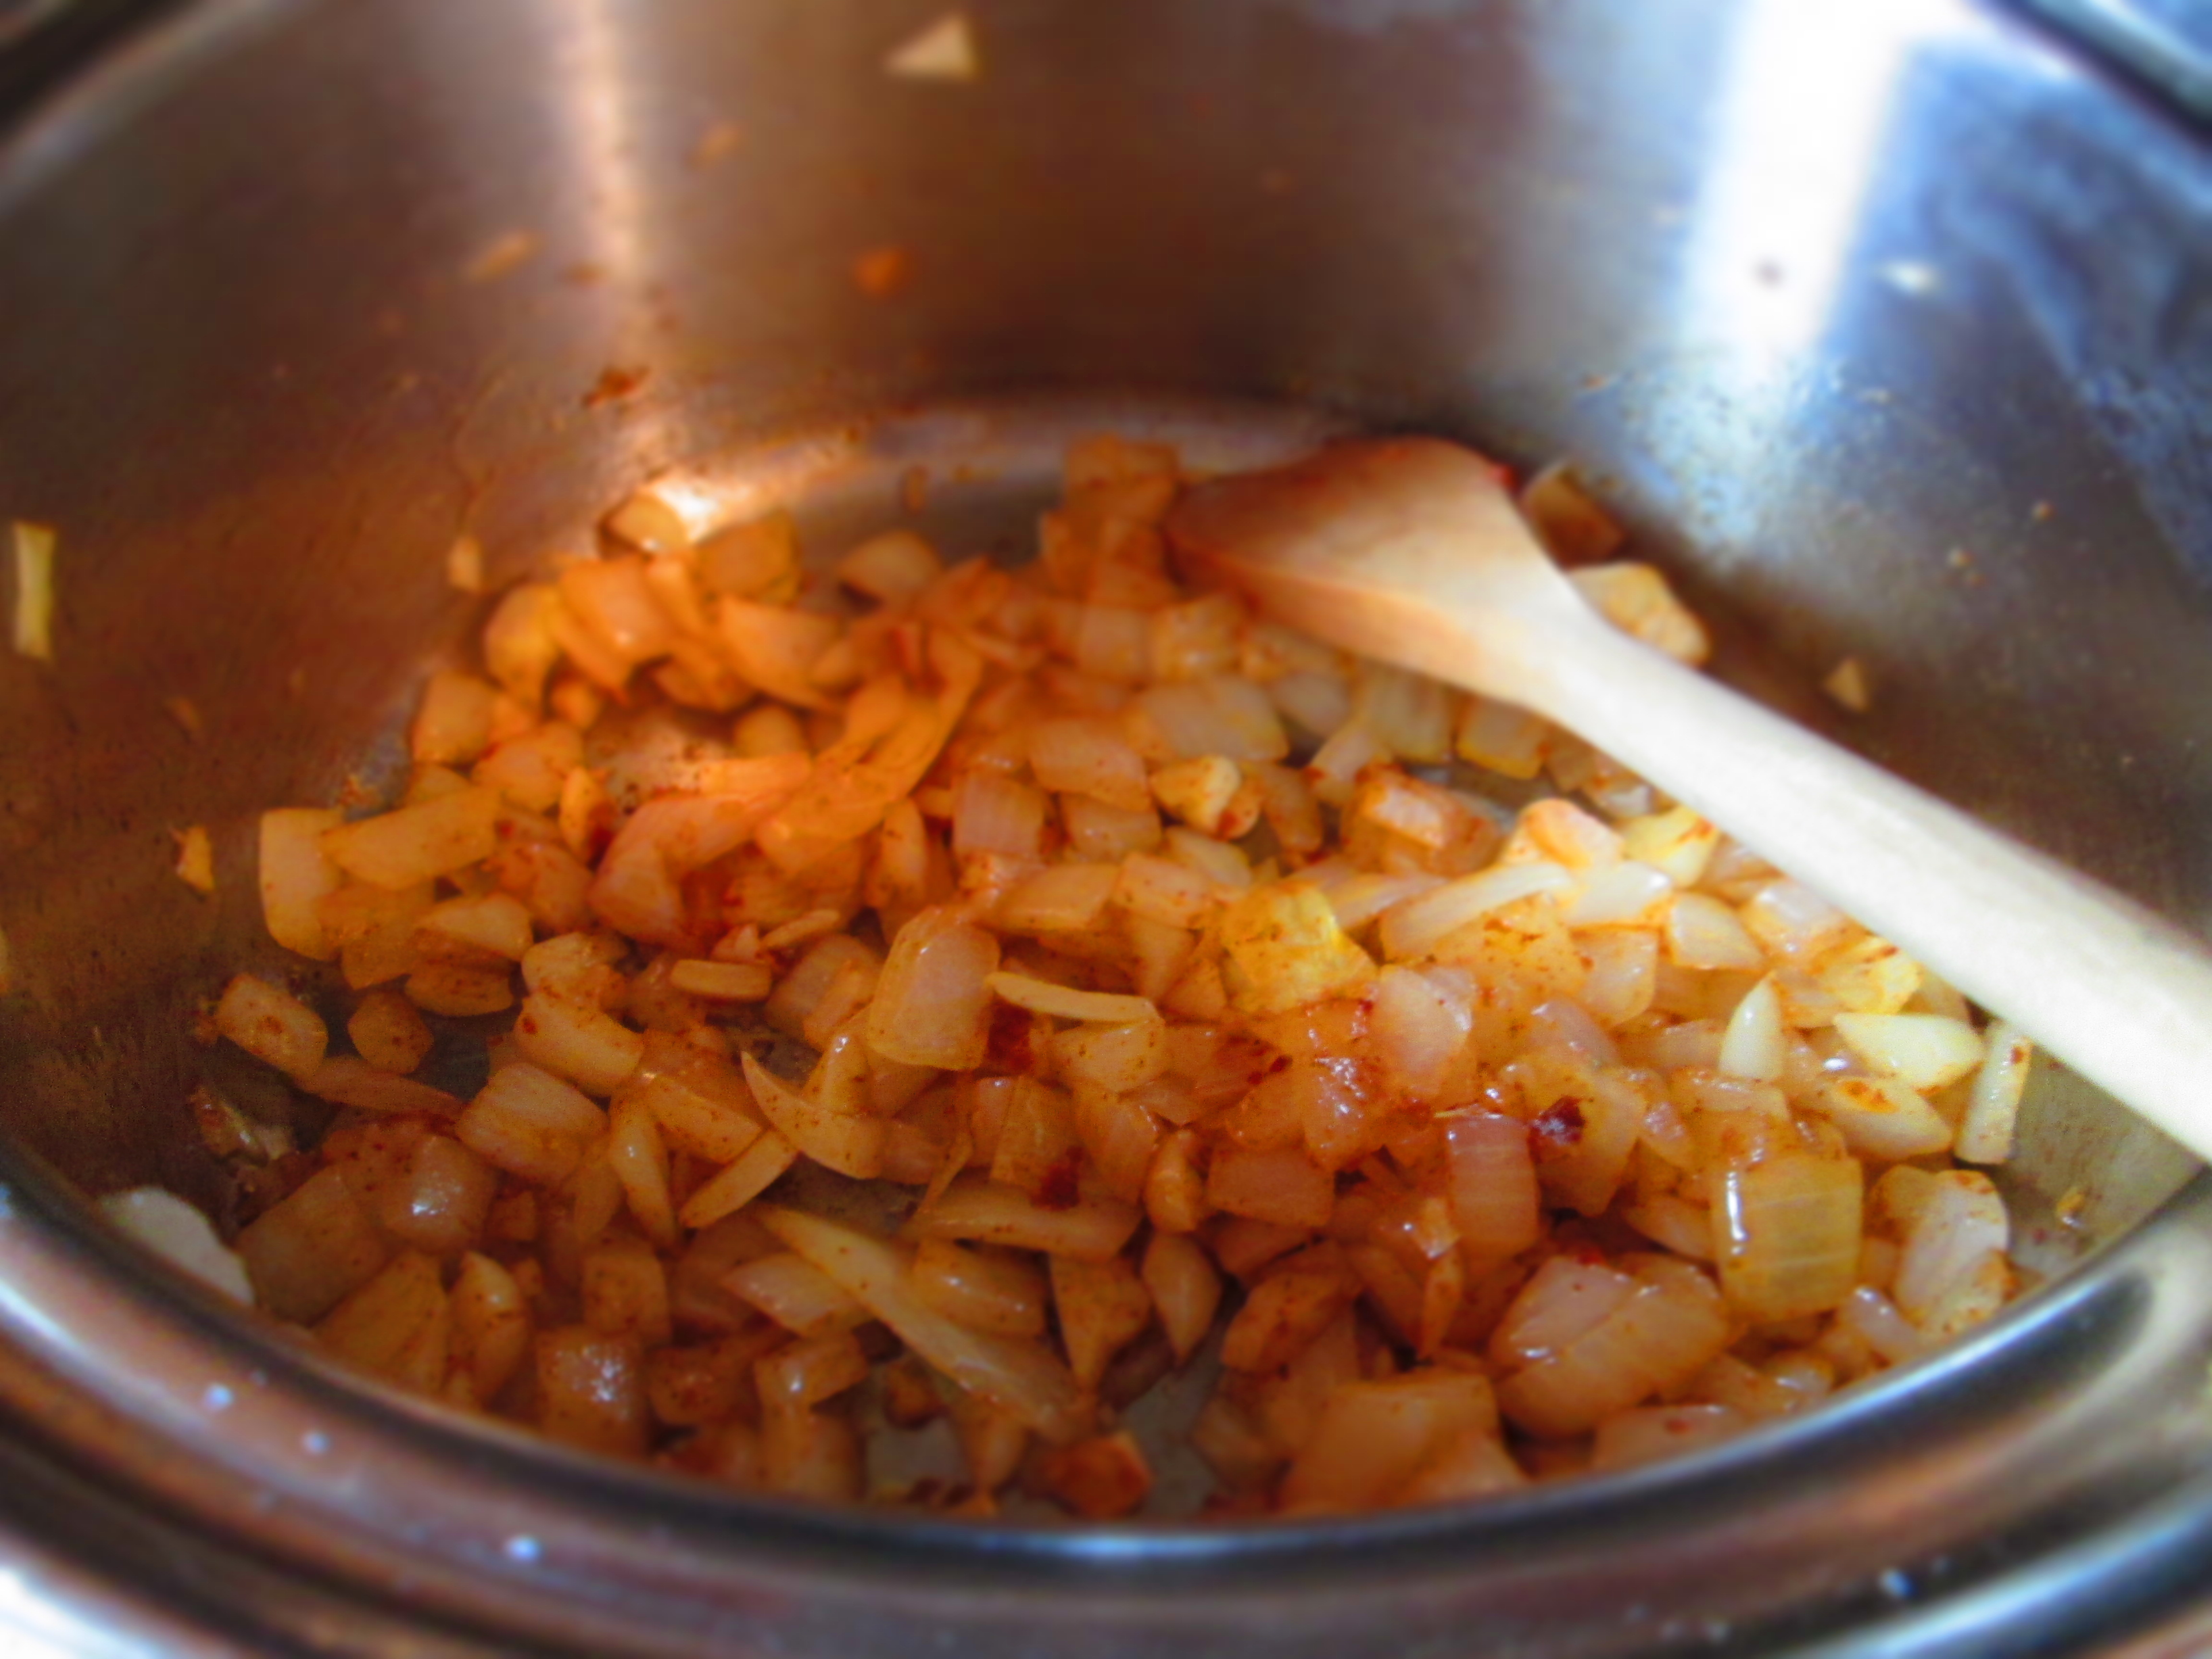
Heat the oil in a medium pot. Add onion and ¼ teaspoon salt and saute until translucent, about 5 minutes. Add garlic and saute another 2 minutes.
Make a space in the pot and place the tomato paste in that spot. Stir it for about 30 seconds then stir it into the onions and garlic. Mix well.
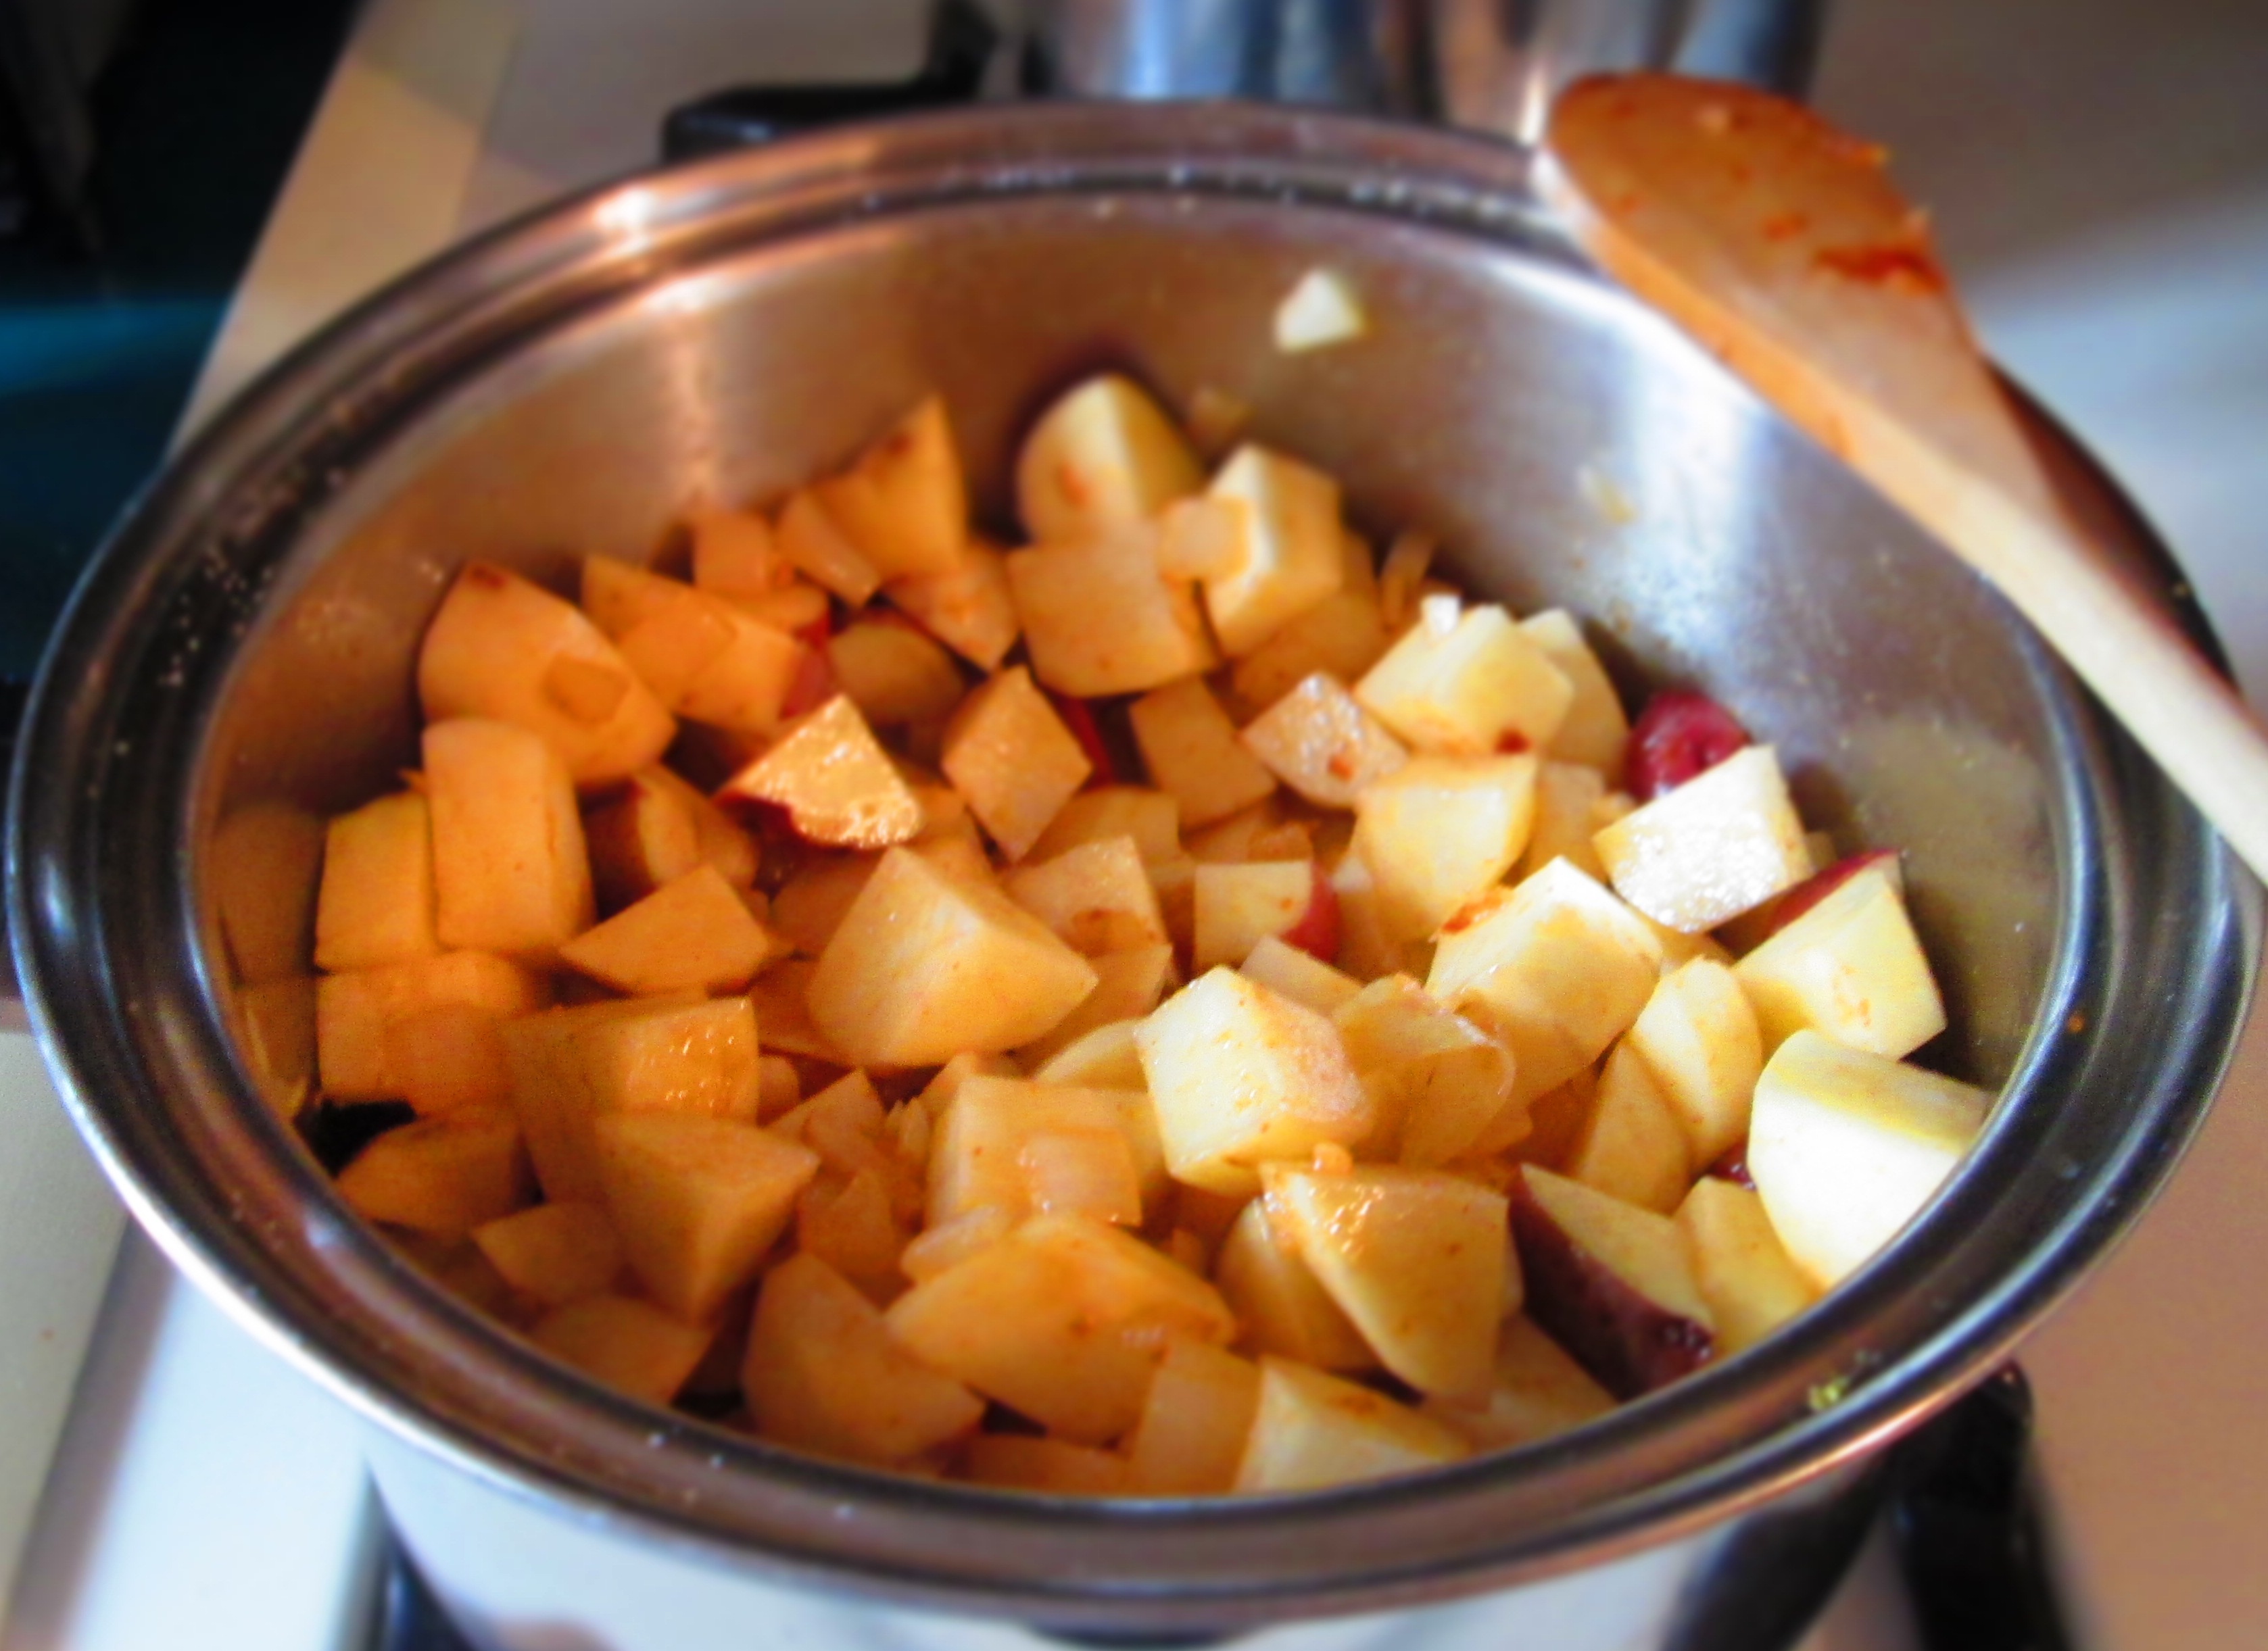
Add potatoes and stir them in. Let cook about 2 minutes, stirring occasionally.
Pour in the broth and add broccoli and ½ teaspoon salt. Bring to a boil; lower heat and simmer, covered, until potatoes and broccoli are tender, about 15 minutes.
Using a stick blender or blender, puree the soup. If you want a completely smooth soup, puree the entire pot (in a couple of batches). If you prefer it chunky, puree only half of it. If you’ve used a blender, pour the soup back into the pot.
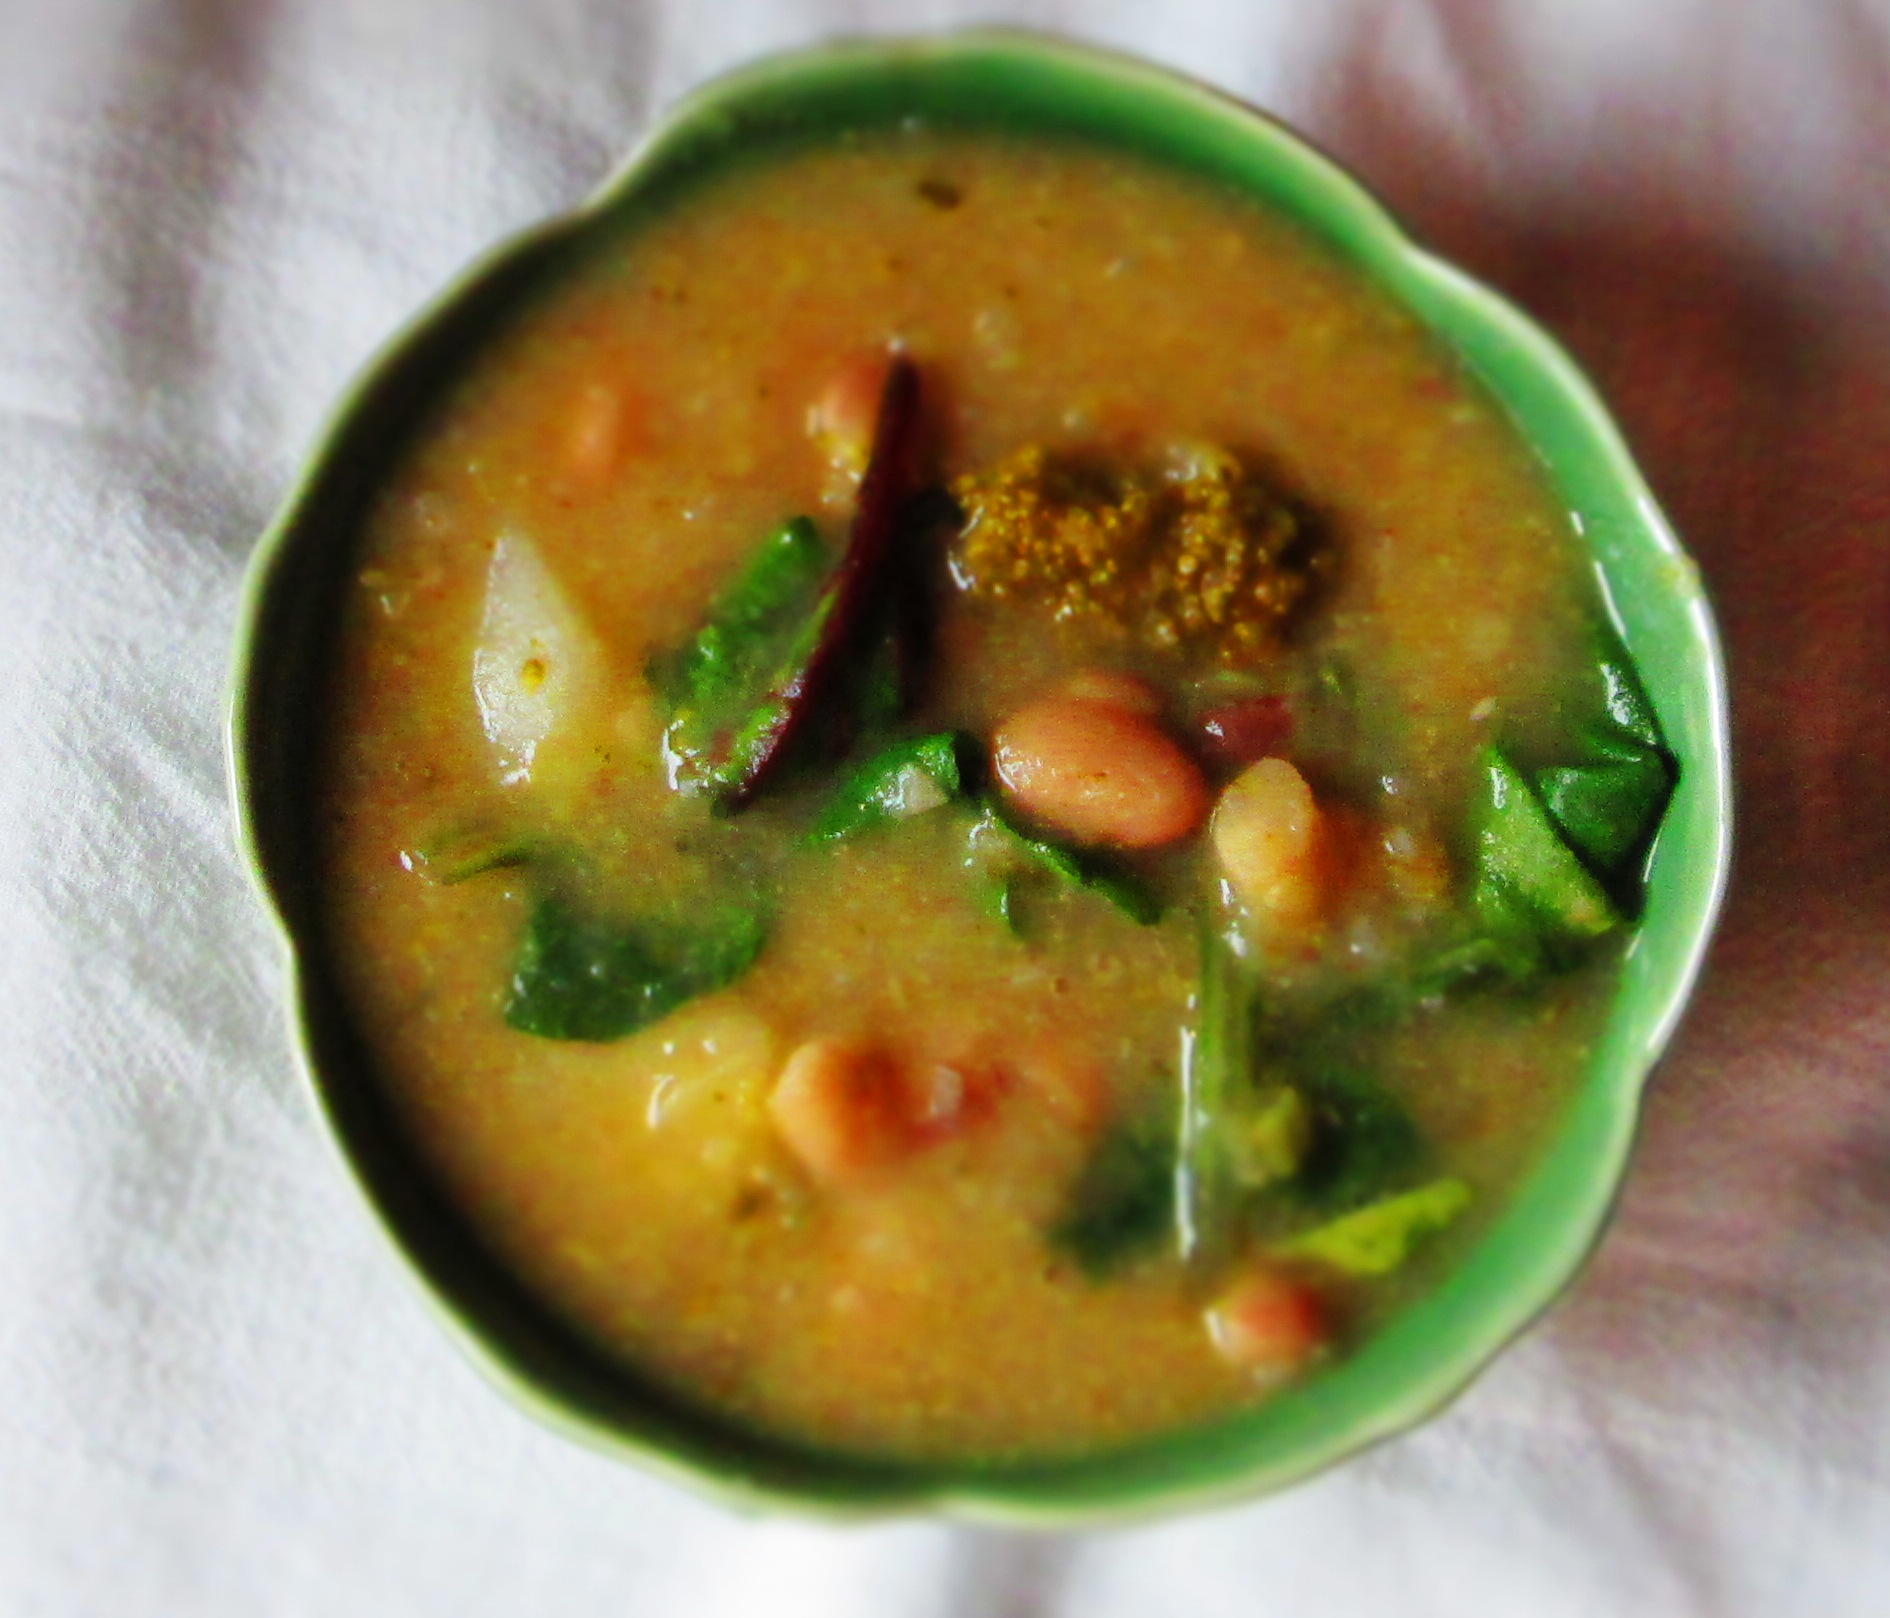
Stir in beans and greens and continue cooking another 5 minutes. Taste for seasoning and adjust if needed.
Ladle into bowls. You can serve with black or red pepper, grated cheese, or croutons, if desired.
Once again, I was the beneficiary of unwanted CSA produce. This time it was Concord grapes. My friends didn’t want them because they are too seedy.
I do understand what they mean—the seeds inside a Concord grape take up half the volume of the entire grape, and as delicious as that little burst of Concord flesh is, it’s a very small burst for all the spitting of seeds that follows. Plus, the skin is tart.
I know this because I once had Concord grapes growing in my yard. But the vines never yielded enough for me to do much with them except have a little snack. The birds got to a lot of them before I did, too.
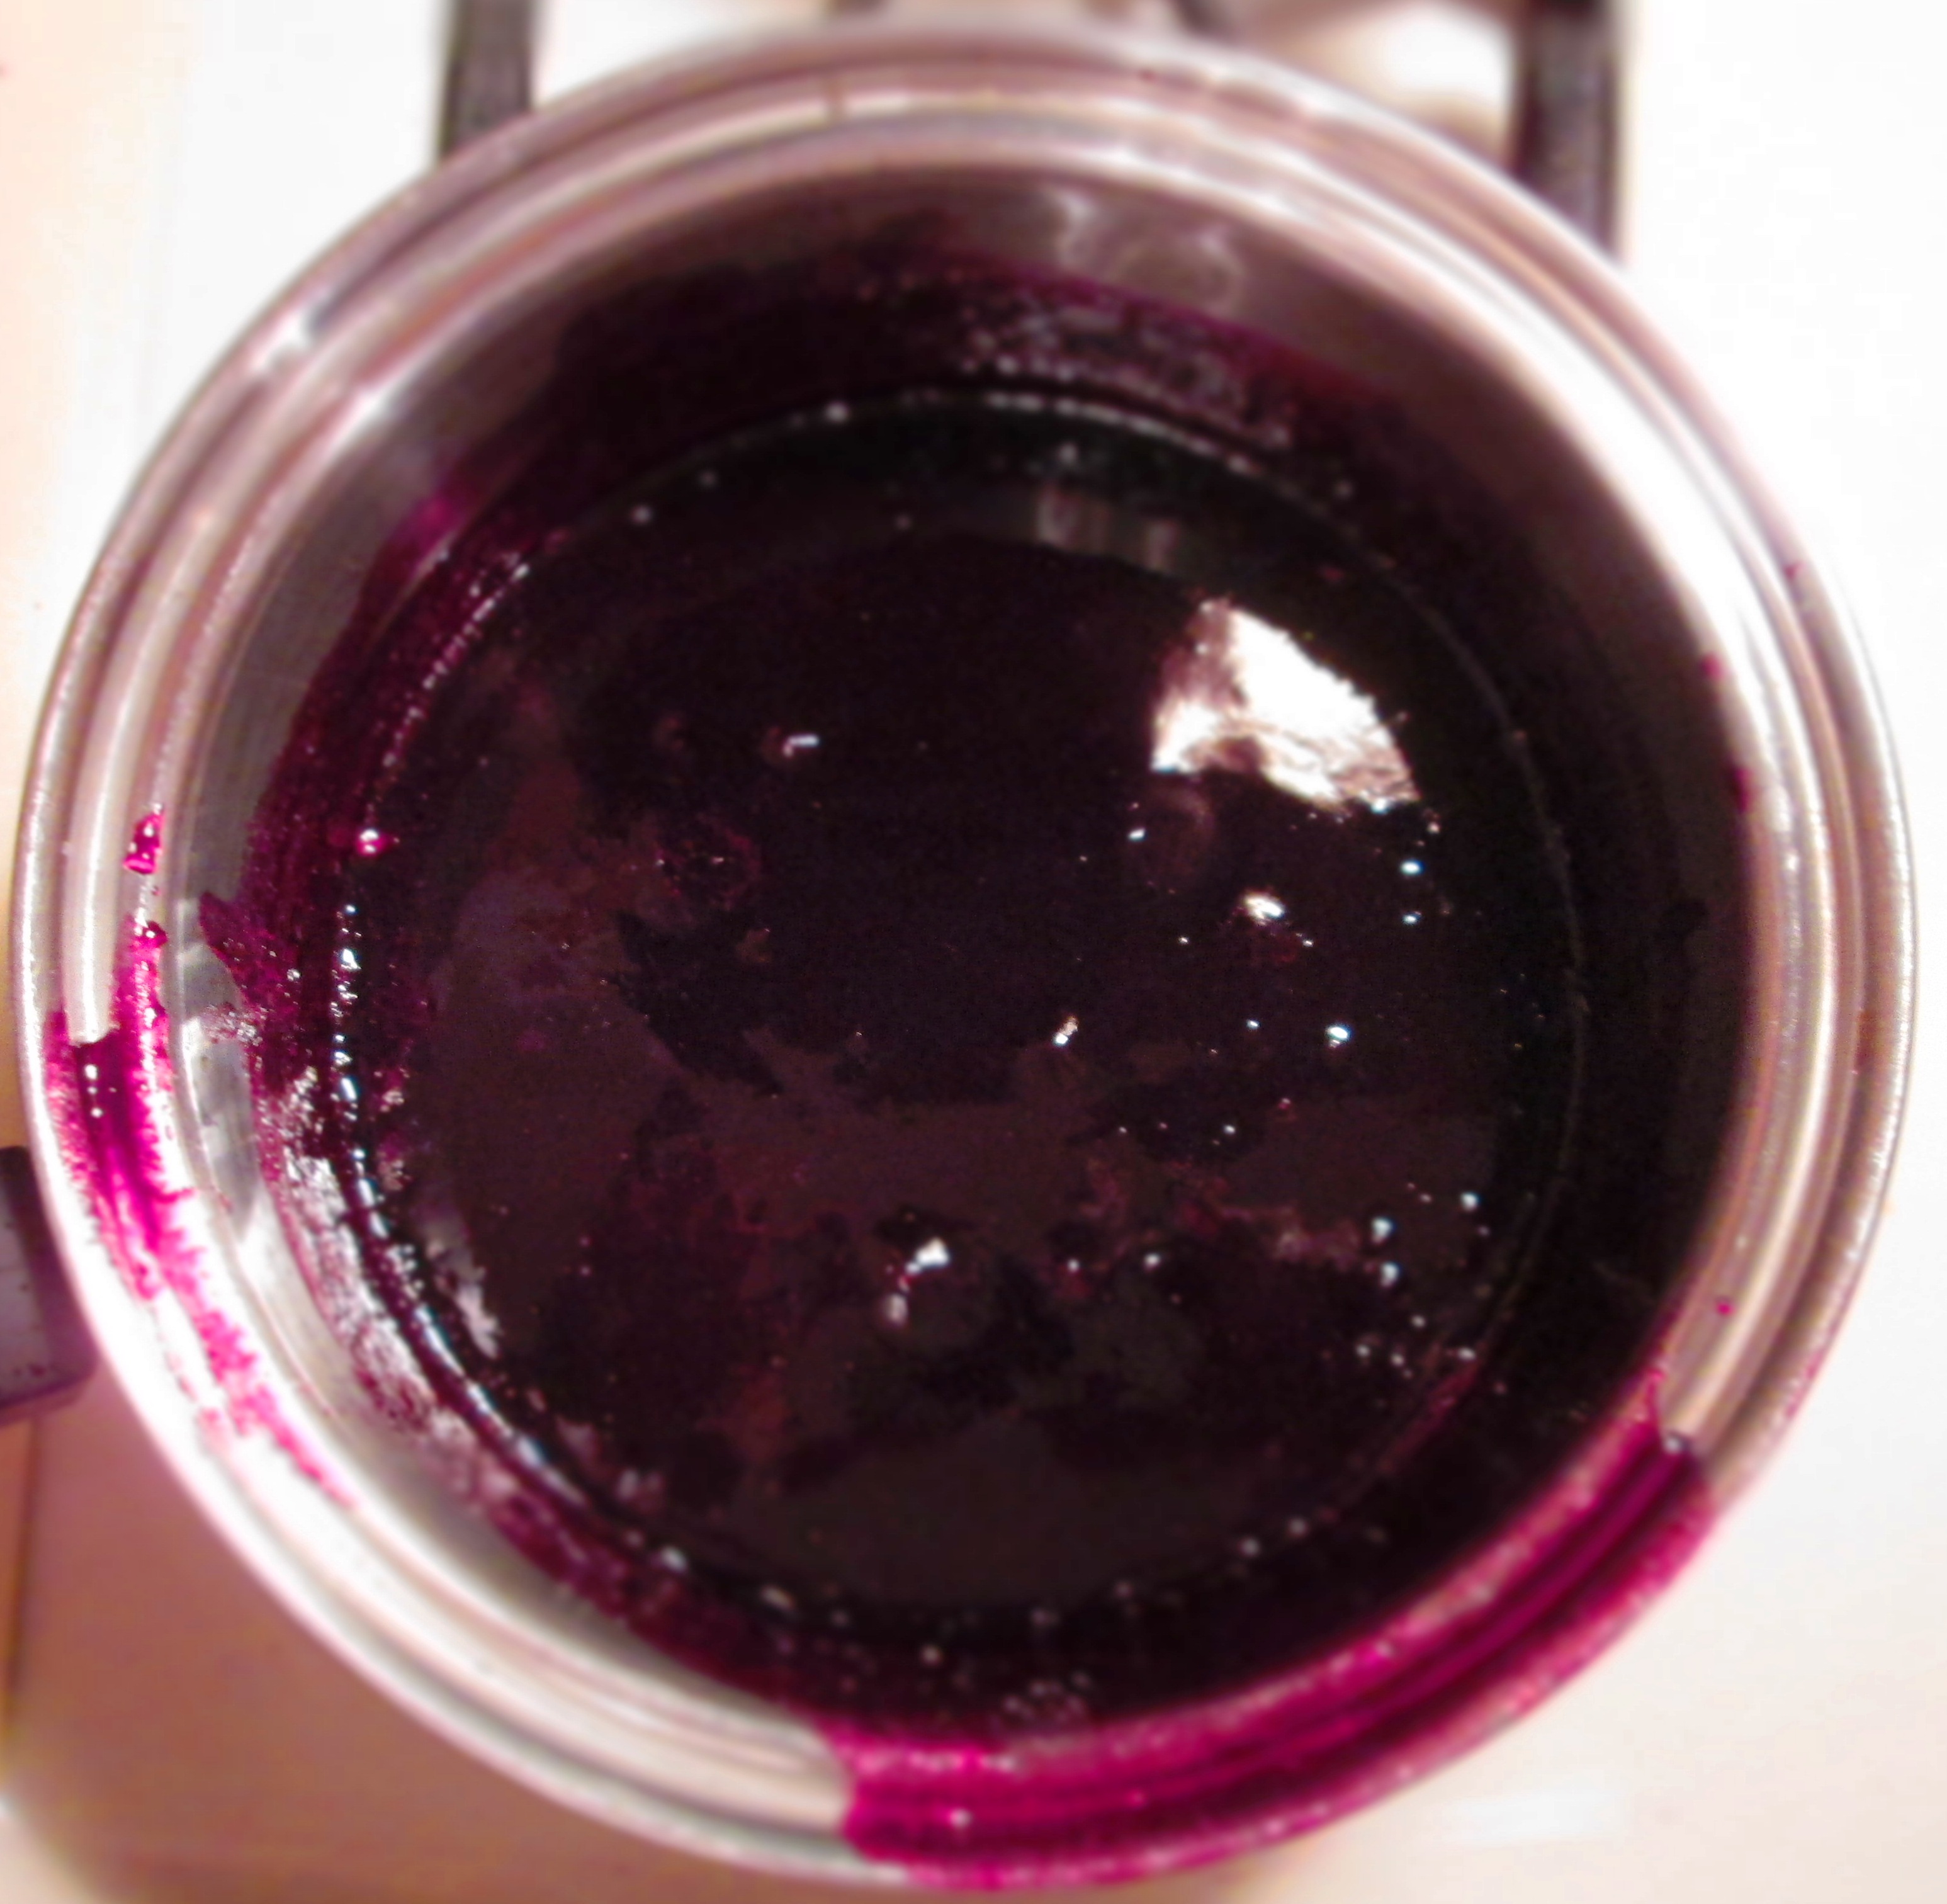
Anyway, I am the recipient of unwanted foodstuffs because my friends know that I will put them to use somehow. In this case, I chose to make grape jam.
I’ve made fruit preserves before, and homemade cranberry sauce has become one of my personal Thanksgiving traditions, but I’d never made grape jam before. Turns out, it’s incredibly simple. You don’t even have to remove the seeds. You just have to remove the skins. Granted, this is a bit time consuming, but it is not at all difficult. Unlike other grape varieties, Concord grapes pop out of their skins very easily. One gentle little squeeze, and out they come. But a little patience is required to do them all. I suggest wearing latex gloves when you do this, or you might end up looking like the purple people-eater.
The rule of thumb for sugar is 1 cup per 1 pound of grapes. I had about 1 ½ pounds of grapes, so I used that many cups of sugar. The result, if I do say so myself, was delicious. The jam was sweet but not cloying (which I hate) and fresh tasting (unlike many jellies, which taste “chemically” from the preservatives).
Because my batch was rather small, I decided not to jar it with the standard canning method. I just put them in 2 little jars and, because of the sugar, they will last in the refrigerator for several weeks. However, if you’re going to make more than I made, or want to make it for long-term storage, you can find instructions for canning here:
You can add flavorings to it, like vanilla or lavender, or create any combination of flavors that you like. Enjoy this on muffins and toast, in yogurt and oatmeal, or in a classic PB&J.
Concord Grape Jam
1 ½ pounds Concord grapes
1 ½ cups granulated sugar
1 tablespoon + 2 teaspoons lemon juice
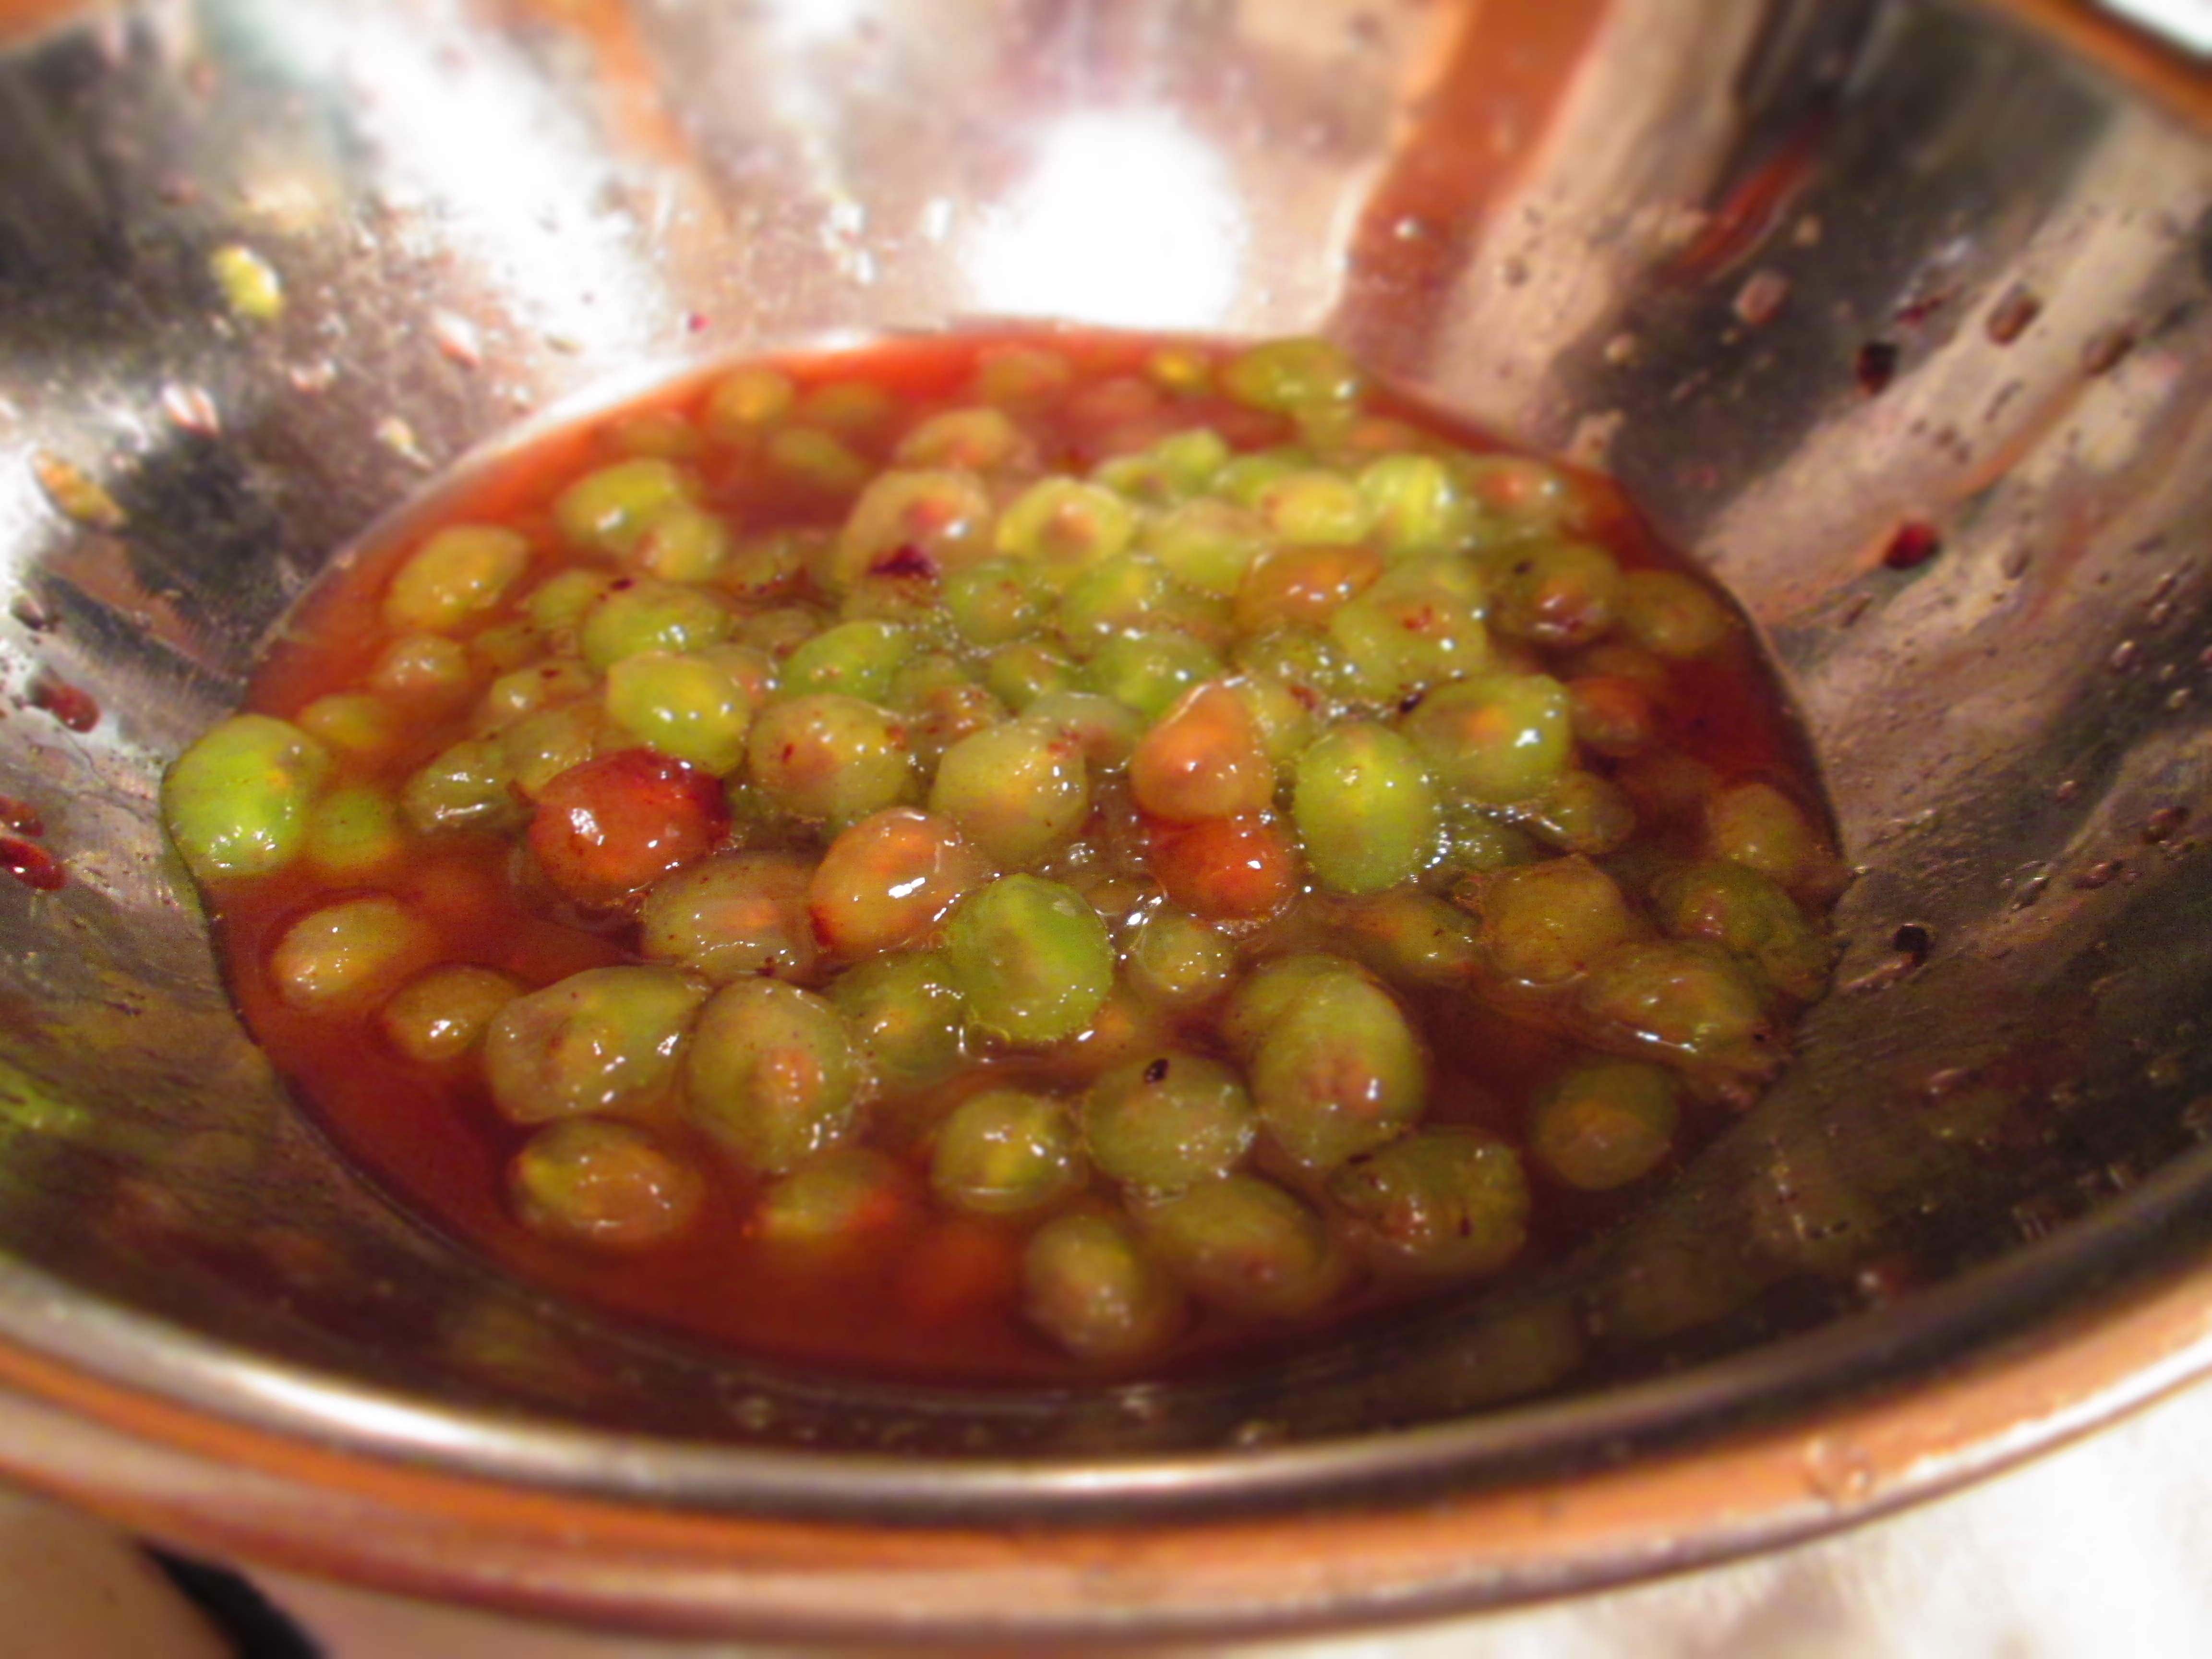
Wash and drain the grapes. Pop them out of their skins.
Place the skins in the bowl of a food processor. Add ½ cup sugar to the skins. Process until pureed.
Place the pulp in a medium saucepan along with remaining 1 cup sugar and lemon juice. Add the skin puree and mix. Bring to a boil; lower the heat to medium-low and simmer, stirring frequently, for about 15 minutes. Skim foam from top, as needed.
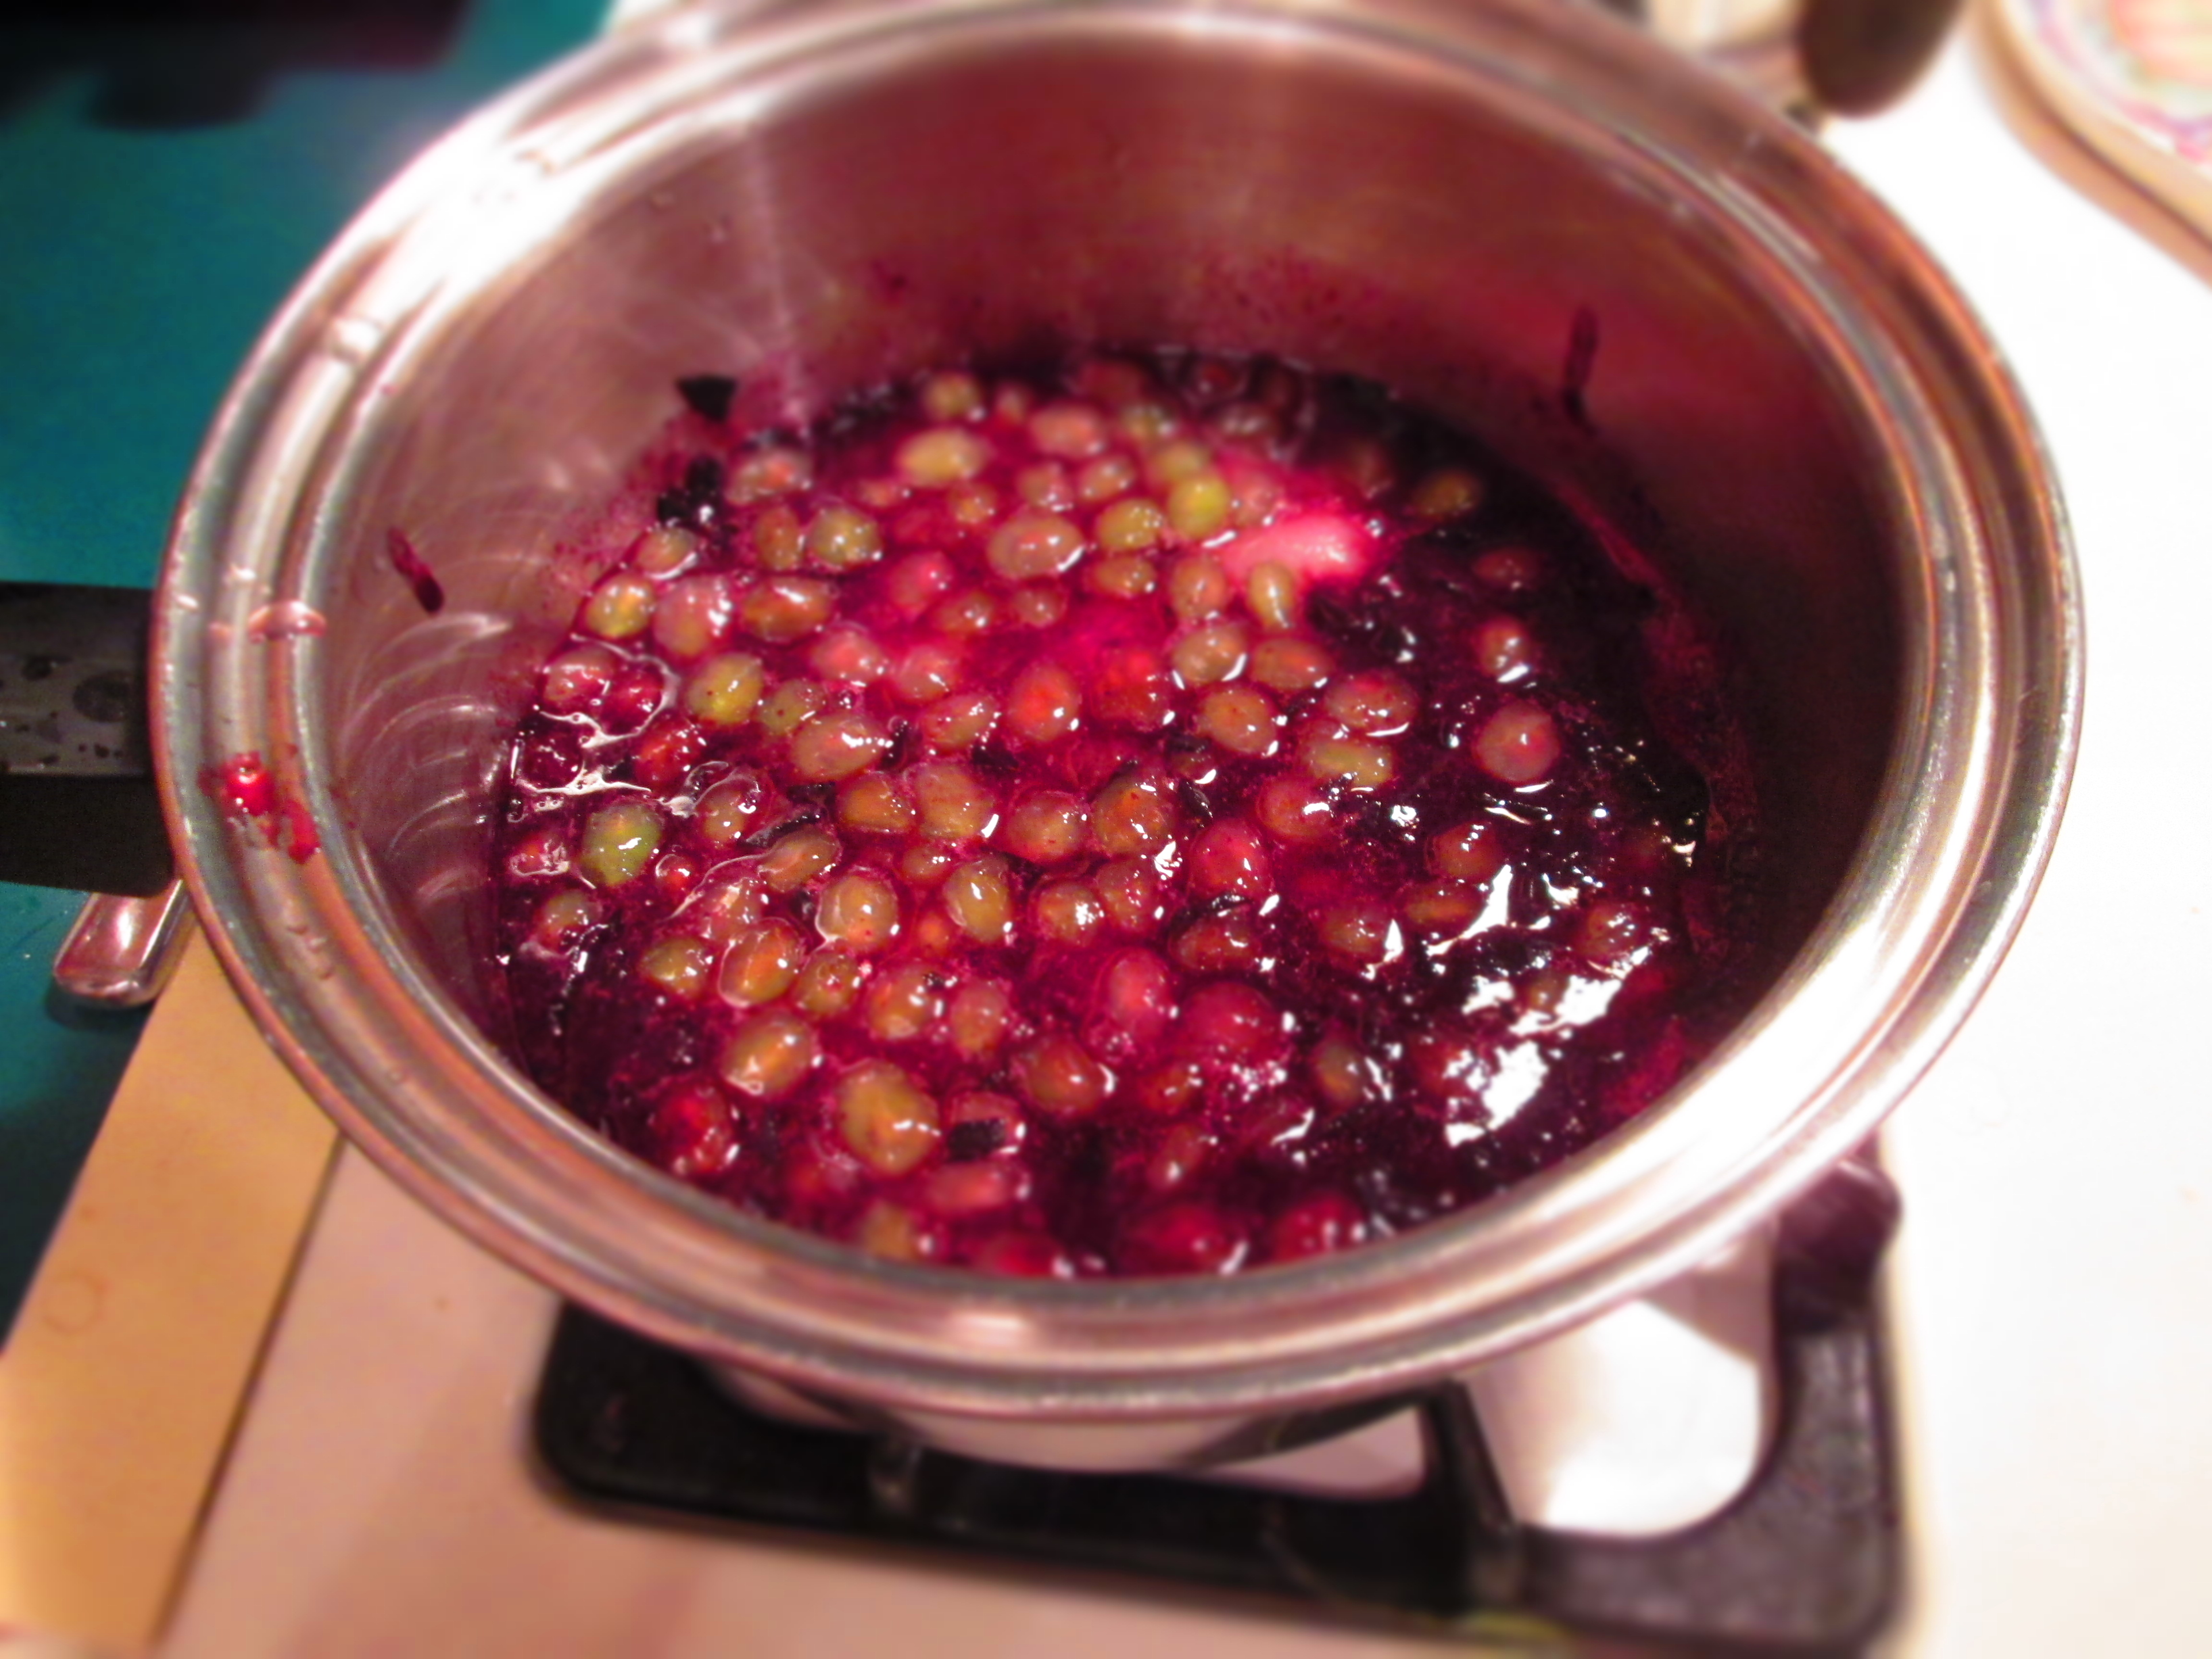
Set a mesh strainer over a bowl. Press the jam through strainer; return the contents of the bowl to the pot, and discard solids. Return to a boil; lower heat again and continue simmering, stirring frequently, for about 30 minutes. The jam will still be loose but will gel as it cools down.
Place in clean jars with tight-fitting lids. For long-term storage, use a standard canning process.
I call Jackson Heights, Queens, the United Nations because half of the world’s cultures, nationalities, and identities can be found there. And where there are ethnic enclaves, there are markets that cater to those enclaves.
This New York neighborhood is home to just about every Central and South American nation you can find on the map, and I’m always going home with some new product I’ve never seen or tried before.
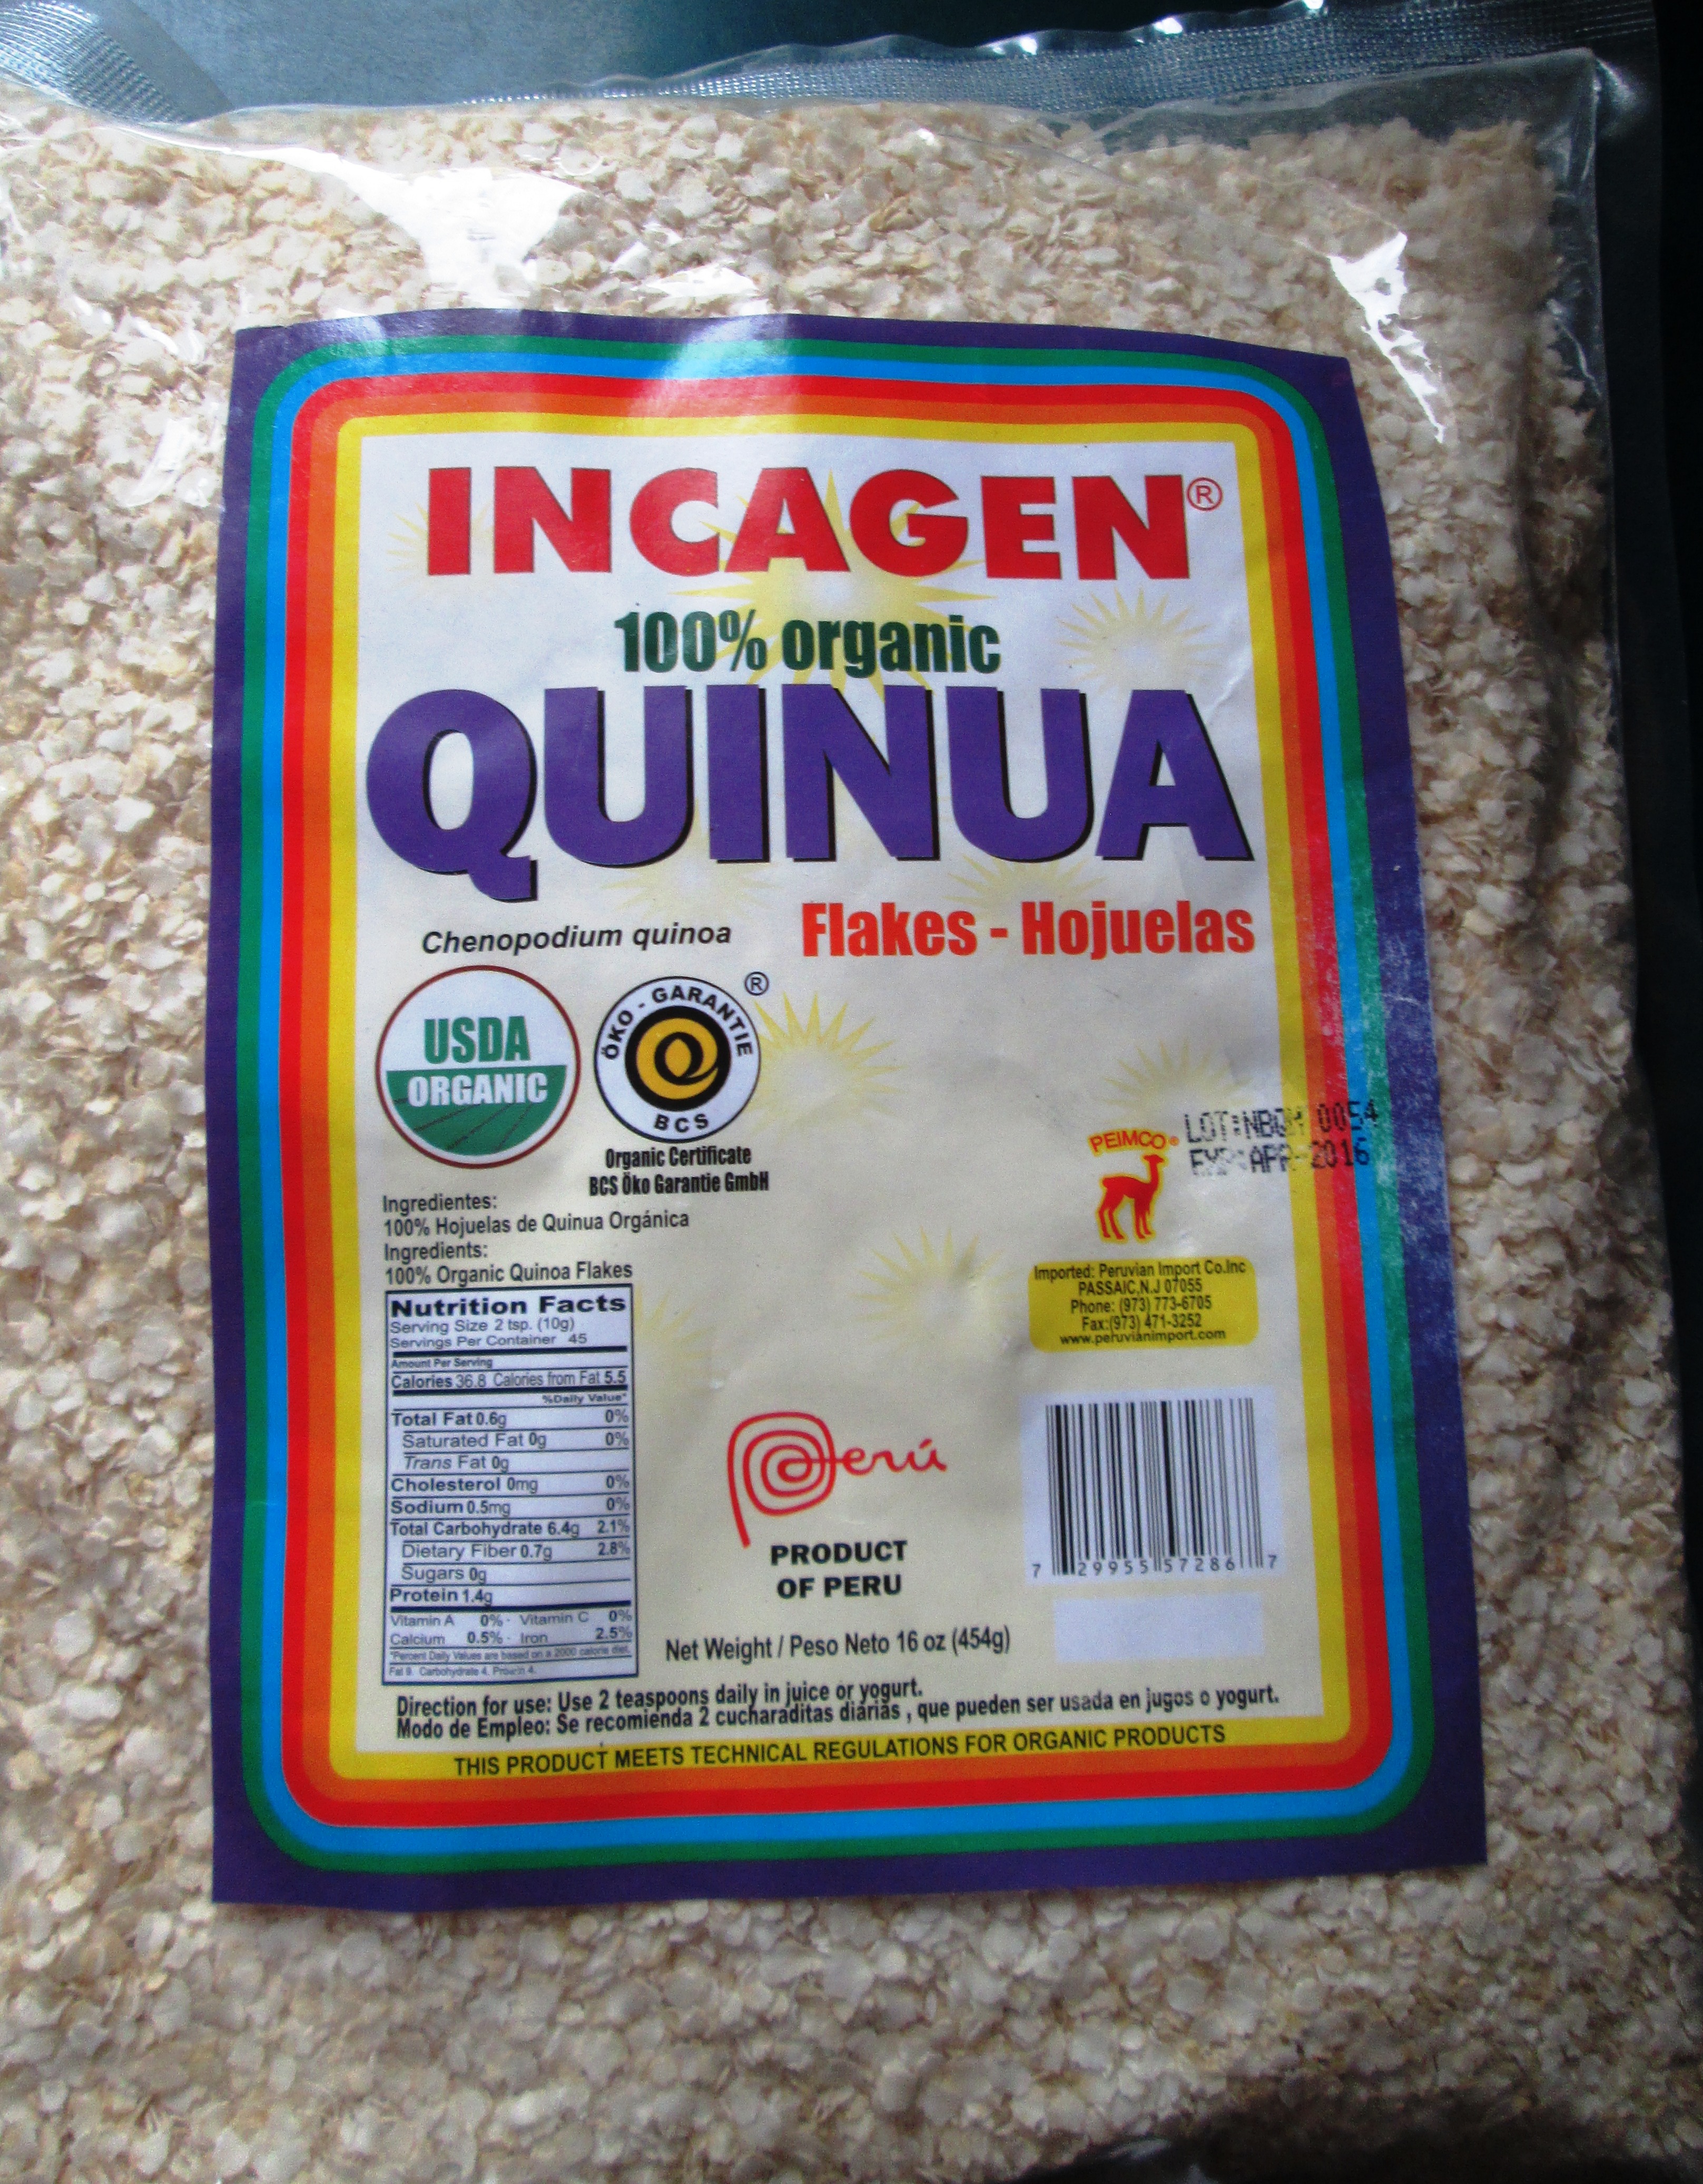
My forays into various ethnic markets have introduced me to many different grains in many different forms, from rice flakes to lotus nut puffs (okay, not technically a grain) to cracked corn. This past week, I found quinoa flakes.
The package recommends putting a couple of tablespoons into a smoothie or yogurt, and I’ve read suggestions to put it in baked goods in place of flour or oats. But I figured it would make a good breakfast porridge, too. I cooked a small quantity by itself, just to see what it was like. It tasted like…well…quinoa. It even had the little signature “strings” of cooked quinoa. But I found it to be a bit blah. Kind of like baby food.
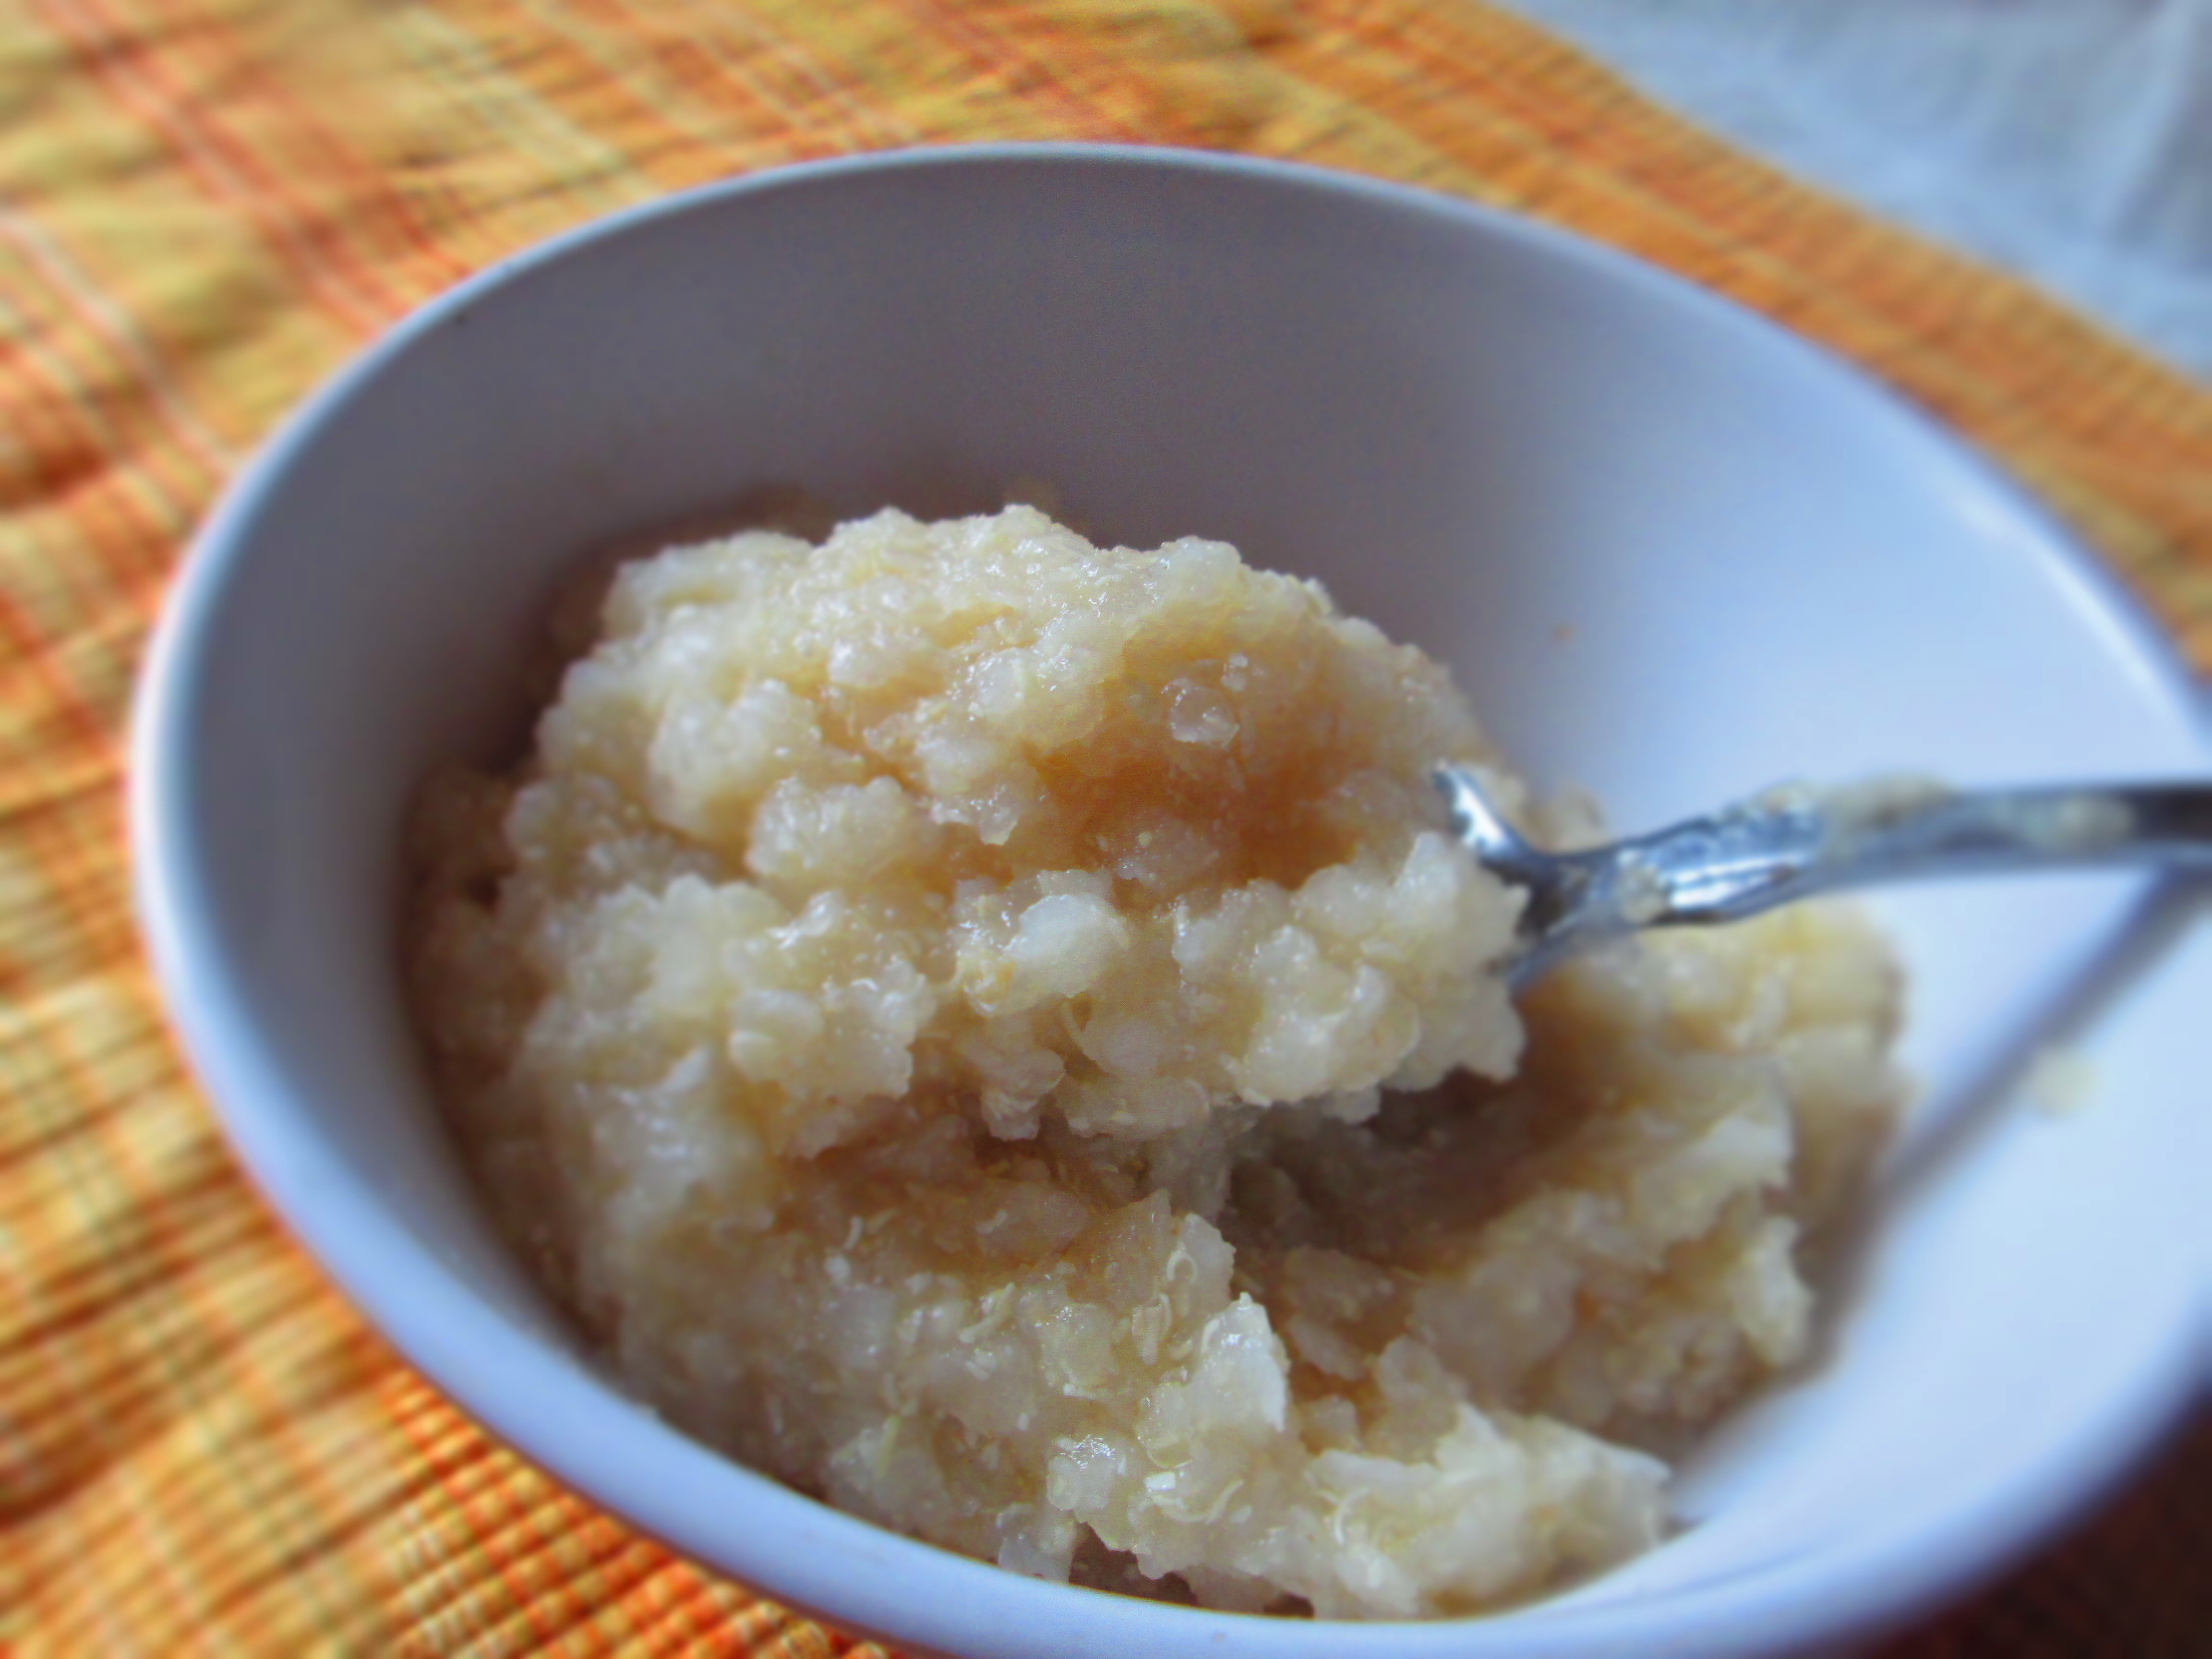
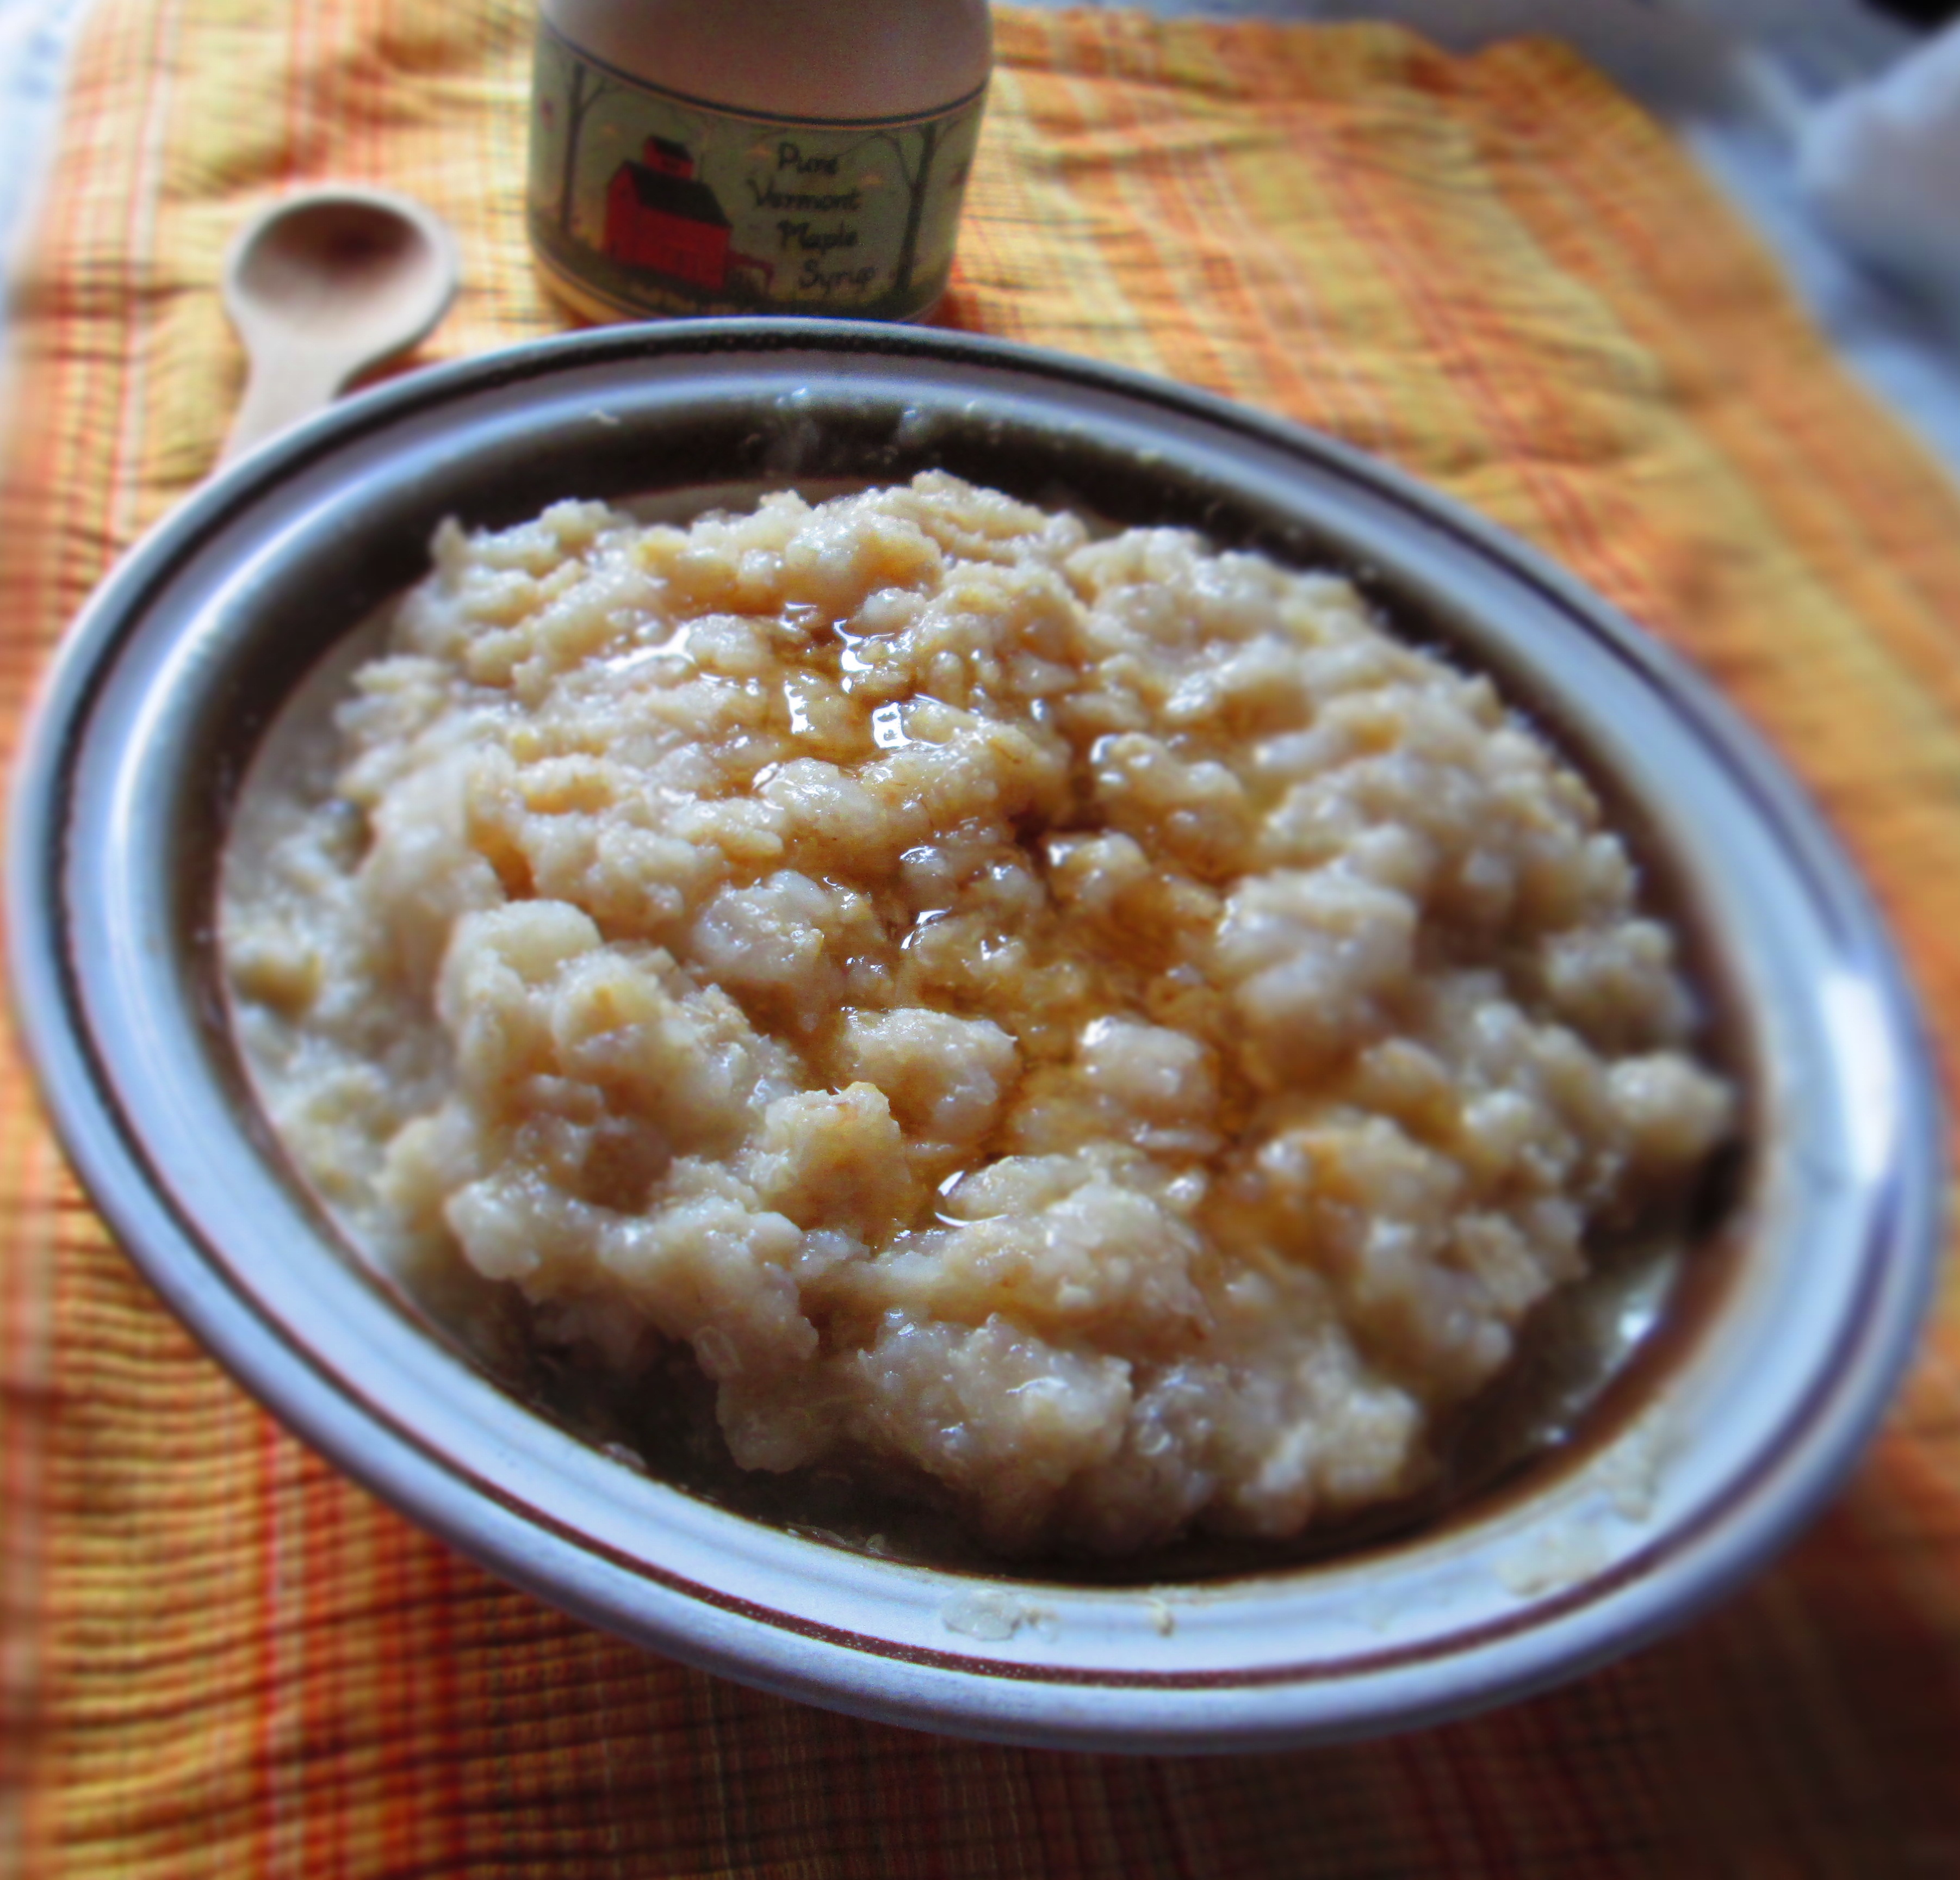
So then I blended it with rolled oats and made a half-and-half porridge. I added some maple syrup to give it some flavor, and topped it off with some chopped pecans for texture. It turned out much lighter than regular oatmeal, but because quinoa has protein, it’s filling nevertheless. And because it’s lighter, I think it would make a great breakfast for someone who is sick or has stomach issues.
Here’s the recipe for my preparation:
Quinoa-Oat Porridge
½ cup quinoa flakes
½ cup rolled oats
Pinch salt
Optional toppings:
Maple syrup
Honey
Chopped nuts
Fruit
Bring 2 cups water to a boil in a small pot. Add quinoa flakes, oat, and salt; lower heat, cover, and simmer 5 minutes, or until desired thickness. You can add more water if you want it looser.
Transfer to 2 bowls. Top with whatever toppings you like.
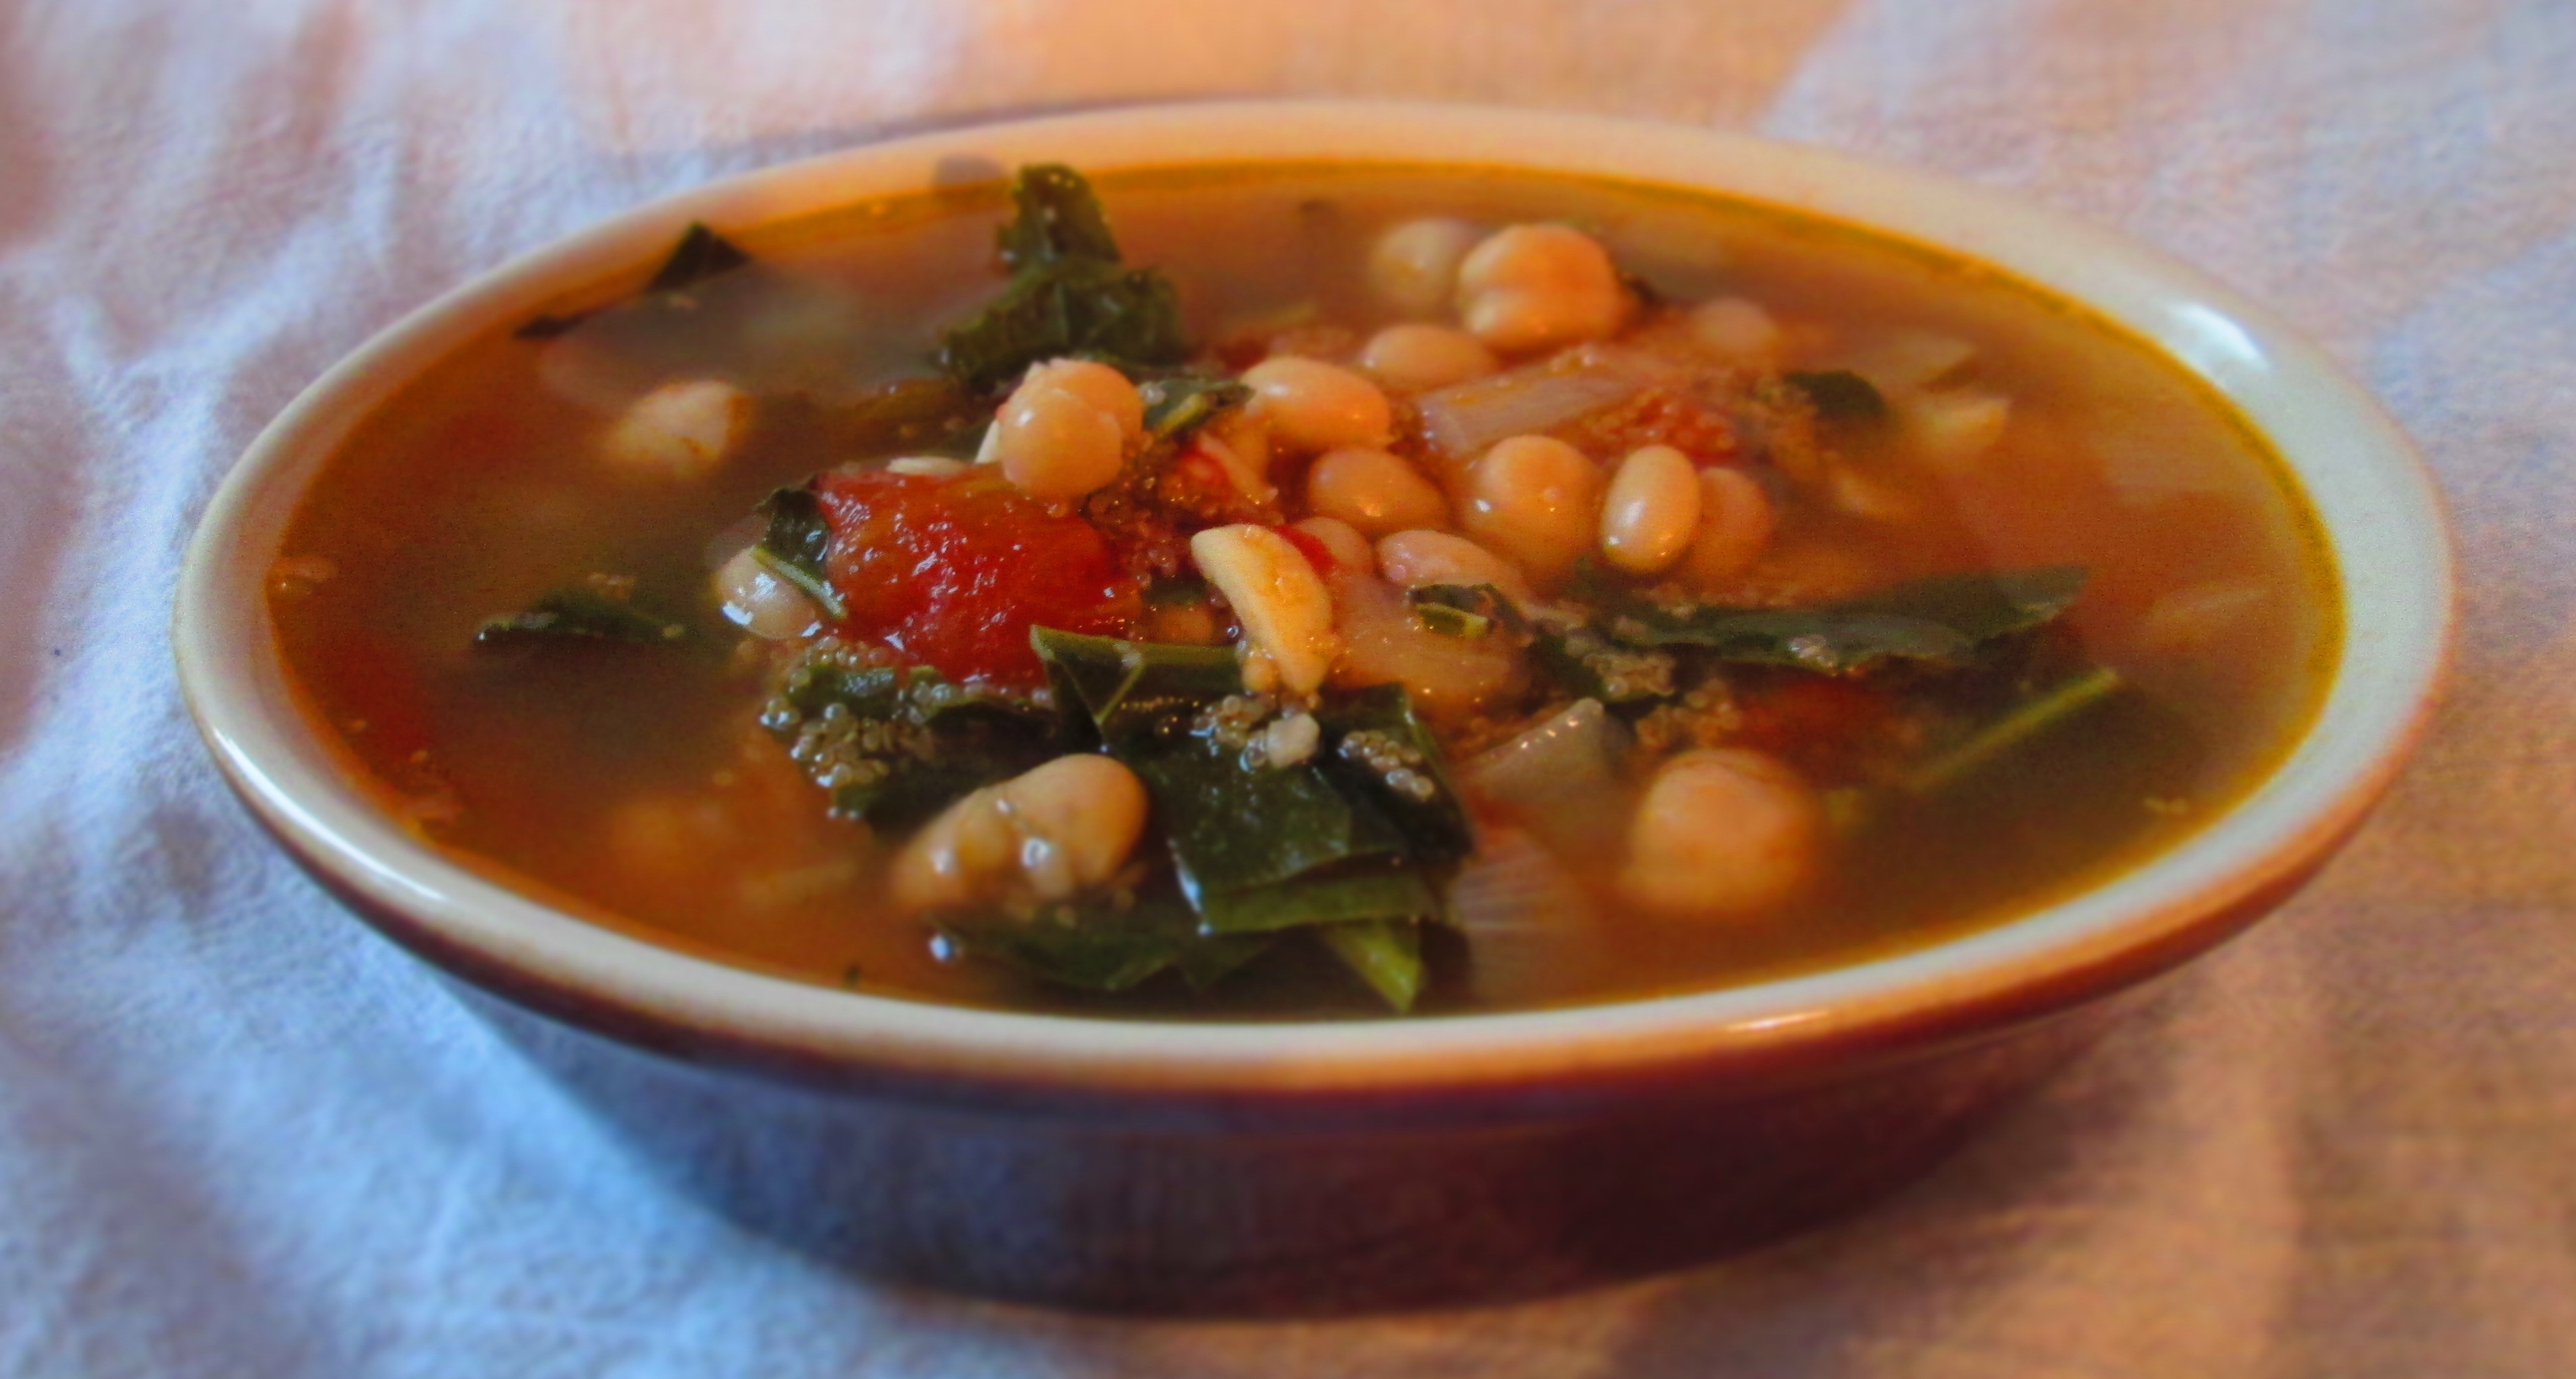
With all the greens flourishing right about now, I’ve been having a craving for bean soup with greens. Why in the world would I crave soup in the dead heat of summer, you ask. I can have soup any time of the year. I absolutely love it. Yes, it can be warm and comforting in winter, but summer also calls for comfort of a different sort.
Plus, studies have shown that eating warming dishes such as soup can actually acclimate you better to the heat by elevating your body temperature, thereby making the weather more tolerable.
Anyway, someone gave me a tiny little bunch of kale and I thought that it was the perfect opportunity to make that beans-and-greens soup. I decided to add some amaranth to it—I love pasta and grains in my soup and amaranth is an exceptionally healthy choice.
Amaranth has been grown in Central and South America and consumed by the regional people for hundreds of years. It’s been an important source of protein for the indigenous people of those regions, and it is less expensive and, consequently, less controversial than quinoa.
Amaranth is a very rich source of protein, and it is more digestible than that of other grains. It’s also an excellent source of lysine, an important amino acid. Amaranth has the most calcium of any grain next to teff. It also is a better source than other grains of magnesium, iron, copper, and fiber. Amaranth is a good source of zinc, potassium, phosphorus, folate, niacin, and riboflavin, and vitamins A, C, E, K, B5, and B6, as well as antioxidants, which fight cancer. It has been shown to lower cholesterol and blood pressure, reduce inflammation, boost the immune system, and—don’t hold me to this—helps prevent premature graying. For carb counters, it’s lower in carbs than other grains and it’s gluten free.
So, here’s my impromptu recipe for Kale-Bean Soup with Amaranth. These are approximate amounts, so use however much you like of anything. Soup is very forgiving where quantities of ingredients are concerned. Enjoy.
Kale-Bean Soup with Amaranth
Makes 4 servings.
1 small bunch kale
2 teaspoons olive oil
¼ cup diced onion
3 large garlic cloves, minced
1 teaspoon kosher salt
½ cup diced tomatoes
2 cups vegetable broth (or 2 cups water + 2 bouillon cubes)
¼ cup amaranth
1 cup cooked beans (whichever you prefer)
Wash the kale and remove thick stems. Chop into bite-sized pieces.
In a medium pot, heat oil; add onion, garlic, and salt. Sauté until onion is translucent, about 2 or 3 minutes.
Add tomatoes and sauté another minute.
Pour in broth and let it come to a boil. Add amaranth; lower heat to medium-low and simmer until is cooked, about 10 minutes.
Add kale and beans and continue cooking until kale is tender (this can take anywhere from 5 to 10 minutes, depending on the size and “toughness” of the kale). Adjust seasoning to taste.
Serve as is or with grated cheese and/or crusty bread.
My parents have a vegetable garden. In the days when both my parents were fully healthy, so was their garden. They grew numerous things, and several varieties, including tomatoes, squash, peppers, lettuce, eggplant, basil, parsley, and mint. These days, my parents are elderly and my father’s health issues keep him from moving around too much. Consequently, their garden is kept down to whatever little they can handle. Which makes me sad on numerous levels.
Every now and then, they tried something new, and have even gotten things growing in there that they had not planted, or they planted what they thought was one thing but got something else. A couple of summers ago, they wound up with a peach tree. To this day, they don’t know where it came from. It made the most beautiful, delicious peaches. But easy come, easy go—as mysteriously as the tree appeared, it died for no apparent reason that same year. Bizarre.
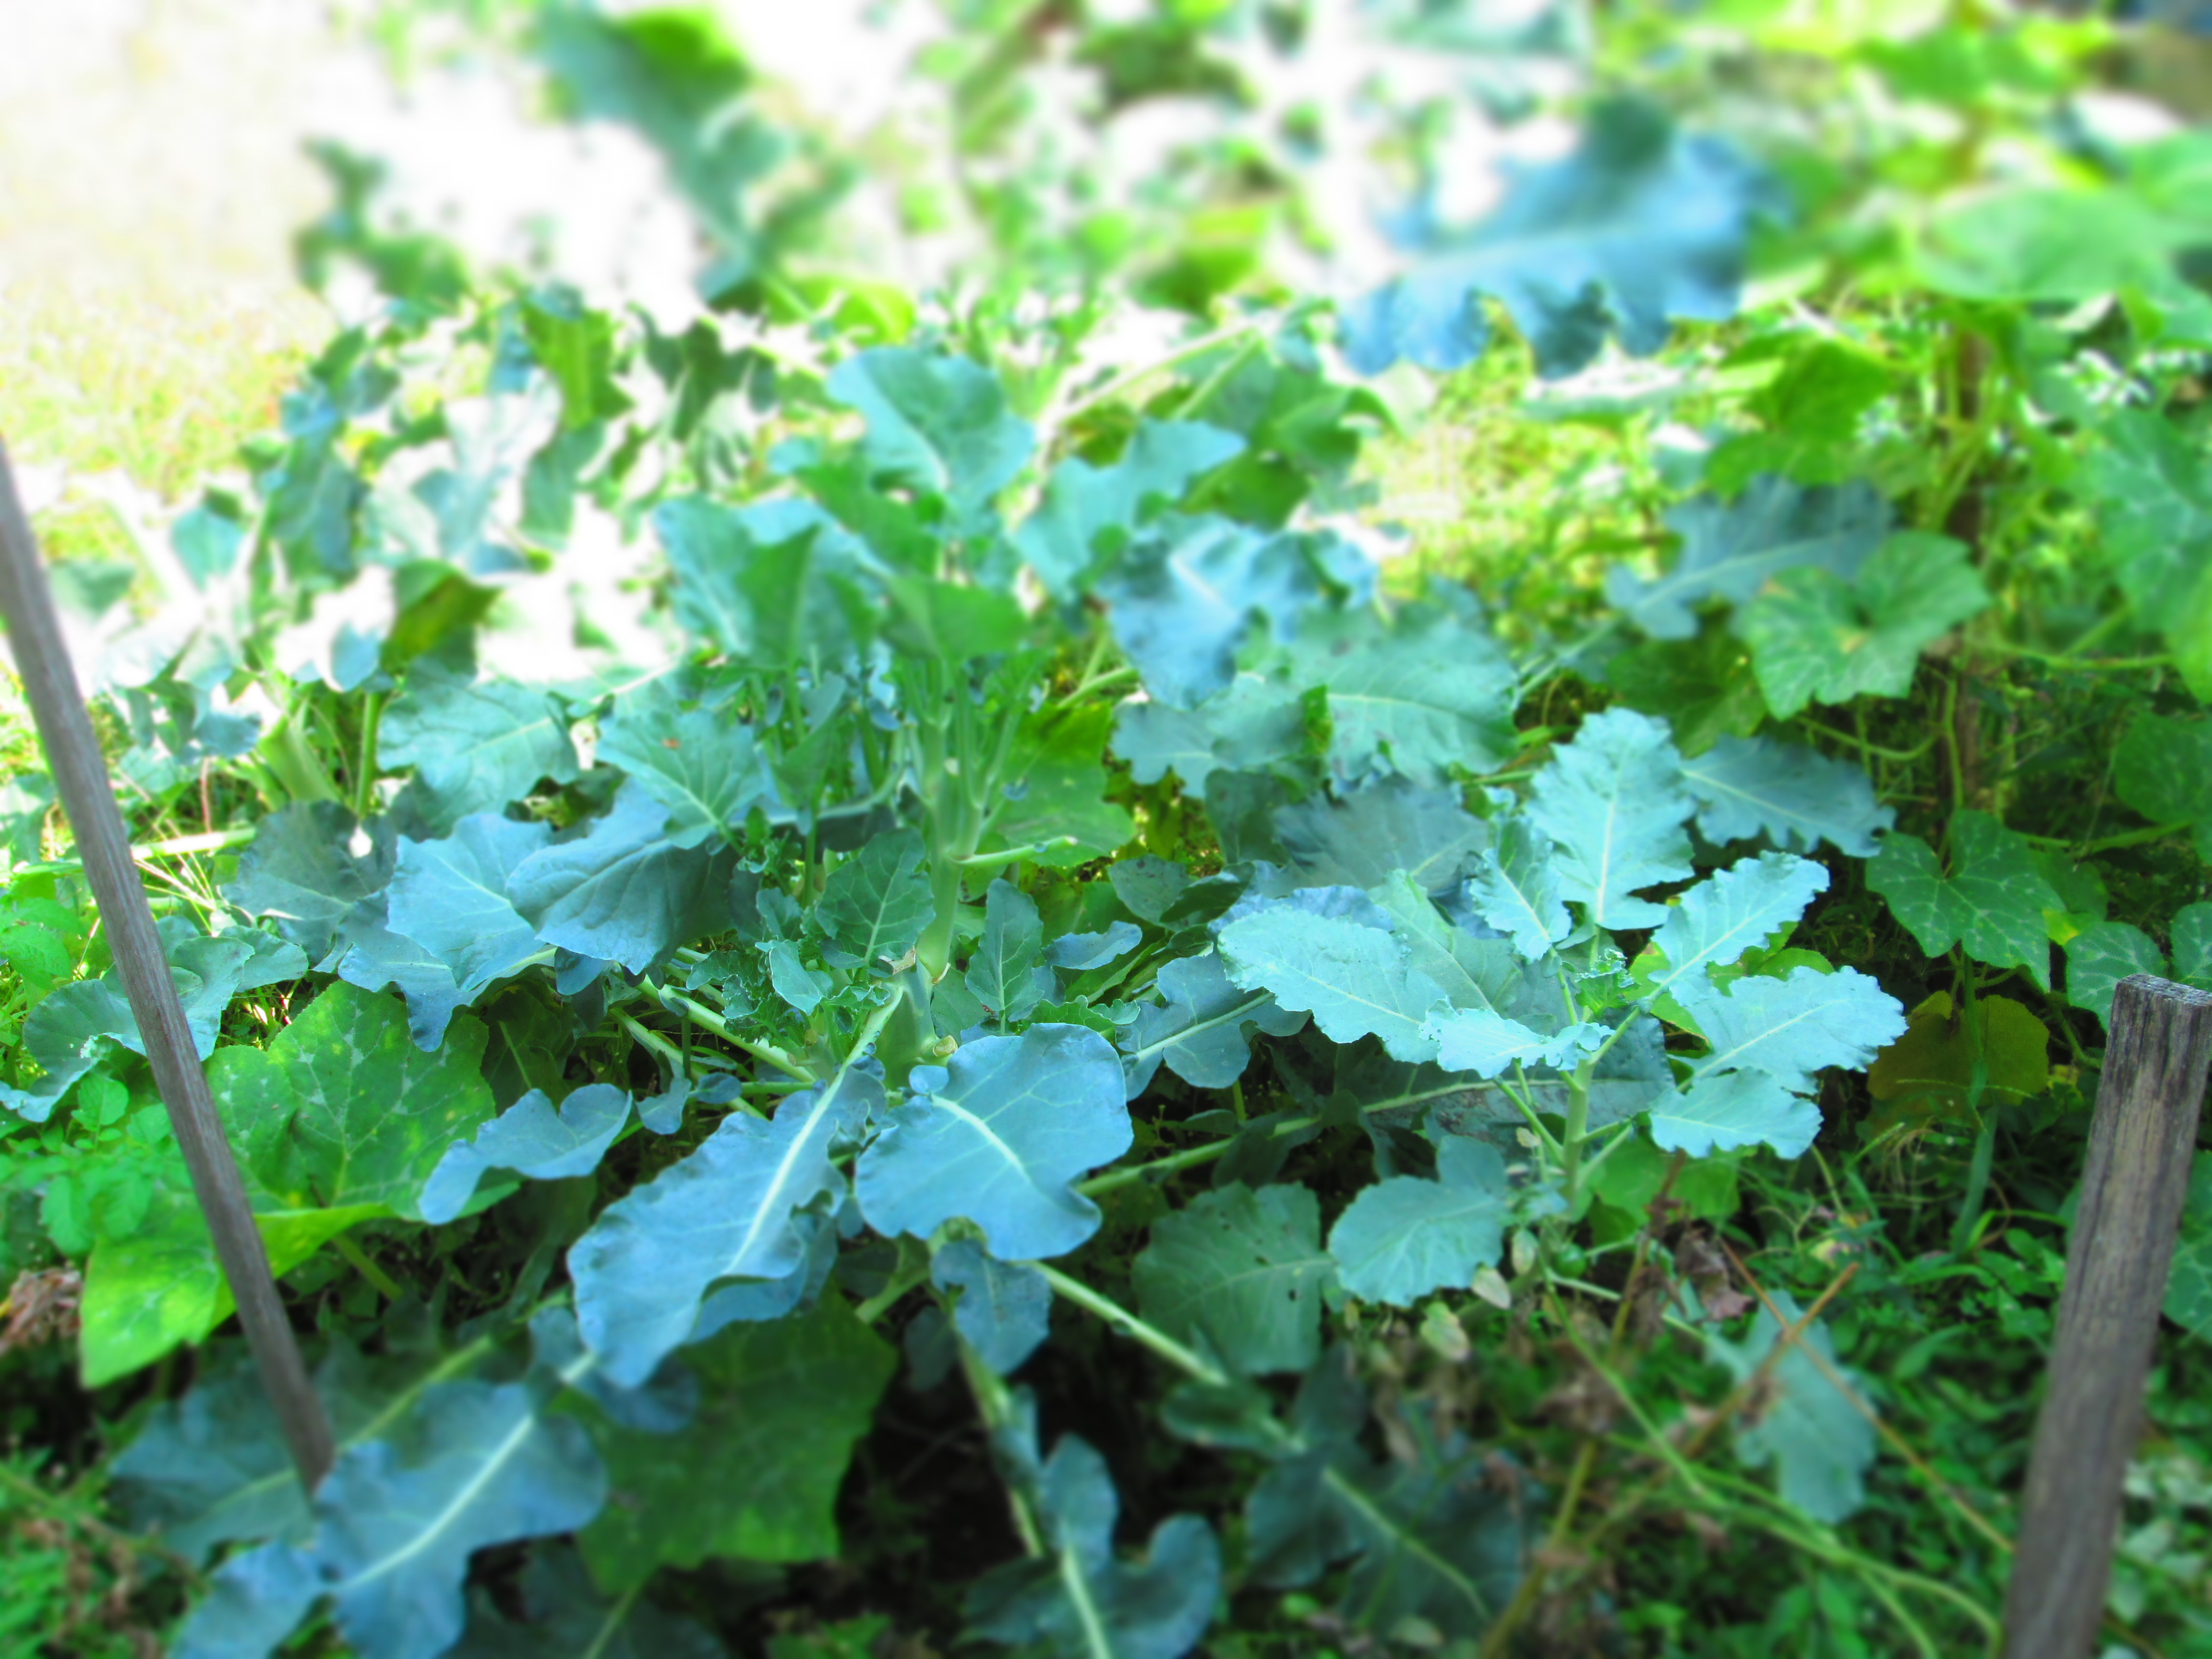
This year, they planted what they thought was kale. But this strange leafy plant grew instead. It kind of has kale-ish leaves, but it is not kale. The plant also closely resembles broccoli rabe, but it does not have broccoli rabe’s signature mini broccoli-like heads. Nor does it have broccoli rabe’s bitterness. It just tastes kind of herbal and grassy. So, we all just happily ate this mystery plant.
Then, this past week, my friend Linda gave me something out of her CSA box. (For those of you not familiar with CSAs, it stands for community-supported agriculture. Local farms prepare boxes each week of whatever is ready to be harvested. You pay a fee and go pick up your box each week. You don’t know what you’re getting until you pick it up, and the surprise is half the fun.) This item was listed as spigarello. She had no idea what it was or what to do with it, so she gave it to me. Imagine my surprise when, upon investigation, that this is the stuff growing in my parents’ garden! Mystery solved.
Native to southern Italy, spigarello (aka spigariello) is an heirloom broccoli variety and has been called by some websites as the “parent of broccoli rabe.” I’ve read that it’s all the rage right now in California but has been featured by some top restaurants here in New York as well, including Tom Collichio’s Craft.
Because spigarello is kin to broccoli rabe, it can be used like it. You can sauté it, put it into soups, or bake it in casseroles. But since it does not have the bitterness of broccoli rabe, it can also be used in salads without sending the bitter part of the taste belt on your tongue into orbit.
So, here is my favorite (and the most classic) recipe for broccoli rabe (which appears in Vegetarian Italian: Traditions, Volume 1), prepared with spigarello. Thanks to Linda for providing the clue.
Sauteed Spigarello with Garlic and Red Pepper
3 tablespoons olive oil
2 large garlic cloves, thinly sliced
Crushed red pepper to taste
1 pound spigarello (or broccoli rabe)
½ teaspoon salt, plus more to taste
In a large pot, combine the oil, garlic, and red pepper and sauté over medium heat until the garlic is well browned, about 3 to 5 minutes.
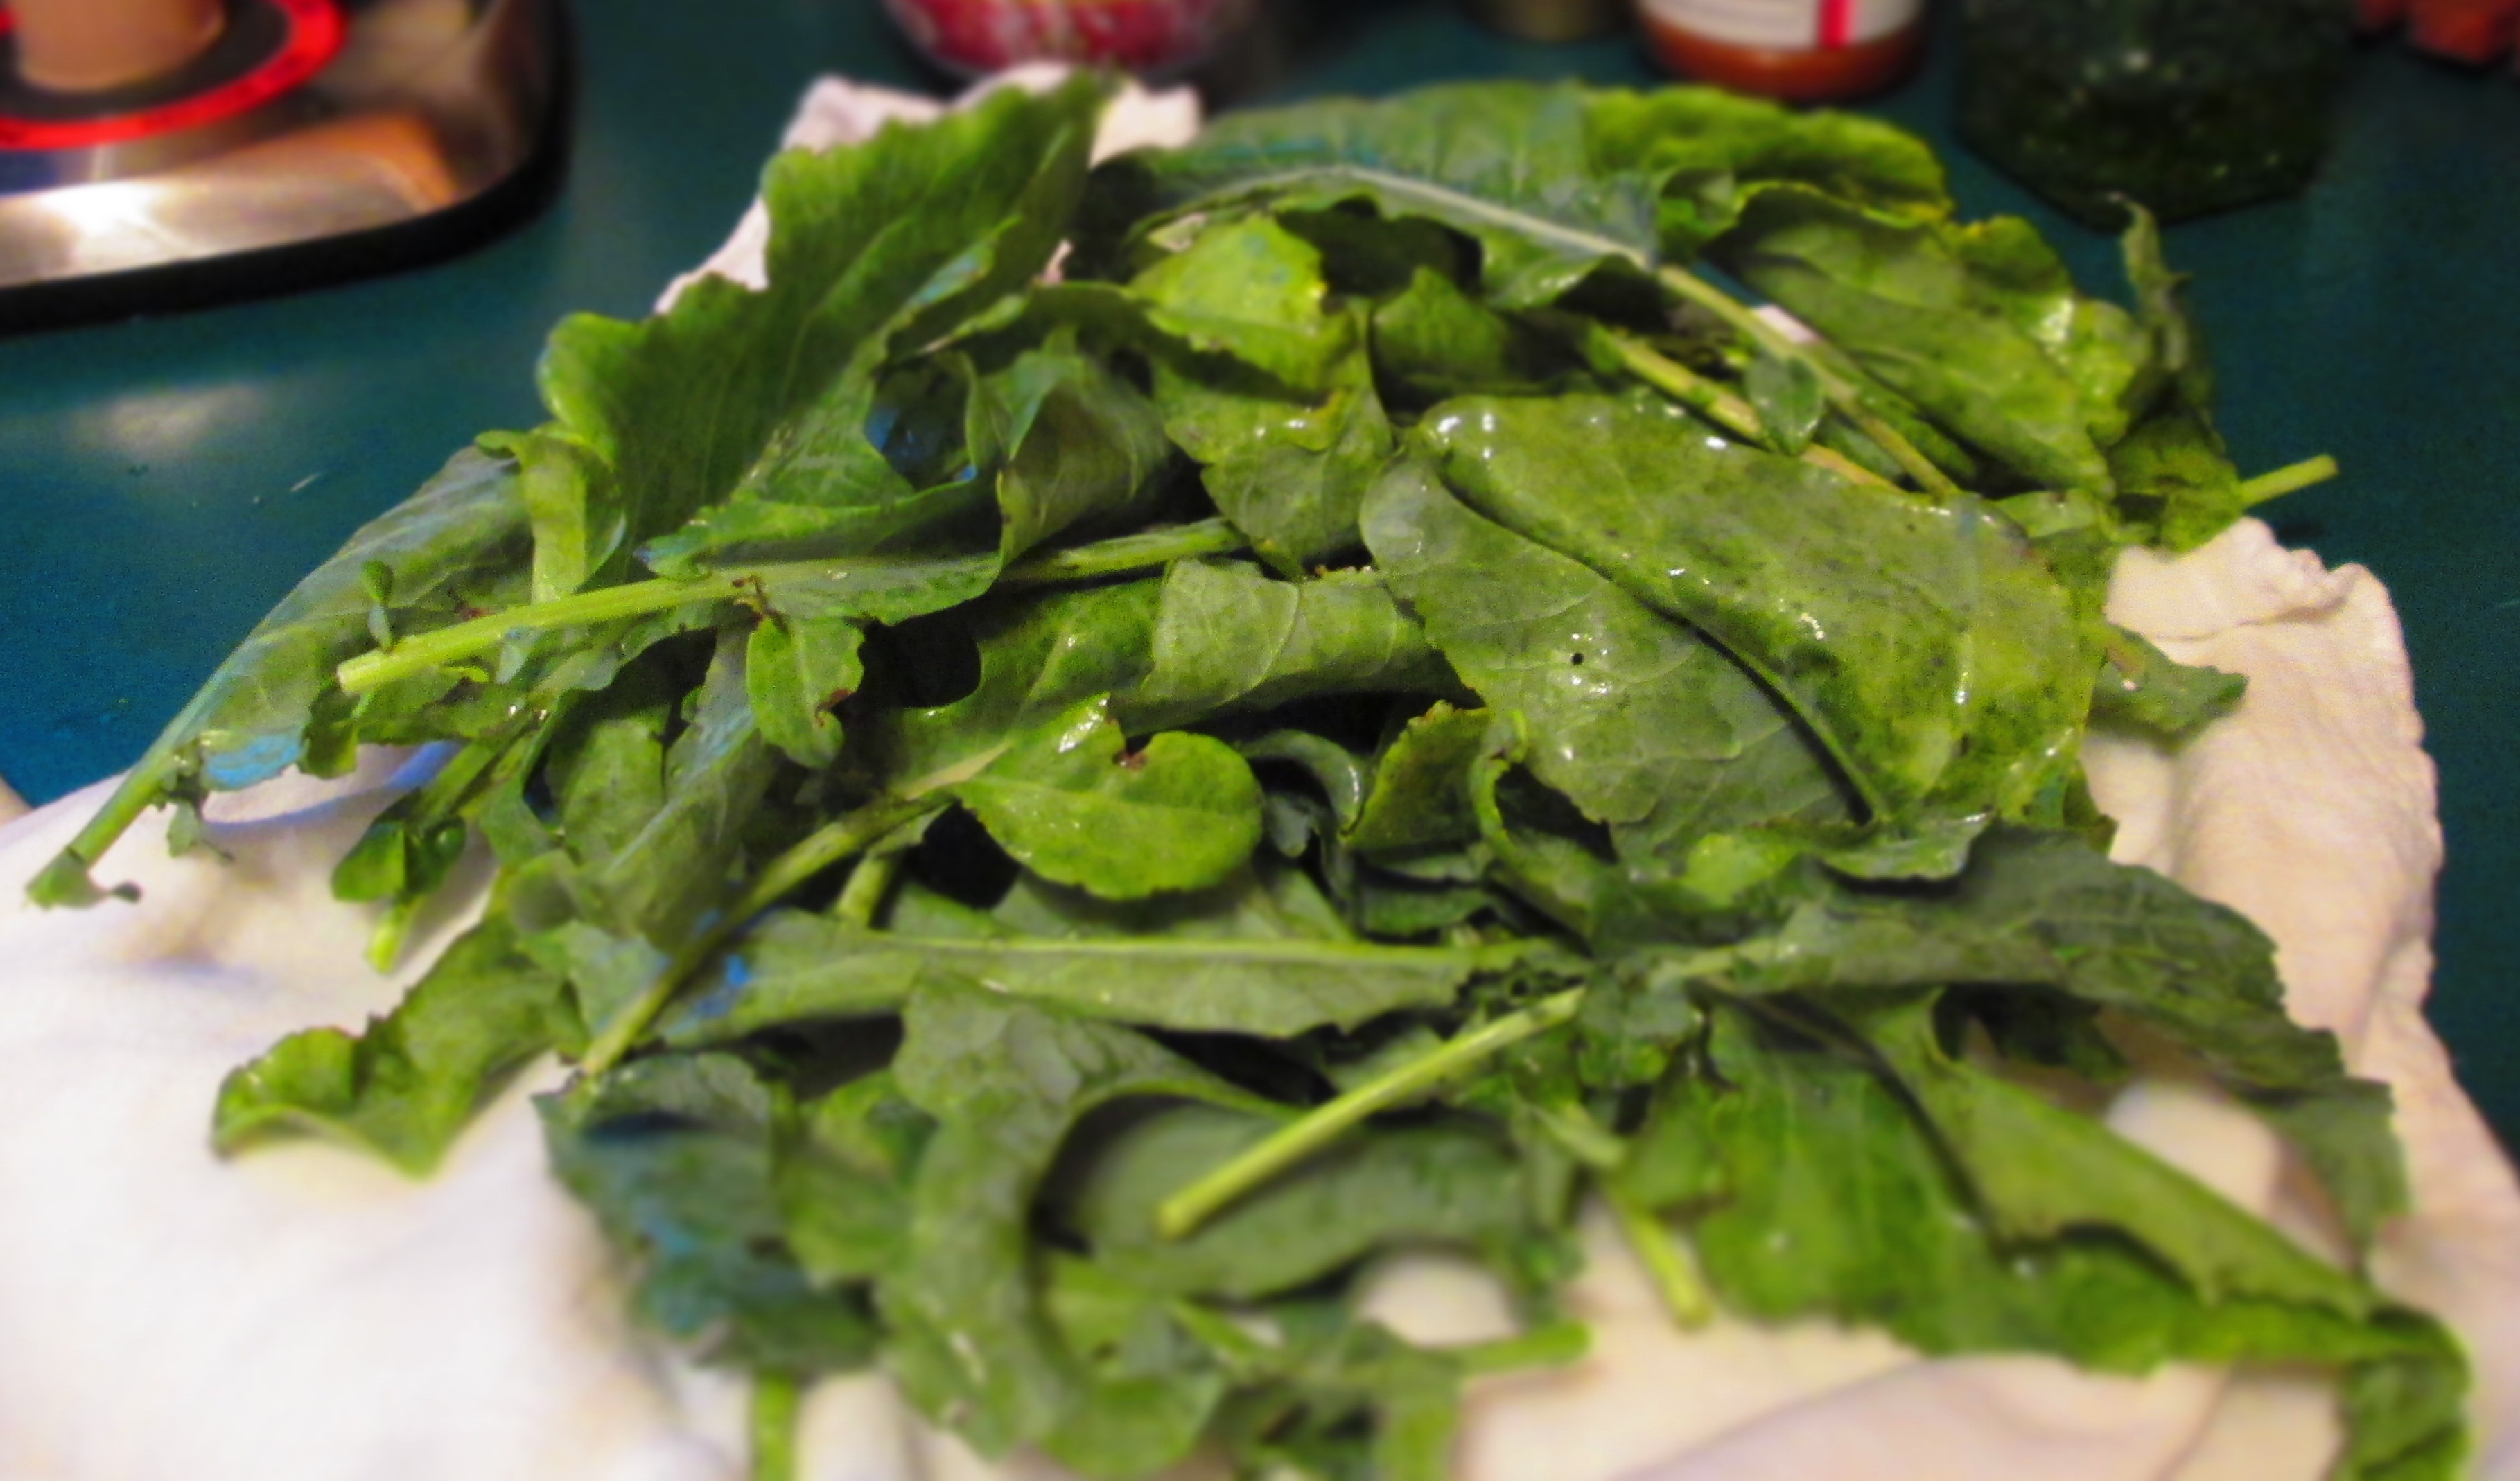
Meanwhile, cut the stems off the spigarello, and remove any blackened or yellowed leaves. Cut large pieces into edible lengths.
Add the spigarello, salt, and ½ cup water to the pot and stir. Continue cooking until the spigarello is tender, about 10 to 15 minutes. If it gets dry, add a little more water. Transfer the spigarello and the juices to a serving platter. Season with more salt, if desired.
Serve hot, cold, or at room temperature with crusty pieces of Italian bread.
Keep leftovers in a sealed bowl in the refrigerator up to 5 days.
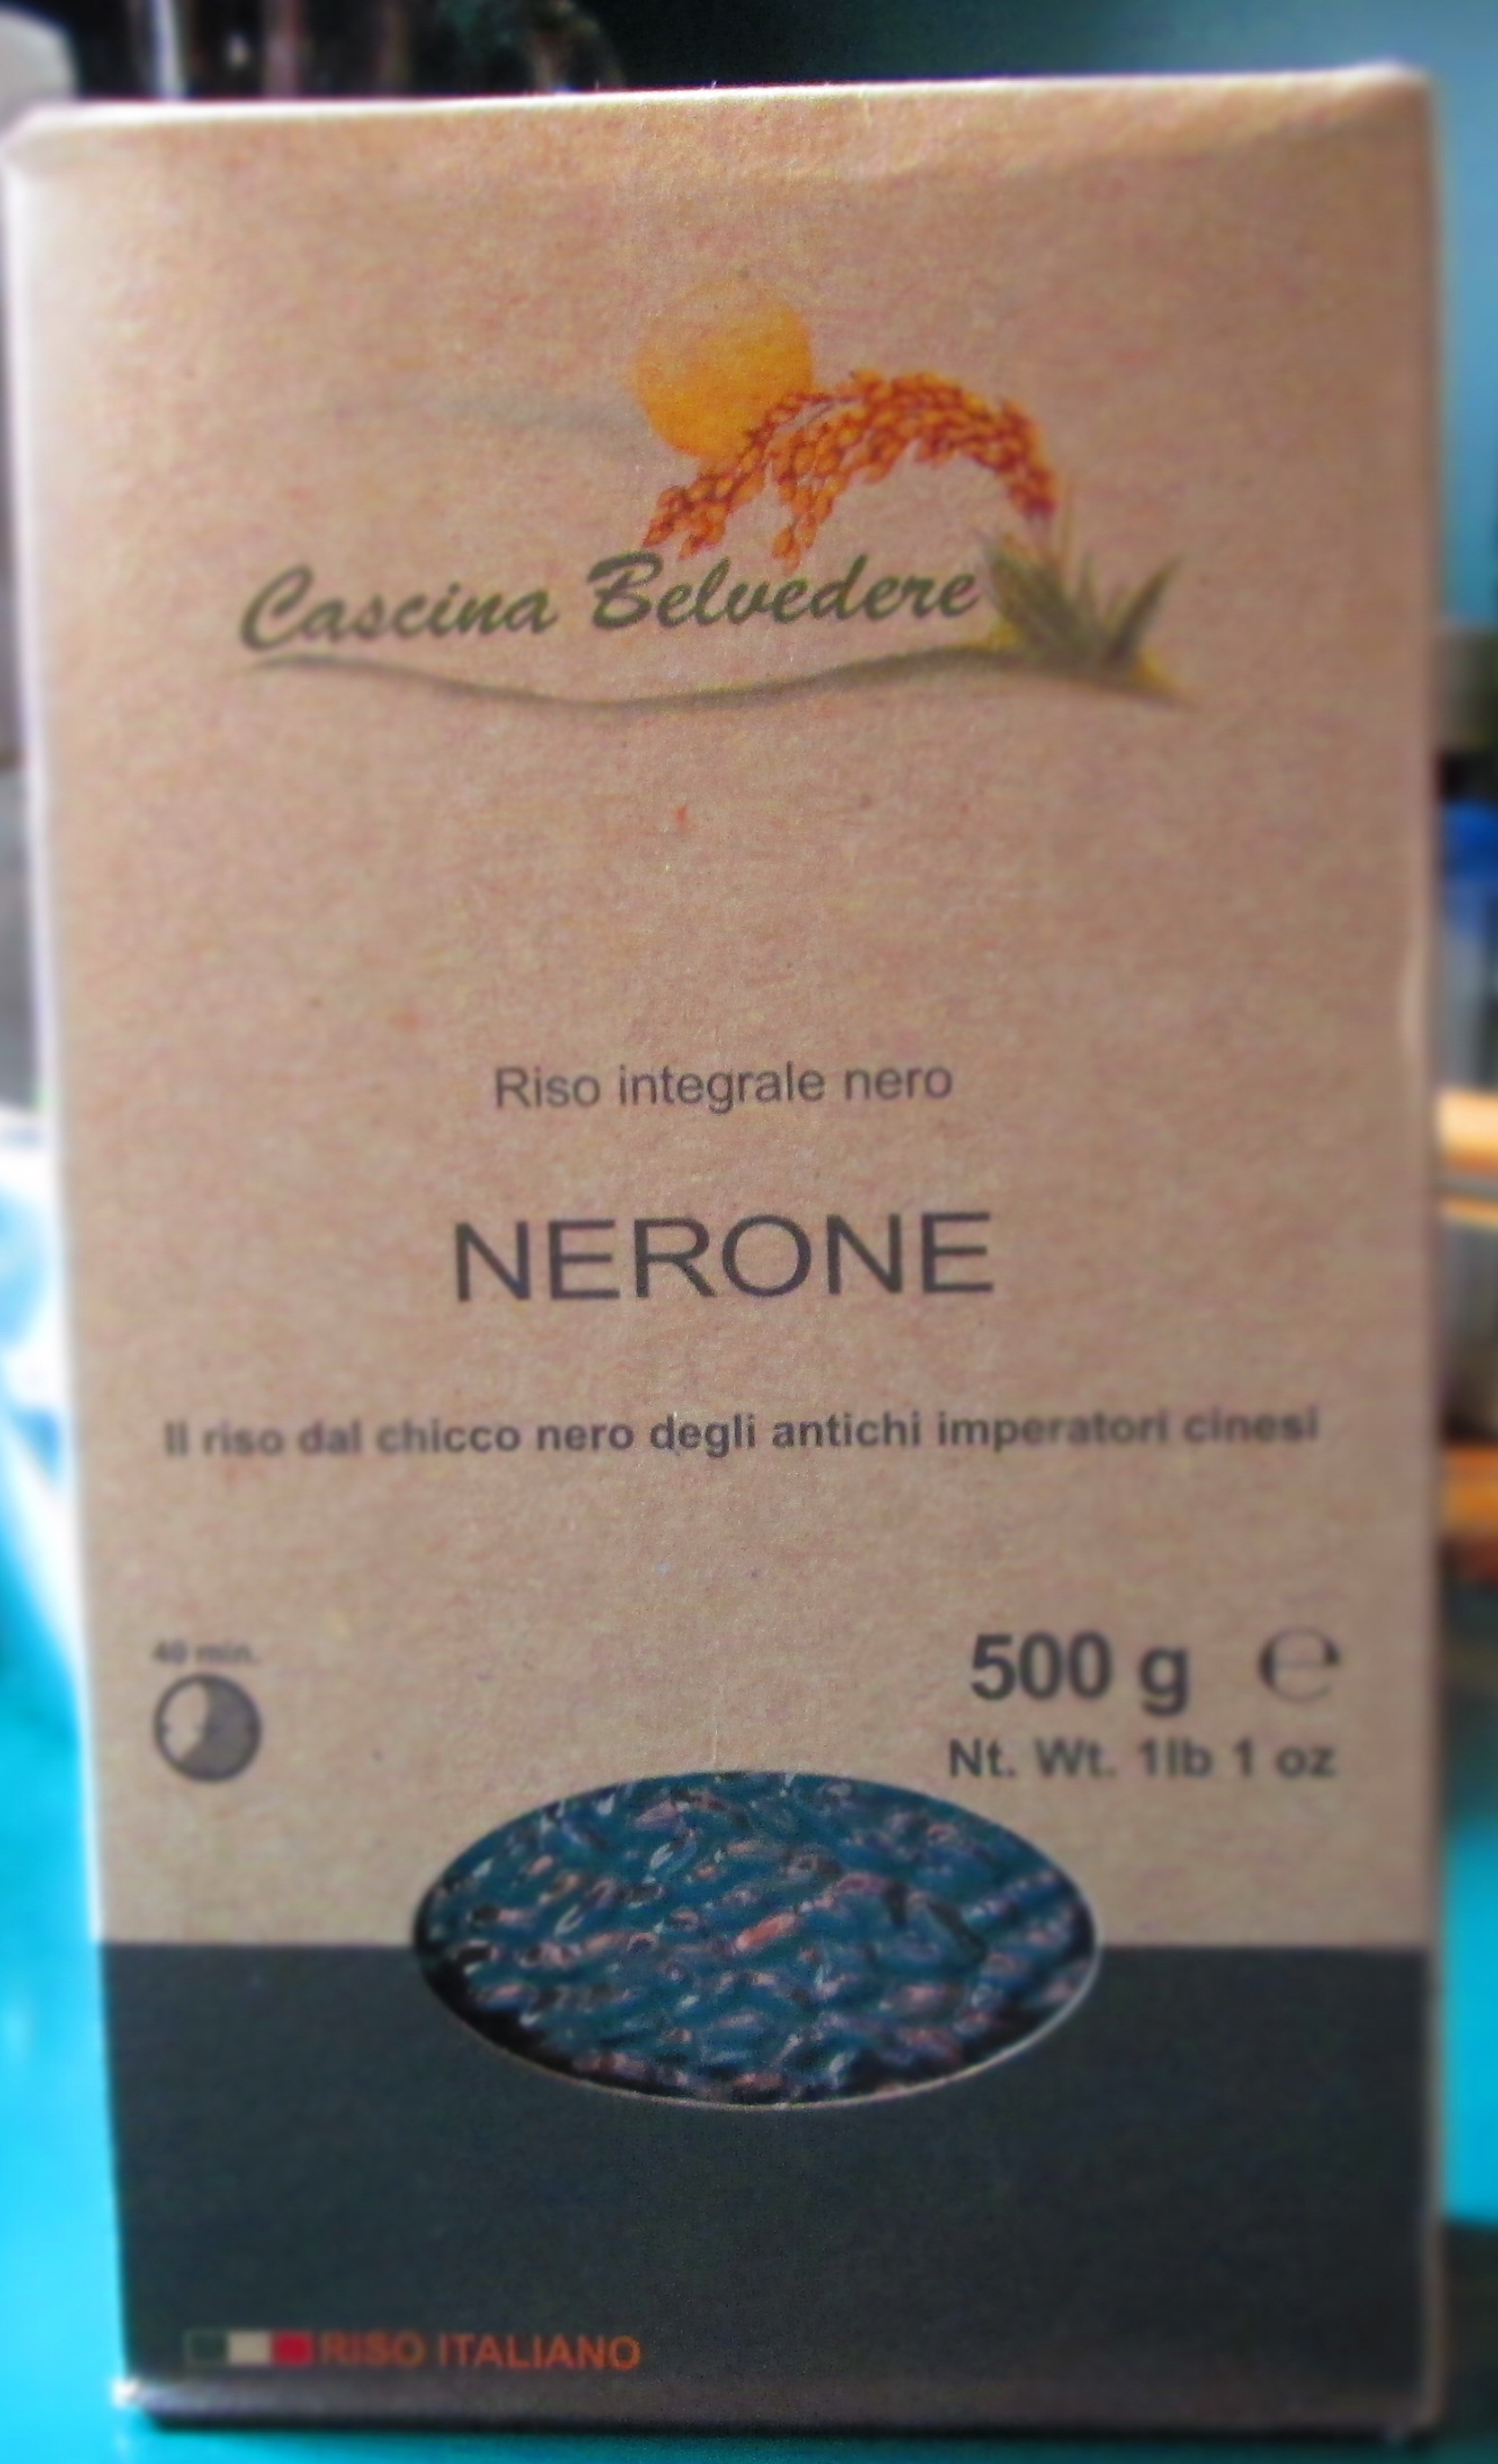
A while back, I was in Eataly in Soho and picked up a box of Italian black rice. I was a bit surprised to see it on the shelf because the only black rice I’d ever seen—as far as Italian cuisine is concerned—was risotto that had been cooked with squid ink. I was too intrigued not to buy it.
Black rice was first cultivated in China, but is currently cultivated in other parts of Asia and Southeast Asia, as well as in Italy near the Po River (hence its appearance in Eataly). Black rice is often called “forbidden rice” because, according to legend, it was so rare, nutritious, and precious, only the Chinese Emperor was allowed to eat it.
Black rice is a whole grain that contains anthocyanins, antioxidants found in purple, blue, and red produce, such as blueberries, cranberries, grapes, red cabbage, blackberries, acai, and others. This anti-cancer agent has also been linked to decreased risk of heart disease, increased memory function, and lower blood pressure. It also helps with urinary tract infections and has antibacterial and antiviral properties.
There are different types of black rice, some short-grained, some medium-grained. Black sticky Thai rice (sometimes called sweet sticky Thai rice) is short-grained and glutinous, which is what makes it sticky (akin to Arborio rice, used to make risotto). The one I picked up is medium-grained and although short-grain rice is usually used for risotto, I wanted to try and make a black rice risotto this medium-grain variety.
Black rice, also known as japonica rice, is firm and chewy and takes a bit longer to cook than regular rice. So my dish ended up being sort of a cross between risotto and paella. I began by adding broth a half-cup at a time, as if making risotto, to coax out the starch; then I dumped all of the remaining broth in, as when making paella, to get it cooked through.
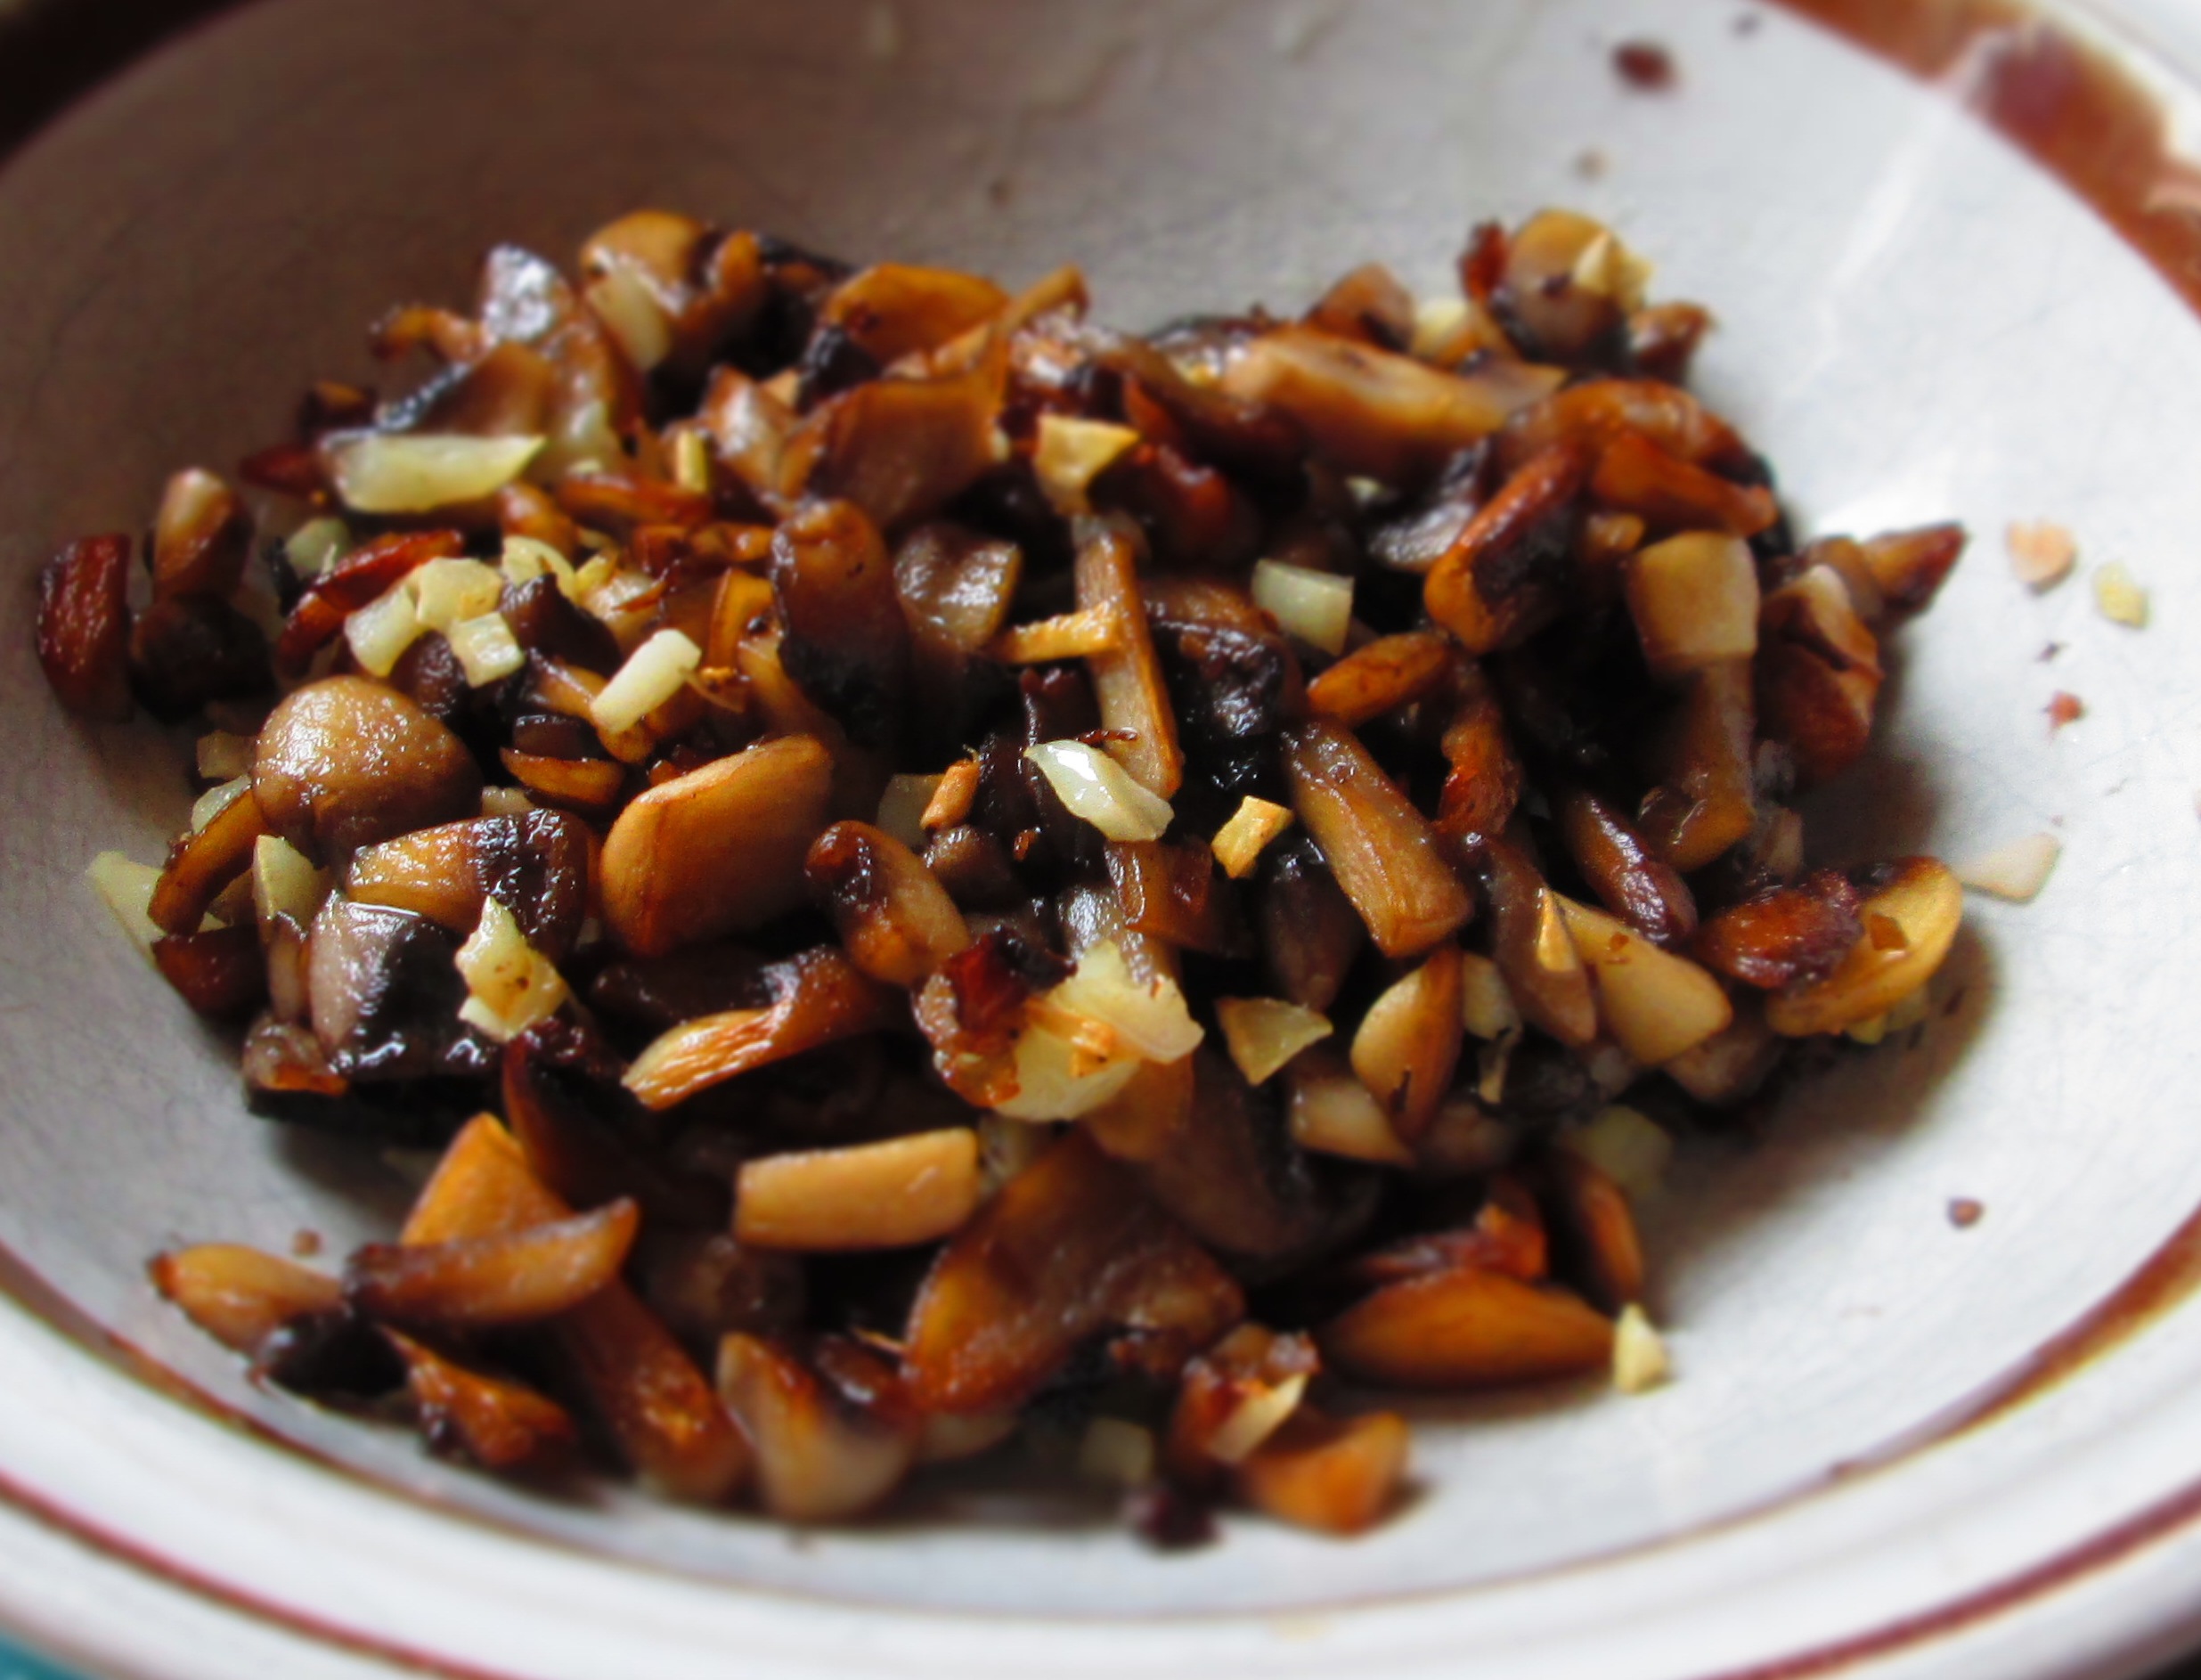
I started out browning mushrooms in a cast iron skillet and decided to just keep using it to make my risotto rather than switch to a more traditional pot. A cast iron skillet is a great cooking vessel, but I soon realized it’s not so great for photography purposes. Not when cooking black rice, anyway. You can choose to sauté the mushrooms in a skillet and start the risotto in a sauce pot, if you prefer.
The end result was not quite as creamy as a risotto should be but was quite tasty. One thing you should know is anything you cook with black rice will turn black. The only way to have that not happen is to cook the rice separately, as you would any other rice, then mix in other ingredients. This is also why it doesn’t matter whether you use red or white wine, except where personal taste is concerned.
As for the herbs, I used what I had in my garden, which was basil, savory, and sage. Feel free to use any herbs you like, or none at all.
By the way, if you ever see “black pasta” on a menu, that still means that it was made with squid ink.
Black rice is usually available in Asian markets, but make note of what the package says: If it says “sweet” or “glutinous” then it’s short-grain, which is fine, but it’s not japonica. I hope you can get some and that you try out this recipe. Enjoy!
Black Rice Risotto with Peas and Mushrooms
12 oz. white mushrooms
¼ cup olive oil
2 teaspoons kosher salt
2½ cups vegetable broth
½ cup chopped red onion
¼ cup chopped red pepper
5 large garlic cloves, minced
1 cup black rice
½ cup red or white wine
1 cup frozen peas
Freshly ground black pepper
Herbs of your choice
Choose a few nice mushrooms, slice thinly, and set aside. Coarsely chop the rest.
Heat 2 tablespoons oil in a wide cast iron pan. Add mushrooms and a teaspoon kosher salt. Sauté over medium heat until mushrooms are nicely browned on both sides, about 15 minutes. Transfer to a bowl. Add reserved sliced mushrooms and gently sauté until browned on both sides. Transfer to a small bowl.
Bring the broth to a boil in a small pot; lower the heat very low and keep it simmering.
Add another tablespoon oil to the pan and heat. Add onion; sauté over medium heat a couple of minutes until softened. Add red pepper and sauté until softened, about 5 minutes. Add garlic and 1 teaspoon salt and sauté another 2 minutes.
Add rice and stir until all grains are coated with oil. Let rice toast for 2 or 3 minutes, stirring often.
Stir 1/2 cup of broth and let it be absorbed; repeat with another ½ cup. Stir in the wine and let it be absorbed. Pour in the remaining broth; cover and lower the heat to medium-low. Cook until most of the liquid is absorbed. Mix in the chopped mushrooms and peas and continue cooking until all liquid is absorbed. If the rice is still not fully tender, add a little more broth or water. The rice should be firm and chewy. Season with salt and pepper and stir in herbs, if using.
Transfer to a serving bowl and place browned sliced mushrooms on top.
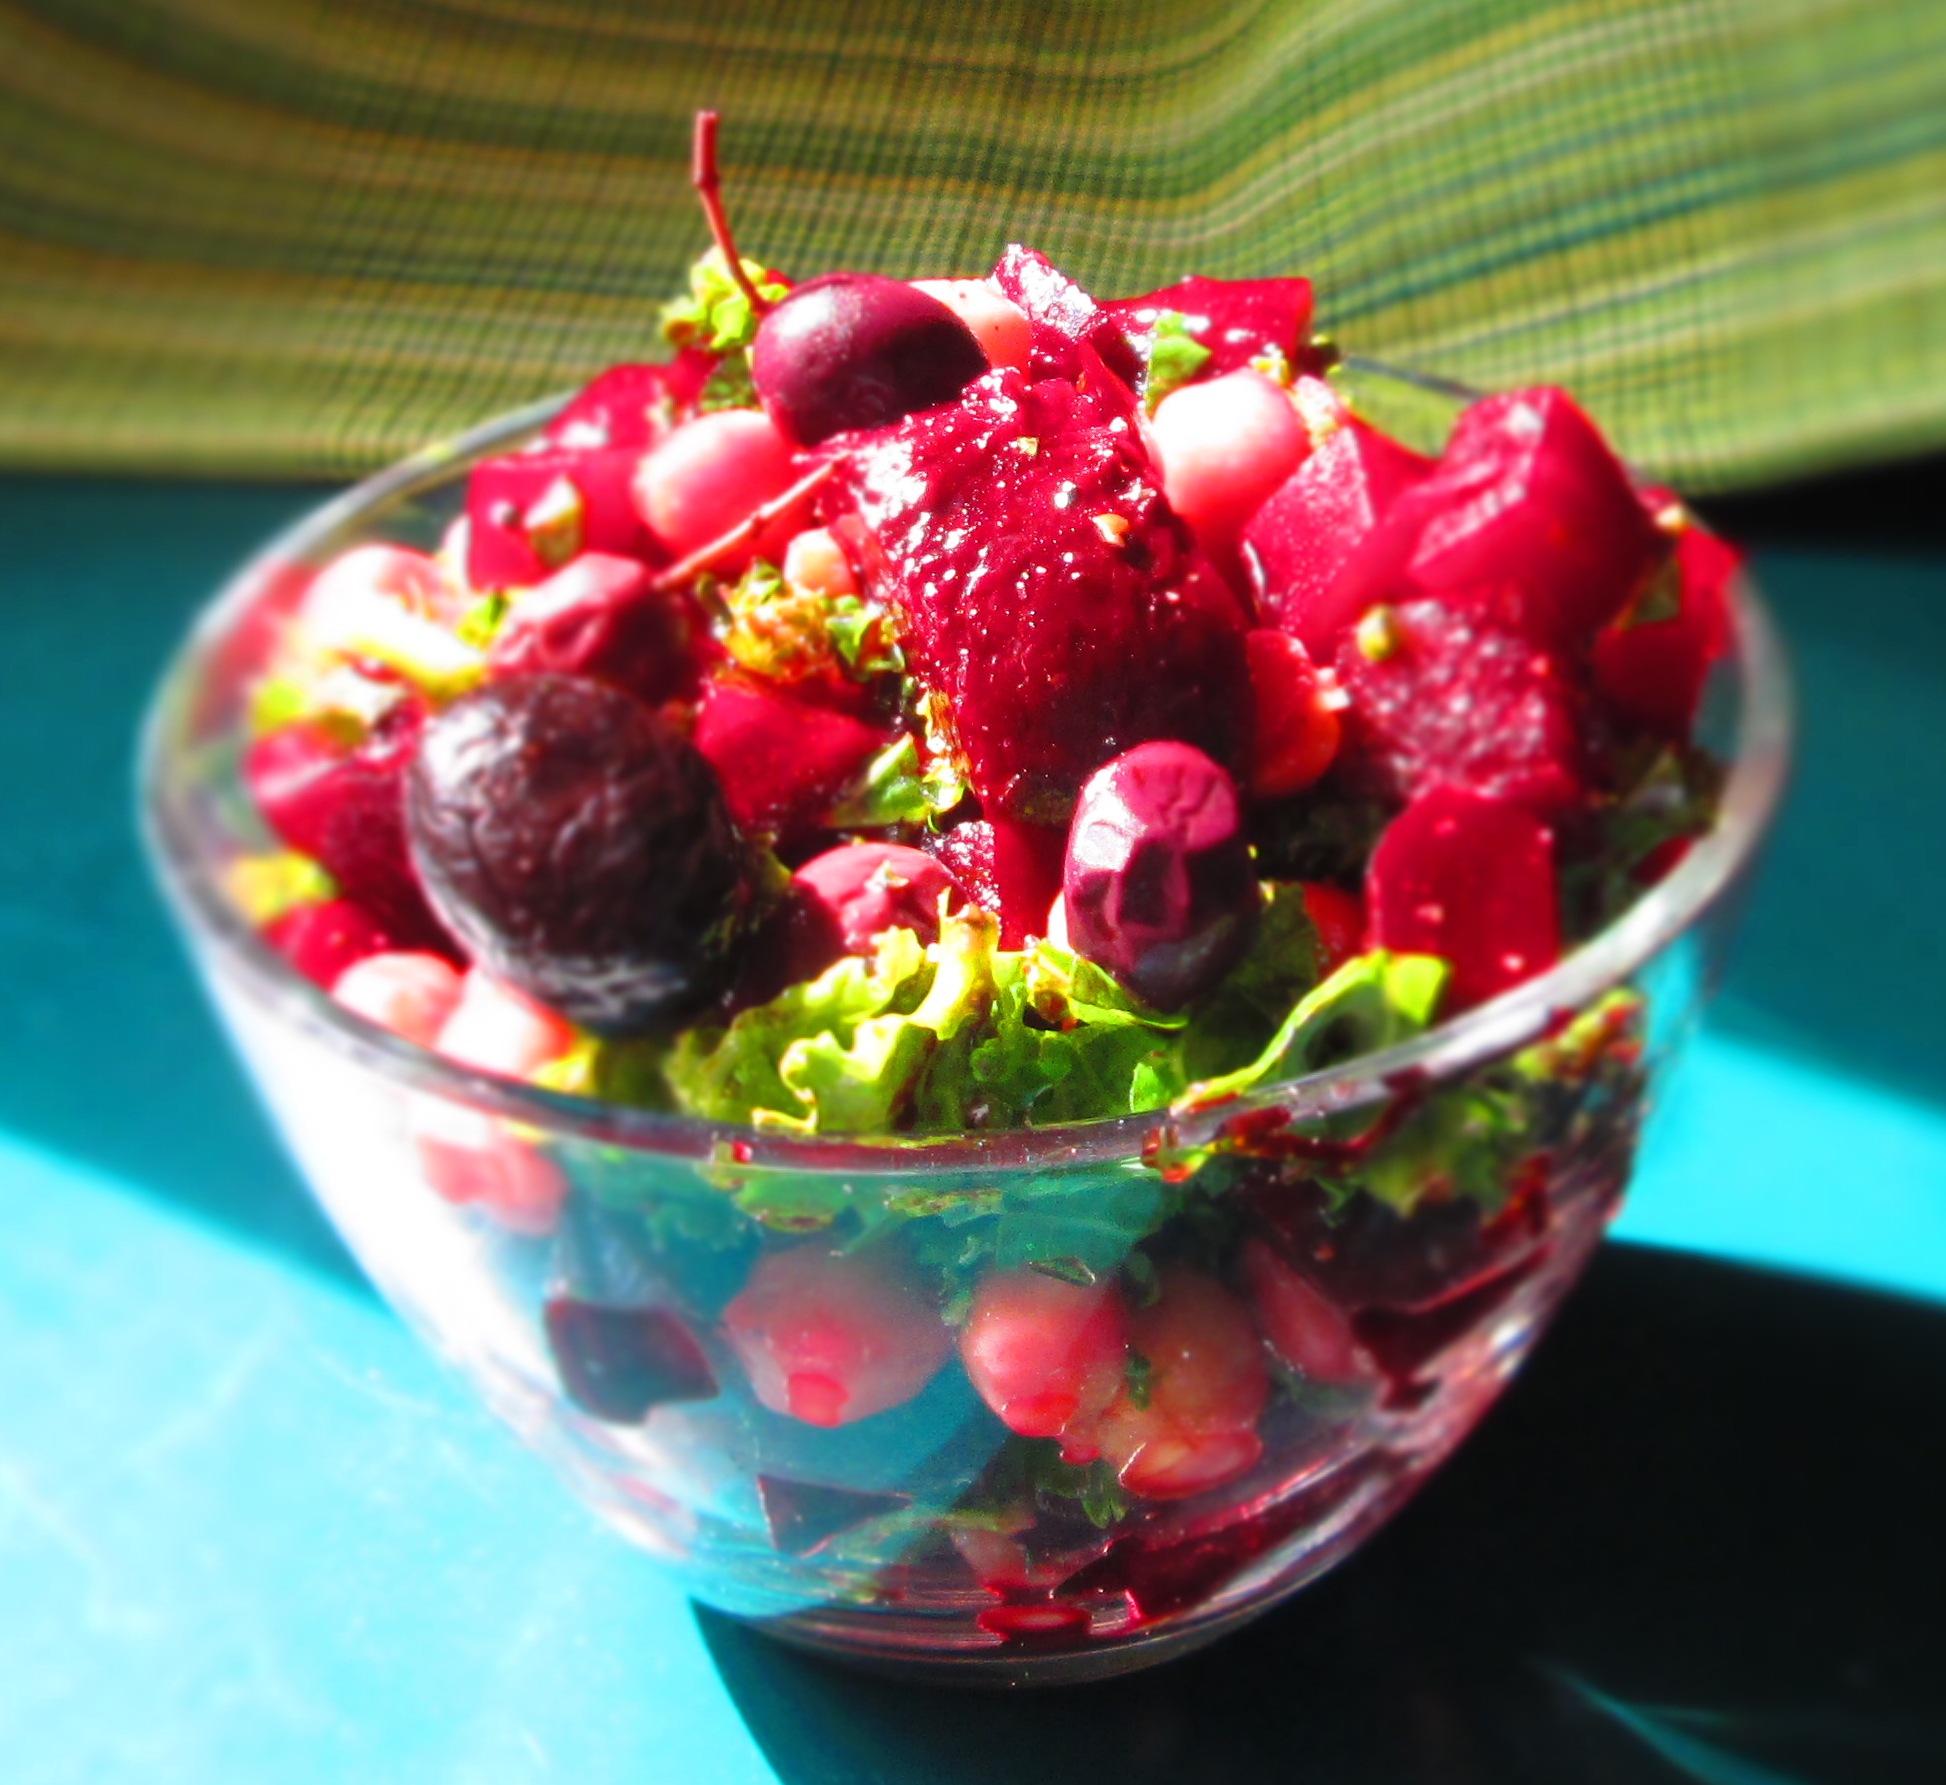
I went to the Greenmarket this past week and found golden beets, which is not something I encounter often. So I bought a bunch and finally got around to roasting them. I love beets and so happened to also have some red beets left over as well.
I wondered what I should do with all these beets. Well, as it turns out, today was a pretty hot day and I just didn’t have the energy or desire to do too much food prep.
So I pulled out my mandoline and just sliced these little jewels up. My mandoline is old and cheap and it sucks, so I didn’t really get nice clean edges. But it didn’t matter. Some extra virgin olive oil, sea salt, freshly ground pepper, and thinly sliced red onions (which I also got at the Greenmarket), and I had a simple, flavorful, and attractive light summer dish. The herbs from my garden and a few olives topped it off.
Do not discard the leafy greens. Those are amazing sauteed in olive oil and garlic. Trim off the tough stems. Fill a big bowl with cold water and soak the leaves for about 15 minutes (swish them around a couple of times). Lift the leaves out of the bowl and place them in another bowl. Repeat this a couple of times until you feel the leaves are clean. Saute garlic in olive oil, sprinkle in some paprika, then add the greens and some salt. Cover and cook over medium heat until wilted, about 10 minutes. This is both delicious and nutritious—they contain antioxidants, vitamins B6 and A, calcium, and they help fight osteoporosis and Alzheimer’s Disease. The beets themselves have vitamin C, magnesium, potassium, folate, and manganese. They help prevent prevent anemia, build muscle and maintain nerve function, build bone strength, regulate blood sugar levels, and promote a healthy immune system. And its betaine, an amino acid, helps fight against colon and stomach cancers.
Red & Golden Beet Carpaccio
2 large red beets
2 large golden beets
1/2 small red onion, thinly sliced
2 tablespoons extra virgin olive oil
Sea salt
Freshly ground pepper
Preheat oven to 400 degrees F. Wash and trip beets (snip off long roots and cut off stems). Wrap beets up tightly in aluminum foil and place on a baking sheet. Roast until tender when pierce with the tip of a knife, about 45 to 60 minutes. Remove from oven and unwrap. When cool enough to handle, peel off skin with the help of a paring knife.
Using a mandoline or sharp knife, slice beets as thinly as possible. Arrange on a plate, along with the red onion. Drizzle olive oil over the top. Season with salt and pepper.
Add olives, herbs, or any other seasonings you’d like.
Chickpea (garbanzo) and beet salad is not a new thing. In fact, a recipe for it is in my cookbook, Vegetarian Italian: Traditions, Volume 1. But, see, I had this kale that I needed to use, and I had just roasted up these fresh beets that I’d purchased at the Greenmarket.
So, this particular chickpea and beet salad is a mutated version of my old recipe, encompassing the little “extras” in my fridge. It’s really simple and can easily be seasoned to suit anyone’s taste.
Beet-Kale-Garbanzo Salad
2 medium beets
1 cup kale leaves, washed and chopped
½ cup cooked garbanzos
3 tablespoons extra virgin olive oil
1 tablespoon balsamic vinegar
sea salt and freshly ground black pepper
¼ cup cured olives (any kind)
Preheat oven to 375 degrees F. Wrap the beets in aluminum foil and place on a baking sheet. Roast until tender when pierced with a knife, about 45 minutes. (The time will vary, depending on the size and freshness of the beets. You will have to unwrap the foil to check it.)
Remove from oven, unwrap the foil, and let cool. When cook enough to handle, peel the beets with a paring knife (the skin will pull right off). You may want to wear gloves to keep your fingers from turning red. Chop and place in a medium bowl.
Add kale, garbanzos, oil, and balsamic and mix. Season with salt and pepper to your liking and mix again. Gently mix in the olives.
A couple of friends of mine receive CSA boxes. For those of you who don’t know what a CSA box is, it stands for “community-supported agriculture.” You have to join a CSA program and every week, you go and pick up your box, in which there will be a collection of produce based on that week’s crops. It’s basically a “what’s ready” box. You’re getting farm-fresh local and seasonal produce and you are supporting your local farmers.
As much as I believe in local and organic produce and sustainable farming, CSA boxes are not practical for me because when I do have time to cook, I have to focus on recipes that I must make. If you’re a food writer like me, you know exactly what I’m talking about: There are specific recipes that need to be tested, dishes to be photographed, events to cook for… We cook with an agenda, and cooking just for pleasure is a luxury.
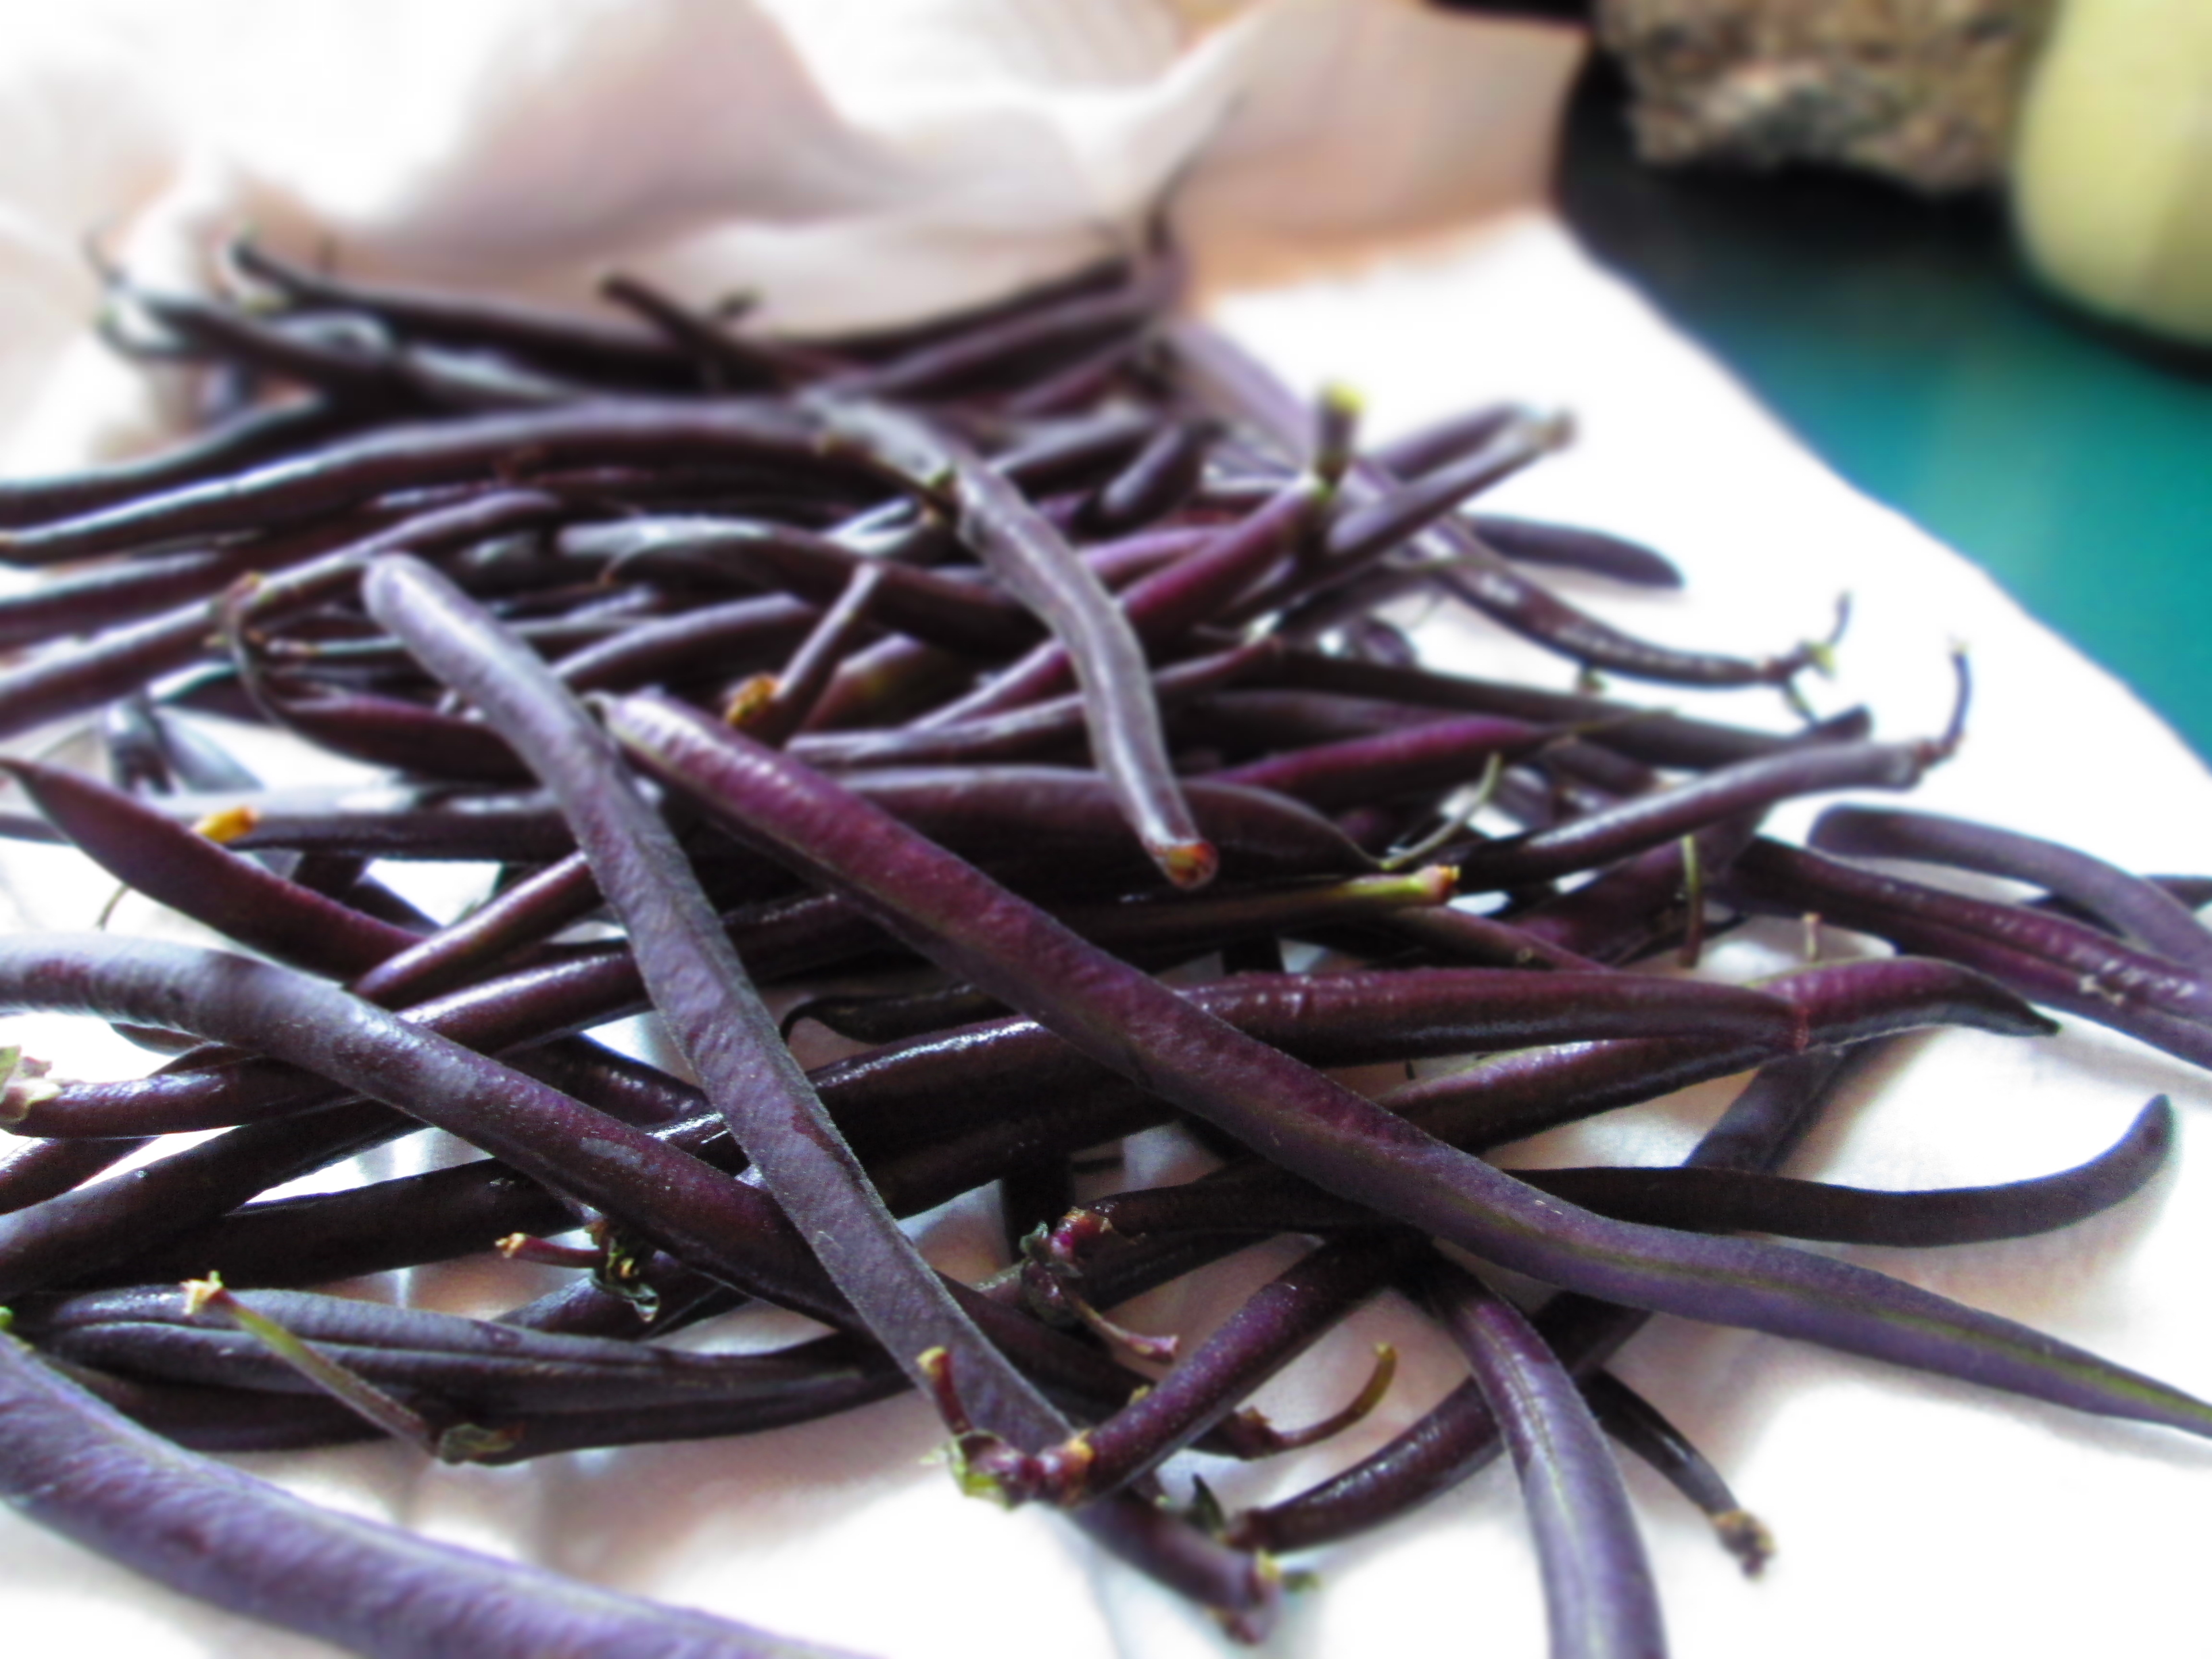
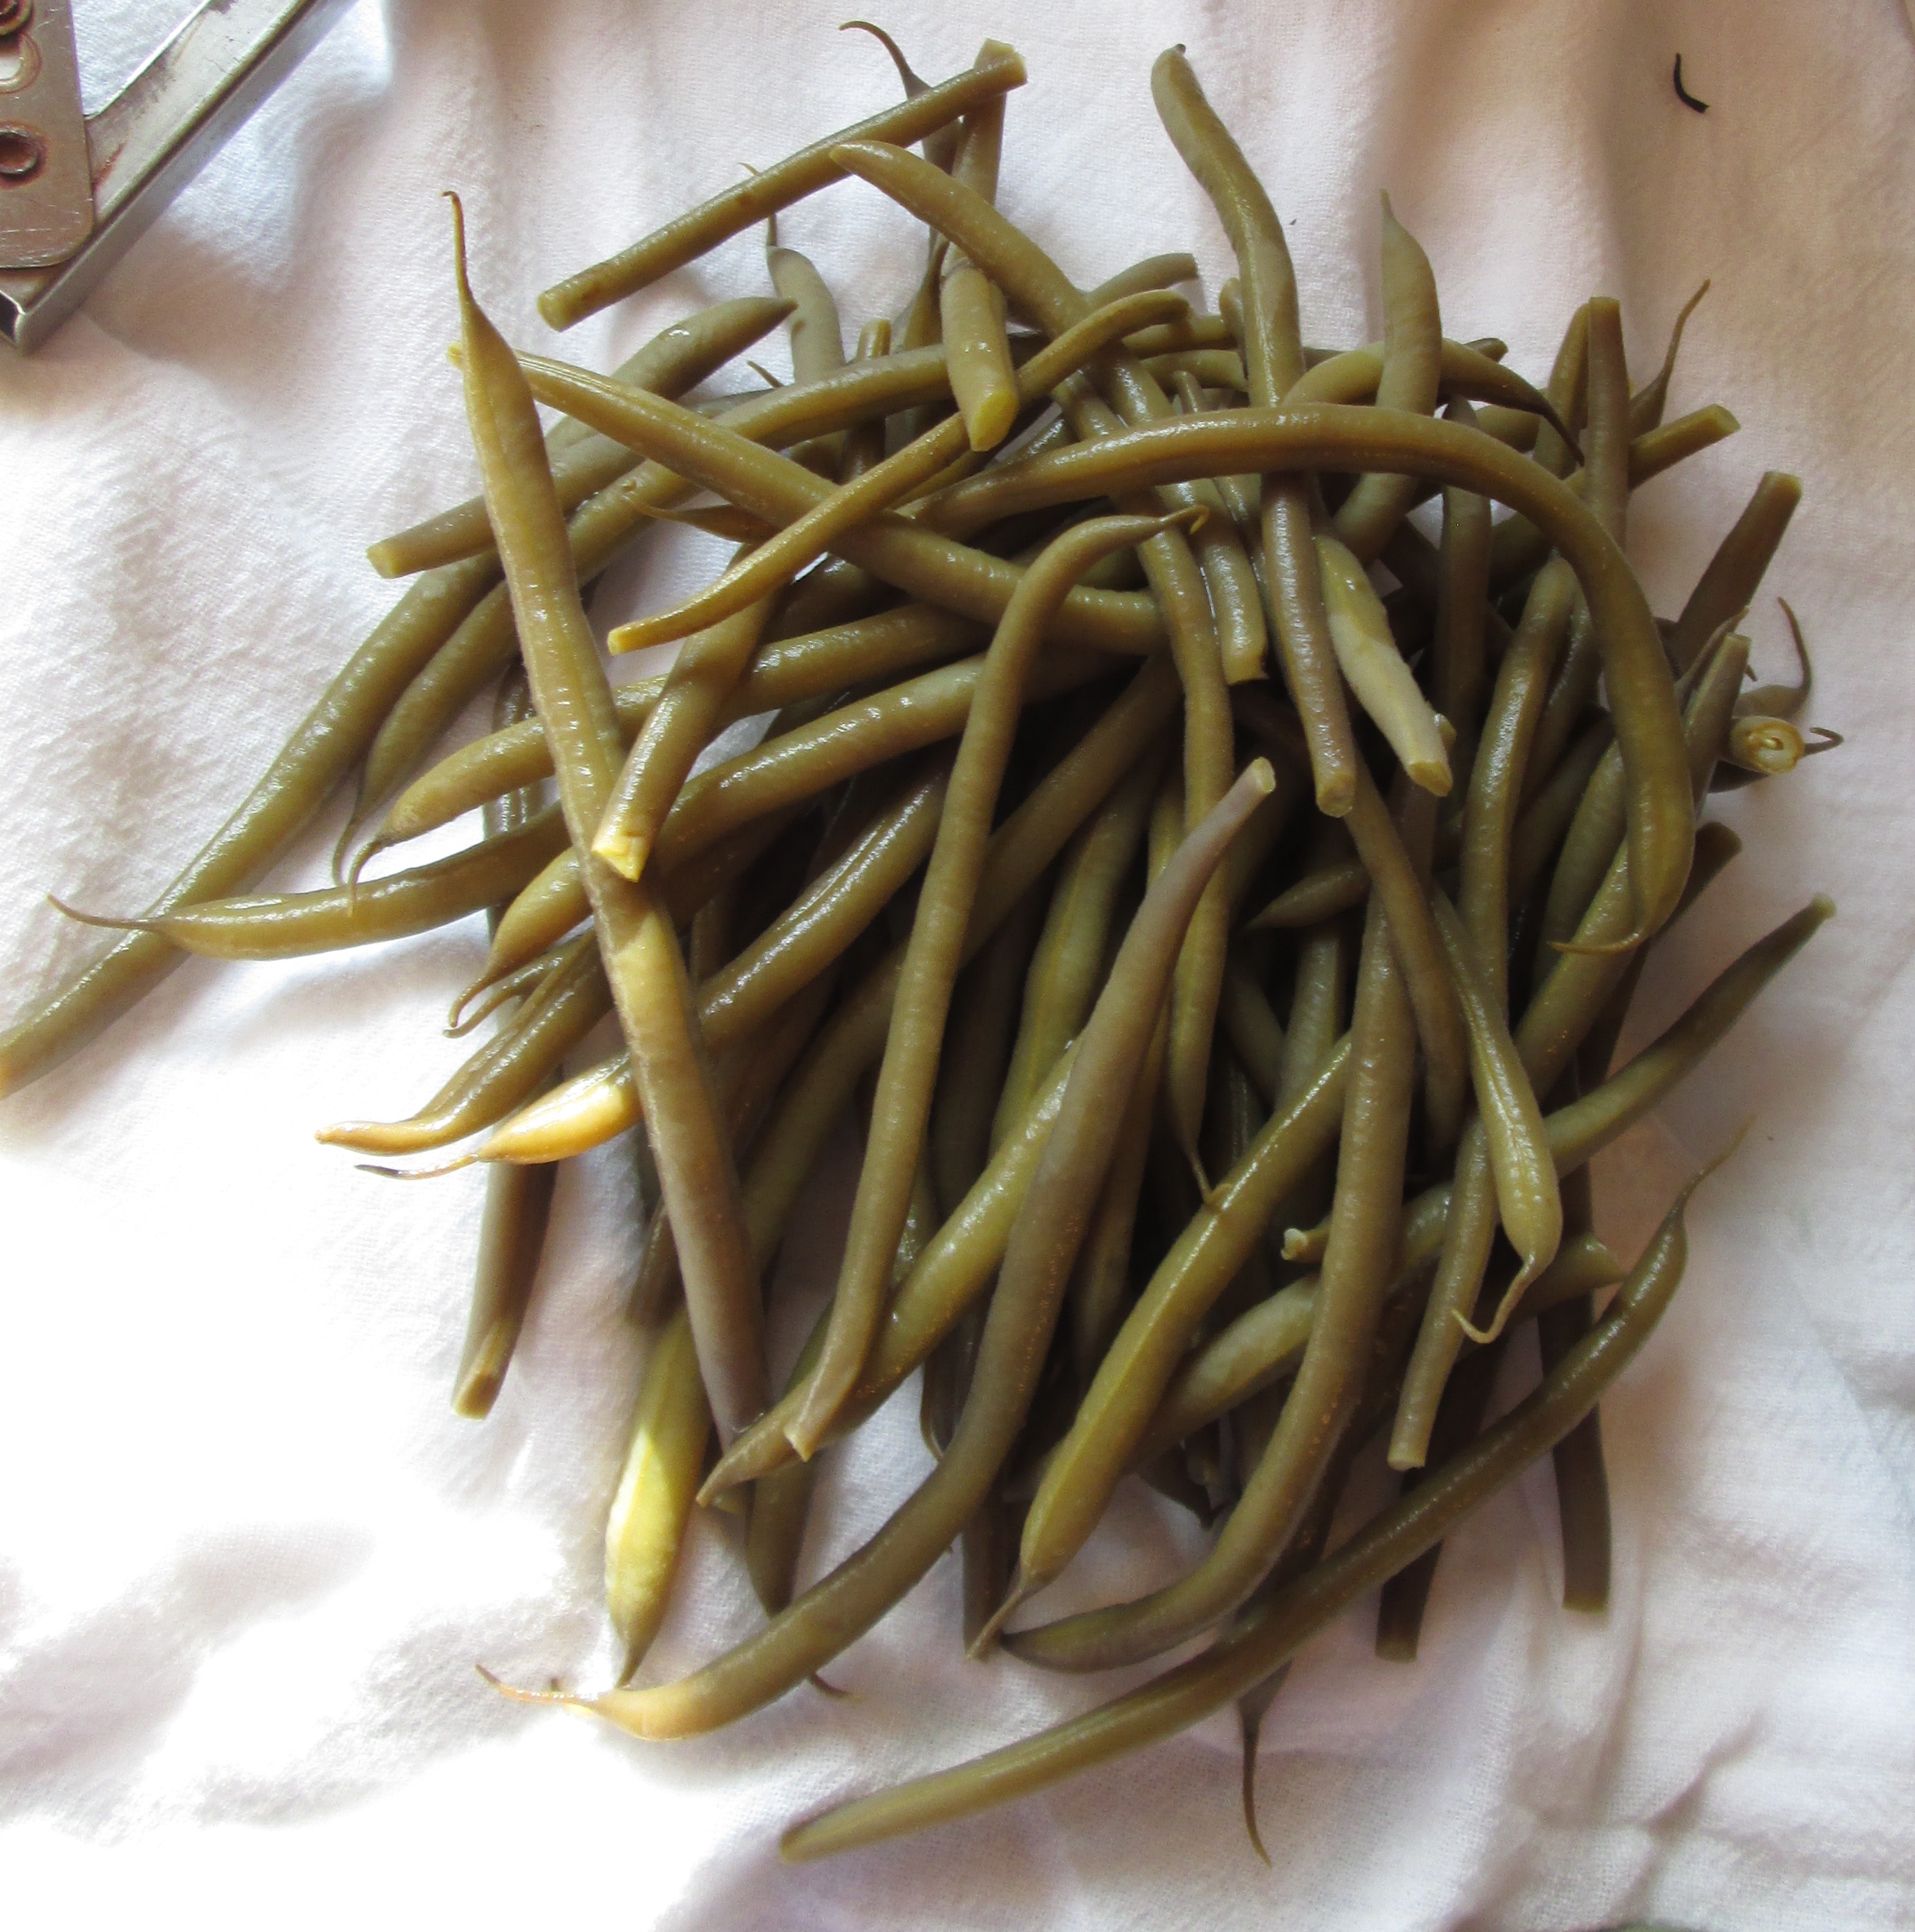
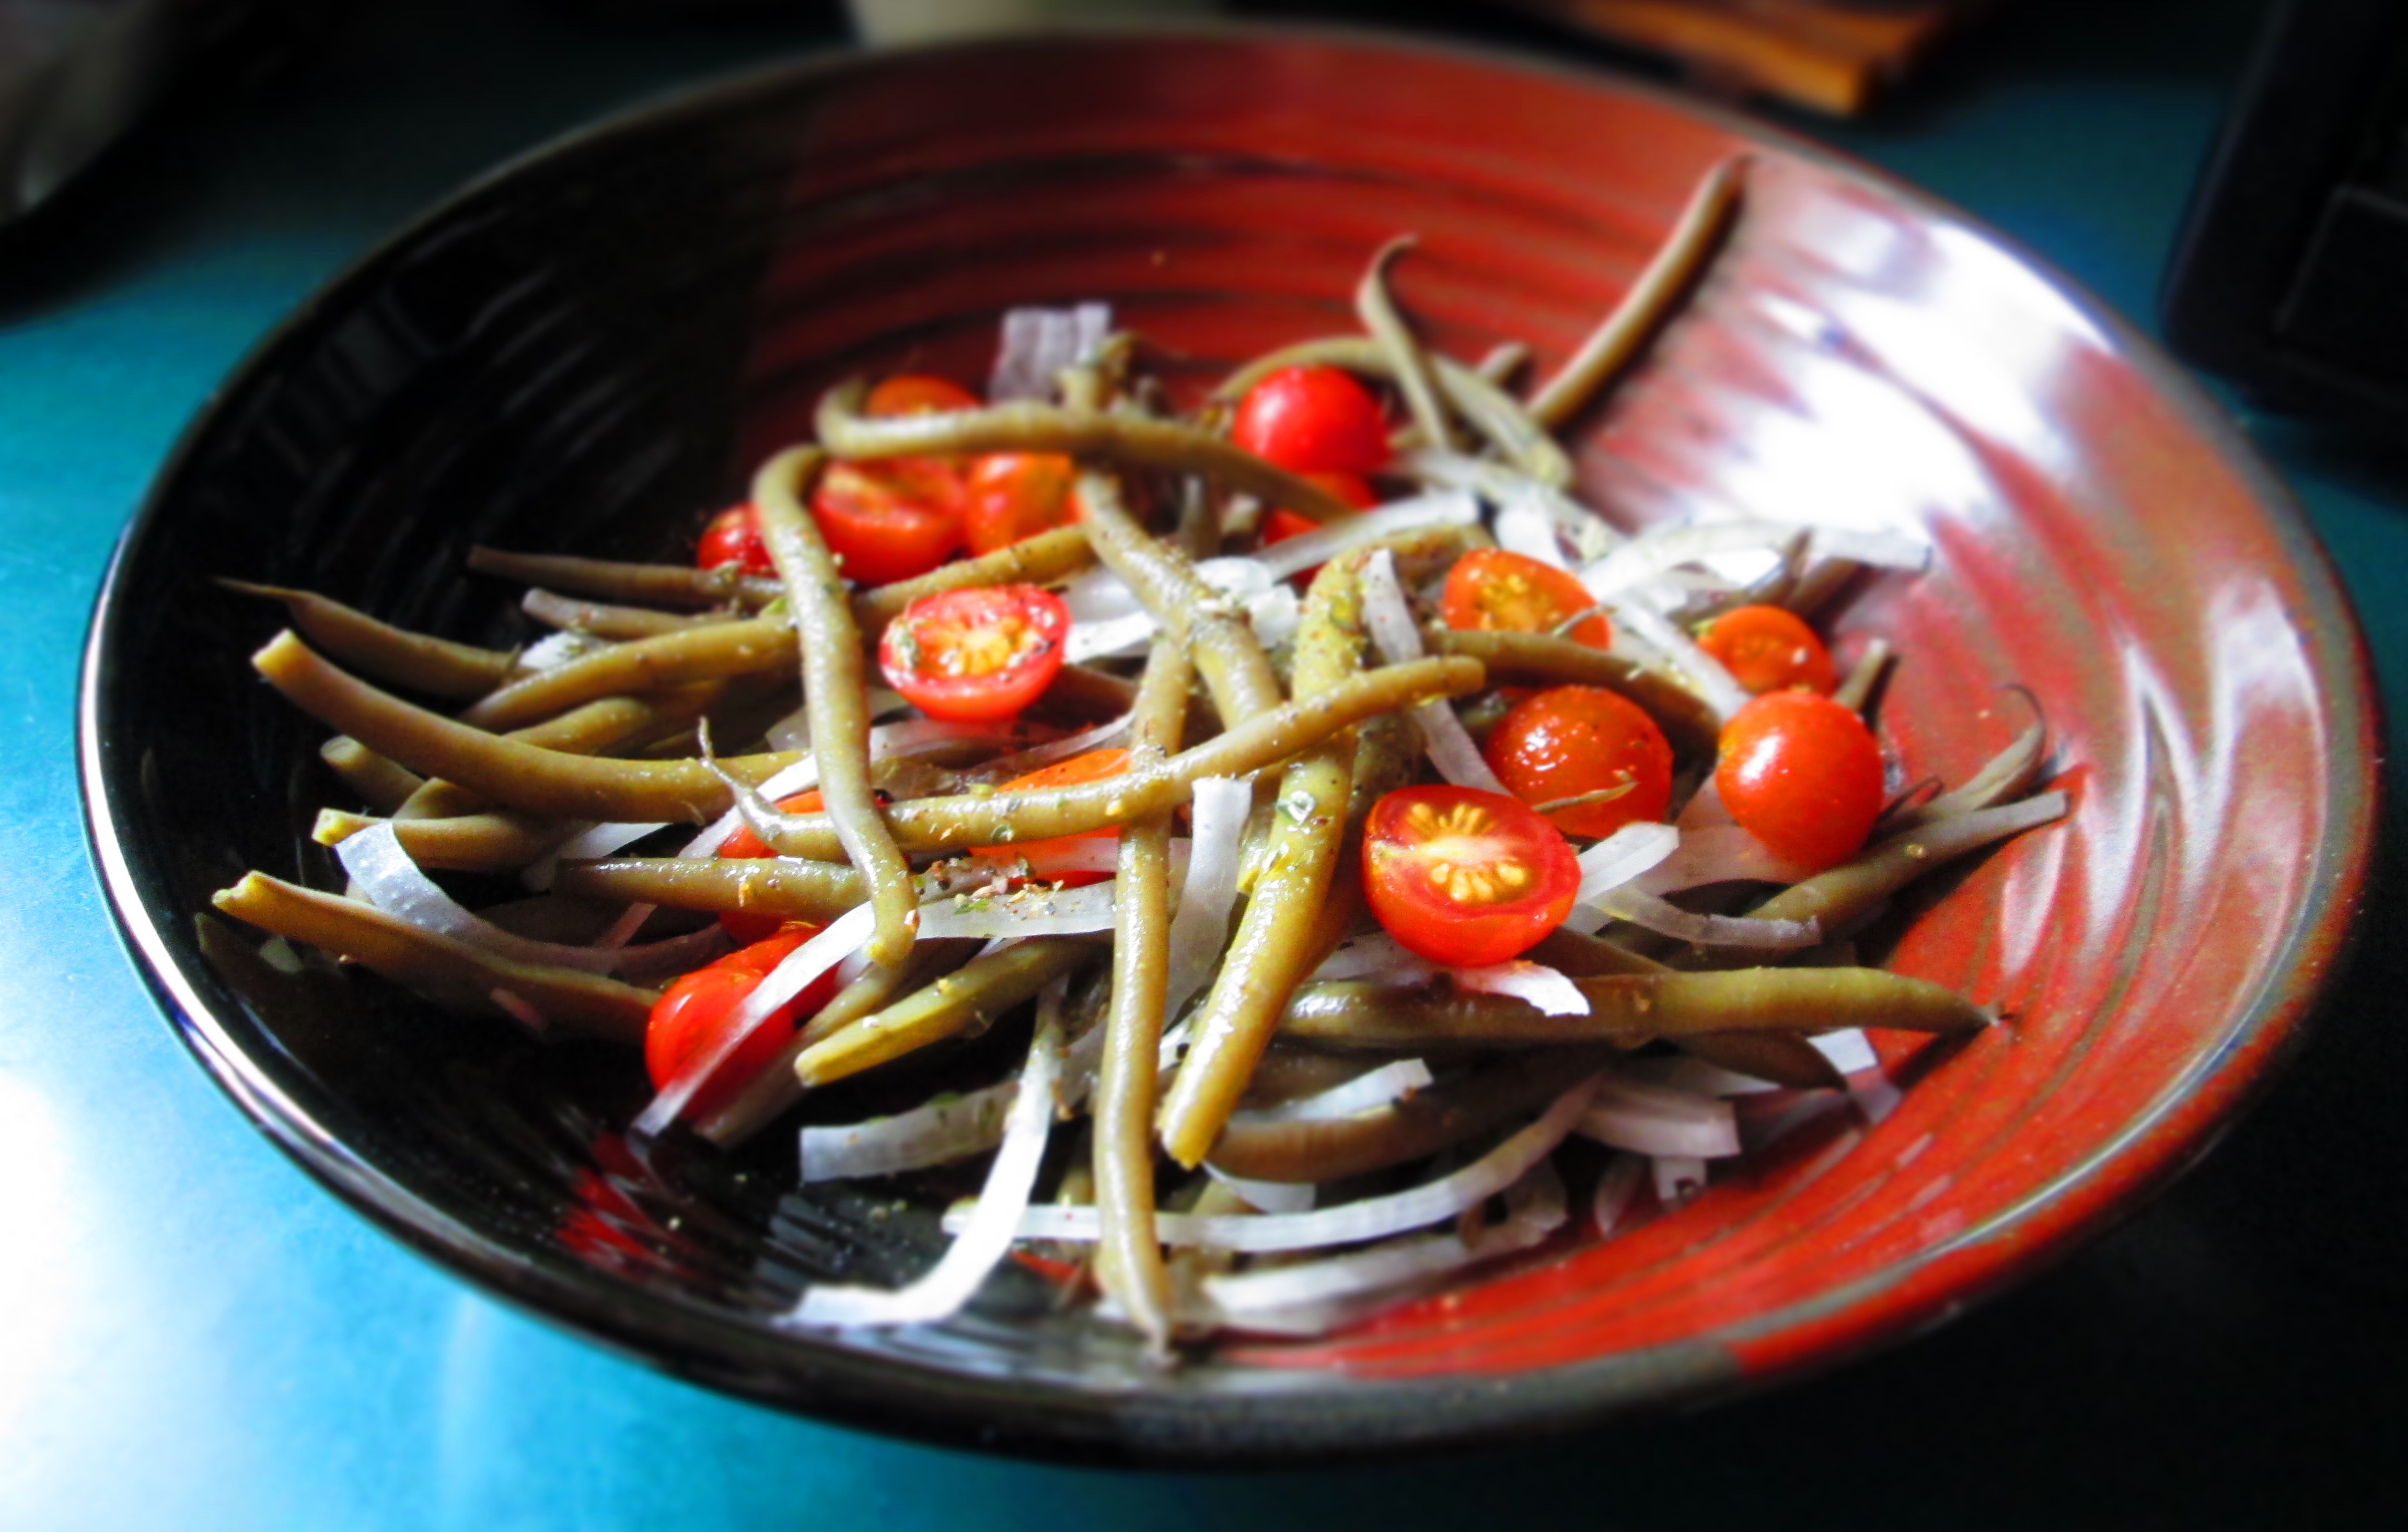
At any rate, these friends were going away for a week and would not be able to use all the produce in their CSA box. They offered me a few items, including some beautiful purple haricot vert.
It was my brother’s birthday this past week and my mother wanted to cook him a special lunch with the whole family, and I thought it would be a nice to bring a fresh green bean salad, using the purple haricot vert. This salad is simple and fresh and you can appreciate the grassy notes of the beans. Note that purple beans will, sadly, turn green once cooked. It’s such a shame that they can’t retain their dazzling color. The vinegar will at least keep it a vibrant green.
Haricot Vert Salad
1 lb. purple haricot vert (or other fresh green beans)
1 teaspoon apple cider vinegar
½ small white onion, thinly sliced
½ pint cherry tomatoes, halved
1 teaspoon dried oregano
½ teaspoon sea salt
Freshly ground pepper
2 tablespoons extra virgin olive oil
Bring a medium saucepan of water to a boil; add the beans and vinegar. Return to a boil, then lower the heat and simmer until tender but still firm. Drain and run under cold water. Drain well and place in a serving bowl.
Add remaining ingredients and gently stir. Taste and adjust seasonings, if needed.
I love avocados. They’re so rich, buttery, and delicious, yet healthy. There are so few things in life that can’t be said to be decadent and heart-healthy at the same time. This is one of them.
Avocados—technically, fruits—are a good source of dietary fiber, potassium (more per weight than bananas), folate, B5, B6, and B9. One avocado contains more than one-third the daily value of vitamin C, and more than half the day’s requirements of vitamin K. People often avoid avocados because they think they’re high in fat. And they are. But the good kind of fat—monounsaturated, in the form of oleic acid, which reduces levels of bad cholesterol and lowers the risk of stroke and heart disease.
Avocados have been shown to reduce the risk of diabetes and, due to their phytochemicals, prevent cancer. Studies have also found that people who ate avocados were more likely to have a lower body weight, BMI (body mass index), and waist circumference. An average avocado contains around 4 grams of protein, more than most other fruits, and only .4 grams of sugar, less than most other fruits.
I didn’t have my first avocado until I was an adult. We didn’t eat avocados in our family—it simply wasn’t a typical Italian ingredient. I was probably in my 20s when I had my first taste. Initially, I didn’t care for them; I didn’t appreciate their butteriness. It felt to me like I was eating…well, a stick of butter. Then I was introduced to guacamole, and my world changed. Guacamole became the secret treasure I would seek out at parties. And if there wasn’t any, I was very disappointed and marked that party off as a failure. I then began to appreciate avocados on their own and in other dishes.
Avocados go well with so many other ingredients, including cabbage. I was inspired to create this recipe by a dinner I worked to fulfill a class requirement at The Natural Gourmet Institute. By using your hands to squeeze the ingredients together, the cabbage softens and it creates a tender, creamy slaw. You can put your own swerve on it by adding other ingredients, such as poppy seeds, chopped pickle, or shredded carrot.
Avocado Slaw Canapes
Makes 16.
1 large ripe Haas avocado, diced
4 cups shredded cabbage
1 tablespoon lime juice
1 1/2 tsp kosher salt
Freshly ground black pepper to taste
8 (6-inch) tortillas (corn or wheat)
Olive oil for brushing
2 medium plum tomatoes, diced small
1. Combine the avocado, cabbage, lime juice, salt, and pepper in a medium bowl. With your hands, squeeze the ingredients together until cabbage has softened and ingredients are well combined. Taste for seasoning and adjust to your taste.
2. Using a 3-inch biscuit cutter or drinking glass, cut out 2 circles from each tortilla. Brush the circles lightly with olive oil and brown them on both sides on a grill or in a frying pan.
3. Spoon a heaping tablespoon of the slaw onto each tortilla round and garnish with the tomato.

 I love it when leftovers come together so beautifully that they make a healthy, delicious meal. Yep, this is another one of my everything-in-the-refrigerator concoctions. And it turned out pretty damn good.
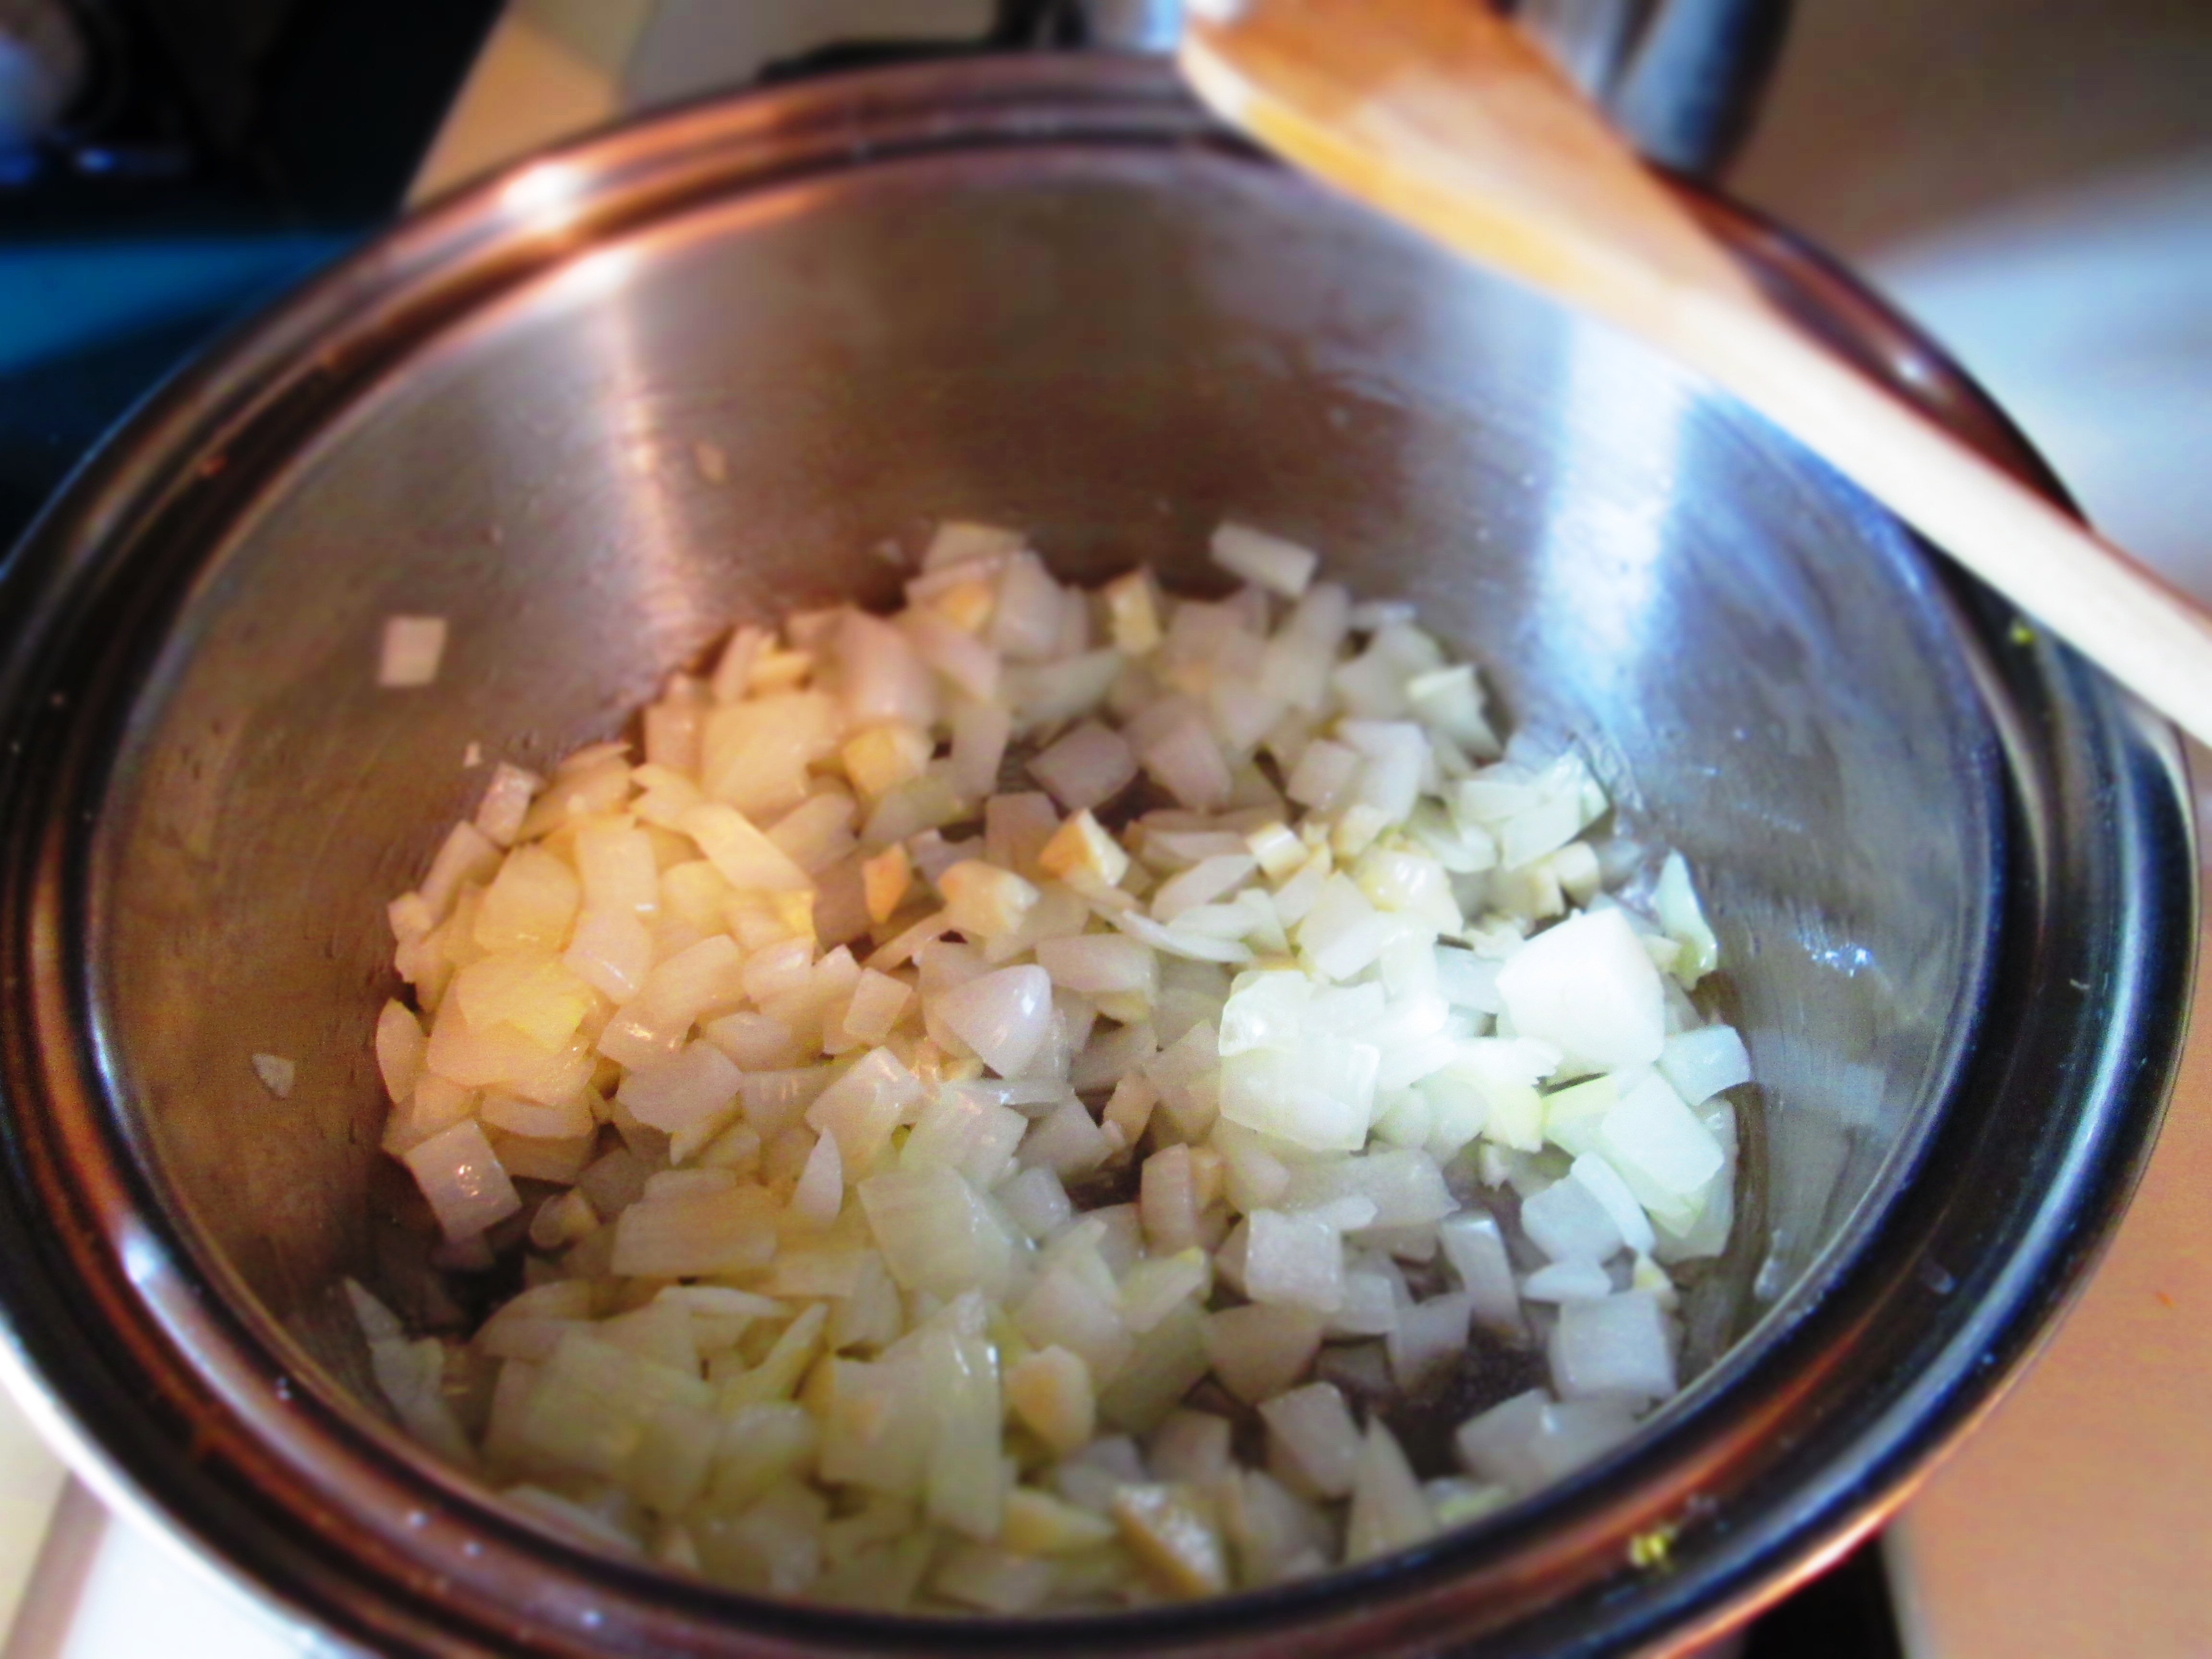


 them. I love beets and so happened to also have some red beets left over as well.
 Greenmarket), and I had a simple, flavorful, and attractive light summer dish. The herbs from my garden and a few olives topped it off.