Miz Chef

Cooking Up a Healthy Life


Leave a comment

Pear-Pignoli Salad with Cranberry Sauce Vinaigrette

Do you still have cranberry sauce left over after the holidays? I know some of you do. Admit it.  You’ll see lots of sites and professional chefs telling you that everything should be thrown out three days after the holiday. I have news for you—if you’ve stored it properly, that cranberry sauce is probably still good. The thing is, because of the sugar content, cranberry sauce has a long shelf life. It’s just like a jar of jam or preserves in your refrigerator. (Of course, if it smells or tastes funny, or if it has mold on it, throw it out.) For those of you who prefer the stuff that comes in cans (you can admit that, too, don’t be ashamed), you can use those up as well, so that they don’t sit in your pantry for another year.

There are many things you can do with leftover cranberry sauce. One way to use it up is to make a dressing with it, and I’ve done just that. I paired homemade cranberry sauce here with baby greens and Anjou pears. So that the cranberry doesn’t overwhelm the delicate ingredients, I strained the dressing.

So, why not start out with plain cranberry sauce (such as what comes in a can) instead of whole berry sauce, you ask. Because I think that whole berry sauce has so much more depth of flavor than flat cranberry sauce. Plus, chances are that if you have a significant amount left over, it’s probably the homemade kind, which is most likely going to be chunky.

You can adjust the recipe to any flavor profile you like. Enjoy!

Cranberry Sauce Vinaigrette

Makes ¾ cup dressing.

1 cup whole berry cranberry sauce
2 tablespoons balsamic vinegar
1 teaspoon stone-ground mustard
1 teaspoon sea salt
Freshly ground pepper to taste
3 tablespoons extra virgin olive oil

In a medium bowl, combine the cranberry sauce, balsamic vinegar, mustard, salt, pepper, and ¼ cup water. Drizzle in the oil and whisk together well. Using a rubber spatula, strain the dressing through a mesh strainer into another bowl. Taste for seasoning and adjust if you like.

Pear-Pignoli Salad with Cranberry Sauce Vinaigrette

Makes 4 servings.

2 Anjou pears (ripe but still firm)
6 oz. mixed baby greens
¼ cup pignoli (pine nuts), toasted
¼ cup Cranberry Sauce Vinaigrette
2 tablespoons black sesame seeds

Slice the pears about ¼ inch thick. You want them somewhat thin, but not so thin that they fall apart in the salad. Place them in a large bowl. Add the greens and pignoli and toss gently. Add the dressing and again toss gently. Transfer the salad to a serving platter and arrange neatly. Sprinkle the sesame seeds over the top.

Serve immediately.


2 Comments

Whole Wheat Pasta Salad with Kale & Creamy Avocado Dressing

Summer is finally here, and with the coming of sunshine and warm breezes comes the need for pasta salad. After all, you need something easy to bring to all those picnics, barbecues, and beach parties, right?

Pasta salad, however, need not be fattening or unhealthy. In fact, it can be quite the opposite. This pasta salad calls for whole wheat pasta, which already is healthier than regular pasta salad, but you can use gluten-free pasta as well. Rather than mayo or other fat-laden dressing, this one uses avocado. It makes the pasta creamy, rich, and loaded with nutrients (plus some good fat). Add raw kale to the mix and you’ve got a healthy, but delicious, alternative.

Kale can be tough, but squeezing kale with avocado softens the leaves. The salt in the dressing further breaks down the cell walls of the kale, helping it along its journey to tenderness.

This is an excellent start to the summer. Enjoy!

Whole Wheat Pasta Salad with Kale & Creamy Avocado Dressing

Makes 4 servings.

8 oz. cherry tomatoes, halved
2 teaspoons olive oil
2 cups whole wheat pasta
2 teaspoons table salt
2 Haas avocados
2 tablespoons lime juice
½ teaspoons sea salt
Freshly ground black pepper to taste
2 packed kale leaves, shredded*
2 tablespoons extra virgin olive oil
1 tablespoon balsamic vinegar
1 teaspoon red pepper flakes (optional)
¼ cup grated parmesan

Toss the tomatoes with the olive oil in a small bowl. Spread the tomatoes out on a small baking sheet lined with foil and roast until soft and charred, about 20 minutes.Bring a medium pot of water to a boil. Add the pasta and table salt and bring to a boil. Boil over medium-high heat, stirring frequently, until the pasta is al dente, about 8 to 12 minutes (depending on what pasta you choose). Drain and set it aside while you prepare the sauce.

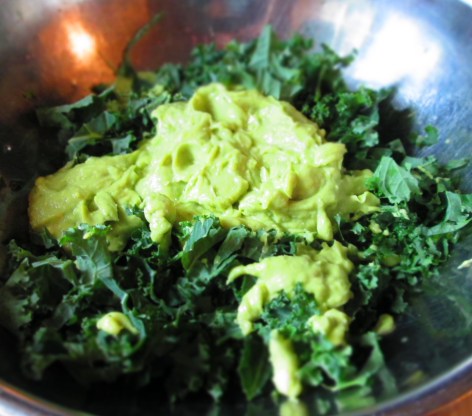
In a food processor, combine the meat from the avocados, lime juice, 1 tablespoon of the extra virgin olive oil, sea salt, and black pepper. Process until smooth.Place the kale in a medium bowl. Pour the avocado sauce over it and squeeze the kale with your hand until everything is well blended. Mix in the balsamic and red pepper flakes, if you’re using it.Add the cooked pasta and parmesan and mix well. Taste for seasoning and adjust it to your liking.Transfer the pasta to a serving bowl. Serve warm, at room temperature, or cold.

*To shred kale, first strip the leaves off the stems by lightly pinching the stem and running your fingers down the stem to the tip, pulling the leaves off along the way. Stack a few leaves and roll them up into a tight log. With a sharp knife, slice the kale thinly.


Leave a comment

Summer Tomato-Cucumber Salad

Well, for those of us in the Northern hemisphere, summer is coming to a close. Garden aficionados are gathering up the final crops of their summer vegetables and herbs, and are preparing their autumn and winter larders.

But there’s still time to enjoy some summer savory dishes. Pick some tomatoes and snap off a cucumber (or get them at the farmers’ market) to make this simple, yet savory, classic dish. Plan one last picnic or barbecue, soak in the warm sun while it lasts, and serve this to hold you over until next year. Pretty soon, it will be time for pumpkins, fireplaces, and warm fleece blankets. And that’s a different kind of joy.

Summer Tomato-Cucumber Salad

1 cup cherry or pear tomatoes, halved
½ medium cucumber, sliced
2 tablespoons extra virgin olive oil
¼ teaspoon sea salt
Freshly ground black pepper to taste
Few leaves fresh basil

Place all the ingredients in a medium bowl. Mix well. Taste for seasoning and adjust, if necessary.

Serve at room temperature. You can make this a few hours ahead of time. Keep it stored  tightly sealed in the refrigerator.


Leave a comment

Wax Bean and Purple Potato Salad

One of the dishes that I remember my mother always making is a cold potato and green bean salad. I considered it such a standard of my mother’s repertoire that I included it in my cookbook, Vegetarian Italian: Traditions. (That book, by the way, is now out of print, but those recipes, including the one below, are available in individual ebooks. This recipe appears in the volume called “Antipasti.”)Anyway, at the farmers’ market, I found one of my favorite things, purple potatoes. I bought some, not really knowing what I was going to do with them. Then, as I moved on down the stalls, I found wax beans, the yellow variety of green beans. I didn’t know what I was going to do with those either, but they were so beautiful, I bought a small bagful.Then I found chocolate tomatoes, which I can never resist (I’m not sure if it’s their color that draws me, or because they’re called “chocolate”). It then hit me what I was going to do with these ingredients—I would combine them to make what I consider to be a classic dish. I got a red onion, and I had the typical, and yet different, ingredients for this salad. You can most certainly make this dish with standard potatoes, ordinary red tomatoes, and average, everyday green beans, and it will be delicious. But using variations on these ingredients, such as the ones I suggest below, will give the dish just a little pop for a fun party or barbecue dish.

Enjoy!

Wax Bean and Purple Potato Salad

2 lbs. purple potatoes
1 lb. wax beans, trimmed
1½ lbs. tomatoes
½ medium red onion, thinly sliced
¼ cup extra virgin olive oil
2 teaspoons kosher salt
Freshly ground pepper to taste
½ cup olives (such as Kalamata, black cured, or Gaeta

Cut the potatoes as necessary so that the pieces are roughly the same size.Place them in a medium pot and cover them with water. Bring to a boil; lower the heat and simmer until tender, about 10 to 12 minutes (but start checking them earlier). Drain them in a colander and set aside to cool. When they’re cool enough to handle, peel and place them in a large bowl.Meanwhile, place the beans in a medium pot and cover with water. Bring to a boil; lower the heat and simmer until tender, about 8 to 10 minutes.Combine the potatoes with the beans, tomatoes, onion, oil, salt, and pepper. Mix gently. Add the olives and mix again. Taste for seasoning and adjust if needed. If it seems dry, add a little more olive oil. Transfer the salad to a serving bowl and serve.


Leave a comment

Pear, Walnut and Abondance Salad

Last week, I mentioned that the great people at the French Cheese Board were kind enough to get me some cheese samples. I created a recipes with one of my new favorite cheeses, Mimolette. That recipe was Caramelized Onion Rings with Chipotle Cream and Mimolette. This week, I’m featuring Abondance cheese.

Abondance is a semi-hard, unpasteurized cow’s milk cheese. It has a creamy texture, similar to Swiss cheese, and has a natural rind that tends to have a granular residue (it kind of looks like sawdust). It’s quite fragrant and has a nutty, buttery flavor. Although it’s yielding, it hold up well in this pear-walnut salad, where it blends beautifully with the nuts and fruits.

Pear, Walnut and Abondance Salad

2 Bartlett or Anjou pears, ripe but still firm
1 lemon
¼ cup extra virgin olive oil
1 tablespoon honey
1 tablespoon Dijon mustard
1 tablespoon balsamic vinegar
Pinch sea salt
Freshly ground white pepper
1 cup walnuts, toasted and coarsely chopped
¼ cup dried cranberries
8 oz. Abondance cheese, cubed

Slice or cube the pears, depending on how you want your presentation to be. Place them in a bowl and spritz lemon over them and toss gently. (This is to keep them from browning.)In a medium bowl, combine the oil, honey, balsamic, salt, and pepper. Whisk until well blended.Add the pears, walnuts, and cranberries to the dressing and toss gently.Add the cheese and stir again.Arrange on a platter, if that’s how you’re serving it. Otherwise, transfer to a clean bowl. Serve.

Save

Save

Save


Leave a comment

Sprouted Quinoa with Roasted Vegetables and Roasted Garlic Dressing

I love cooking with quinoa. It’s not only one of the most nutritious grains—a so-called “superfood”—it’s also deliciously nutty and the texture is slightly crunchy, even while it’s tender.

If you’re already cooking with quinoa, and other nutritious grains, such as amaranth and millet, you’re doing a good deed for your body. Quinoa is one of the only grains that has protein and, of course, it’s gluten free. But if you want to take your healthy ways a step further you might want to incorporate sprouted grains into your diet. You may or may not have heard about sprouted grains, but they are now available as uncooked grains, in dried pastas, and breads, as well as other products.

So what’s the deal with sprouted grains?

Grains contain phytic acid, which is also referred to as an “antinutrient” because of its tendency to block absorption of certain minerals. Phytic acid binds to such nutrients as calcium, magnesium, iron, copper, and zinc. So, while quinoa is a good source of these nutrients, the phytic acid can block them from being aborbed into your system.

Sprouting neutralizes phytic acids, as well as enzyme inhibitors, making the grains’ nutrients more bioavailable. Essential amino acids, such as lysine, also get blocked. Quinoa is one of the few grains on earth that contains lysine, so sprouting quinoa, in particular, is advantageous. Plus, germination produces vitamin C and increases the grain’s (or bean’s or seed’s) B vitamins. Sprouted quinoa looks and tastes just like regular quinoa, except with the added benefits.

You can find packages of sprouted quinoa in health food stores, but considering how much standard supermarkets’ shelves have expanded to include products for health-conscious consumers, who knows, you might be able to find sprouted quinoa in your neighborhood supermarket—if not now, then in the near future.

Sprouted Quinoa with Roasted Vegetables and Roasted Garlic Dressing

Makes 6 servings.

1½ cups diced eggplant
3 cups diced zucchini
¼ cup + 1 teaspoon olive oil
1 teaspoon + a pinch kosher salt
Freshly ground black pepper
3 large plum tomatoes
4 garlic cloves, skin on
1 cup sprouted quinoa
¼ cup extra virgin olive oil
2 teaspoons Dijon mustard
1 teaspoon sherry vinegar
¼ teaspoon sea salt

¼ cup chopped Italian parsley

Preheat the oven to 350 degrees F. Grease a large baking sheet, or line it with foil or parchment paper. Do the same with a small baking sheet.

Combine the eggplant and zucchini in a bowl. Pour in 3 tablespoons olive oil, 1 teaspoon kosher salt, grind in some black pepper, and toss to coat. Spread the vegetables out on the large baking sheet. (You can line the sheet with aluminum foil or parchment, if you like.)Roast, stirring occasionally, until tender and browned, about 20 to 30 minutes.Cut the tomatoes in half and removed the seeds. Dice the tomatoes and place in a medium bowl. Toss with 1 tablespoon oil and a pinch of kosher salt. Lay the tomatoes out on the small baking sheet and roast, stirring occasionally until tender and browned, about 30 minutes.Place the garlic cloves on a piece of aluminum foil. Pour 1 teaspoon olive oil on them, and wrap the foil. Place on a small baking sheet (you can place the packet on one of the baking sheets the other vegetables are on).Roast until soft, about 20 minutes.While the vegetables are roasting, combine the quinoa with 2 cups water and a pinch of salt in a small saucepan. Bring to a boil; lower the heat to medium-low and simmer, half covered, until the water is absorbed, about 10 to 15 minutes. Remove from the heat and let sit for 5 minutes. Fluff with a fork.Unwrap the garlic. When it’s cool enough to handle, squeeze the garlic out of the skin into a small bowl. Add the extra virgin olive oil, mustard, vinegar, and sea salt. Whisk until well blended.

In a large bowl, combine the eggplant, zucchini, tomatoes, and quinoa. Add the dressing and mix well. Mix in the parsley. Taste for seasoning and adjust if needed.

Save

Save

Save

Save


4 Comments

Red and Gold Beet Salad


beet saladLove, love, love beets. There are different varieties, but I think it’s safe to say that the majority of us find the red most often. Getting the golden, pink, rainbow, or any other kind of beets, for me, requires a special trip to a farmers’ market or specialty store.

Well, this past week, I lucked out. The farmers’ market that sets up shop outside of my workplace once a week had golden beets, which is not always the case.beets

Anyway, in my opinion, the best thing to do with beets is make a salad with them. It’s the easiest thing in the world and so flavorful. And when you mix beets, it’s beautiful, too.

But if you can only find the red beets, it’s just as delicious. I like to roast beets, but in the summer, turning on the oven is not fun, so I boil them. (If you have a grill you can use, then that’s even better!). There’s nothing wrong with boiling, just don’t overcook them and use only just enough water to cover them in the pot. Enjoy!

Red and Gold Beet Salad

1½ pounds red and yellow beets
½ small red onion, thinly sliced
3 tablespoons extra virgin olive oil
1 teaspoon balsamic vinegar
½ teaspoon sea salt
Freshly ground pepper to taste

Wash and trim the beets of excess roots or threads. Place in a medium-large pot and fill with enough water to cover the beets. Bring to a boil; lower the heat to medium-low and simmer, partially covered, until the beets are cooked. You should be able to stick the tip of a knife easily all the way through.

Remove beets from the water and let them cool. Peel off the skin and trim off unappealing parts (such as near the roots). Cut them into quarters or bite-sized pieces. Place in a medium bowl. Add the remaining ingredients and stir gently. Serve.
beet salad

Save

Save


Leave a comment

Picnic Posole Salad

posole text

I’ve been making posole salad for picnics, parties, and barbecues years. I think people enjoy it because it’s both something different from the usual fare, while offering something familiar and not too “out there.”

hominy

Dried hominy

So what is posole (or pozole)? Not everyone outside of the Latin community is familiar with posole. Posole means “hominy” (from the Nahuatl word pozolle), and actually refers to a stew, popular in Mexico and made with hominy and pork or chicken. But it is sometimes also used (loosely and unofficially) to refer to the hominy itself, which is properly called mote. Corn, in general, is known as maize.

Mote is maize that has had its hulls removed through a process known as nixtamalization. This involves boiling the kernels in a water-and-lime (or ash) solution. The resulting product is used in many traditional dishes throughout Latin America, the most commonly known being posole stew, a dish that goes back to the pre-Colombian Aztecs. Continue reading


4 Comments

Chilean Tomato and Sweet Onion Salad

IMG_3119

One of the best things about summer is all the beautiful, luscious tomatoes that become available. So this is the season for tomato salads. It’s almost not even worth it to make tomato salad any other time of the year.

This is a simple Chilean version, which gets a bit of a kick from minced Serrano or jalapeno pepper. But if you like, you can omit it. Choose any tomatoes you like—there are so many options this time of year! Heirloom varieties make a stunning salad, but good old beefsteak tomatoes do better than fine. Continue reading


Leave a comment

Oat Noodle Salad with Umeboshi Plum Dressing

IMG_6054

Yes, I’m still on a noodle kick. This time I’ve created a recipe using oat flour noodles. The nice thing about gluten-free noodles is that they’re lighter than wheat noodles, but like wheat noodles, they can be used in a variety of ways.IMG_6043

For some reason, these noodles are sold in packages with the odd weight of 13.4 ounces. I don’t know how or why they came up with that number, but it makes it awkward to create a recipe. (They probably started with 380 grams and it just happens to convert to 13.4 ounces, but why 380?) Well, I used approximately 10 ounces, which is three of the bundles that come in the package in the photo.

In this recipe, I’ve paired oat noodles with string beans and Japanese yams (although, if you can’t find Japanese yams, you can use sweet potatoes). The noodles and yams will soak up the dressing very efficiently, so if the salad is too dry for your tastes, you can add a little more olive oil, but the salad will not be oily in the slightest.

Ume Plum

Ume Plum

For the dressing, I used an umeboshi plum. Umbeboshi plums, a Japanese specialty, are ume plums (but more closely related to apricots) that have been salted and fermented. In the world of natural healing, umeboshi plums are considered miracle workers. If you divide foods into acidic, alkaline, and neutral, umeboshis are alkaline and can adjust imbalances in your body. It’s been used in Asia, particularly, Japan, China, and Korea, for centuries for a variety of ailments, including fatigue, nausea, diarrhea, colds, indigestion, headaches, and hangovers, among other things. Samurai soldiers were given umboshi as part of their field rations. They not used the plums to help them battle fatigue, they also used them to flavor foods such as rice and vegetables. Umeboshis also acted as a water and food purifier. Continue reading