Miz Chef

Cooking Up a Healthy Life


Leave a comment

Zimino di Ceci

Liguria

Hello. This week for my Regions of Italy project, based on La Cucina—The Regional Cooking of Italy by Accademia Italiana della Cucina (The Italian Academy of Cuisine), I’m in Liguria. Liguria sits in a crescent along the Mediterranean coastline on the west side of Italy.

My first recipe for this region is Zimino di Ceci, or Chickpea Stew. This is a pretty easy recipe, and quick, if you don’t count the overnight soaking time. The ingredients list calls for a few items that require prep (although minimal) before using them in the recipe. So I’ve moved the prep instructions for these items to the recipe itself. The other thing I did was to add the mushroom soaking liquid to the stew, which gave it a nice depth of flavor.

Enjoy.

Zimino di Ceci

Chickpea Stew

Makes 4-6 servings.

1½ cups dried chickpeas, soaked overnight*
½ teaspoon sea salt, plus extra
1 ounce dried porcini mushrooms
3 or 4 ripe plum tomatoes
2 tablespoons extra virgin olive oil

1 medium onion, finely chopped
1 celery rib, chopped
1 garlic clove, minced
¾ pound Swiss chard, chopped
Toasted bread (optional)

Drain the chickpeas and rinse them. Place them in a large pot and cover them with fresh water by about 3 inches. Add ¼ teaspoon salt and bring to a boil; lower the heat to medium-low and simmer, partially covered, until they’re tender, about 2 to 2 ½ hours.

Meanwhile, soak the mushrooms in water for about 15 minutes. Drain them and pat them dry with paper towels or a kitchen towel. Chop and set them aside.Bring a pot large enough to fit the tomatoes and fill with water. Cut an “x” into the top of the tomatoes and place them in the water for about 10 to 15 seconds (until you see the skin splitting apart). Scoop them out and let them cool. When they’re cool enough to handle, peel off the skin, remove the seeds, and chop them. Set them aside.Drain the chickpeas in a colander set over a bowl and reserve the liquid.Wipe out the pot. Add the oil and heat. Add the onion, celery, garlic, and mushrooms (reserve the liquid), and ¼ teaspoon salt. Sauté until onions and celery are soft, about 5 minutes. 
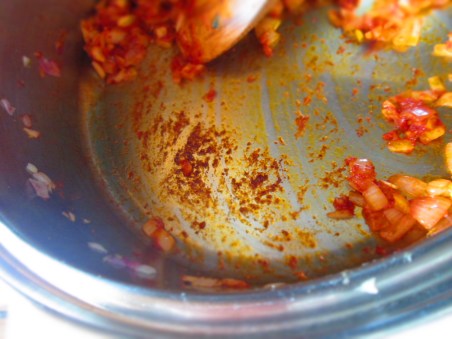
Stir in the tomatoes (and any liquid they gave off). Then add the chard. Cook 2 minutes.Add the chickpeas and cook 10 minutes. Add 1 cup of the reserved chickpea liquid. Carefully pour in the reserved mushroom liquid, making sure to leave any sediment in the bowl. Cook another 5 minutes. If you want it more brothy, add more of the chickpea liquid until it reaches the consistency you like. Taste for seasoning and adjust, if needed.Serve with toasted bread, if desired.

*Place the chickpeas in a bowl and cover them with water by about 3 inches. Cover the bowl and refrigerate for 24 hours.


Advertisement


Leave a comment

Minestra di Zucca

Fruili-Venezia Giulia

Welcome back to my Regions of Italy project, based on La Cucina—The Regional Cooking of Italy by Accademia Italiana della Cucina (The Italian Academy of Cuisine). This week’s recipe moves us into Fruili-Venezia Giulia, which is in the most northeastern corner of Italy. It borders Austria and Slovenia and it’s cuisine is influenced by those cultures. It uses a lot of root vegetables and hearty grains. The first recipe from the region I offer is a very simple one: butternut squash soup.

You’ve had butternut squash soup before, right? So have I. It’s a pretty common dish. There’s something a little different about this one, though. After the squash is cooked, a cup of ricotta is stirred in, creating a unique soup. The recipe is straight-forward and I don’t have too much to say about it, except for one thing. The original recipe instructs to “squeeze dry” the squash. I don’t know what they mean by this, but I put the squash in a sieve and pressed on it with a wooden spoon to release excess water. I further tweaked the instructions for clarity, and I thought the soup needed salt (not given in the original recipe). Other than that, it’s all pretty easy. Give it a try. Enjoy.

Minestra di Zucca

Squash Soup

Makes 6 servings.

1 butternut squash, peeled, seeded, and cut into chunks
½ teaspoon kosher salt, plus more to taste
1 tablespoon olive oil
1 tablespoon butter
2 tablespoon all-purpose flour
1 large garlic clove, minced
1 cup ricotta
1 tablespoon grated Parmigiano-Reggiano
Pinch ground cinnamon
Freshly ground black pepper to taste

Place the squash in a pot large enough to hold it all and cover with water. Add ½ teaspoon salt. Bring to a boil; lower the heat to medium-low and simmer until the squash is tender, about 8 to 10 minutes. Drain the squash into a sieve set over a bowl to catch the water. Press the squash to release as much liquid as possible. Reserve the cooking water.Return the pot to the heat. Combine the oil and butter, and heat until the butter has melted. Add the garlic, then whisk in the flour.Add the squash and mash it with a potato masher or a stick blender. Stir in the ricotta, Parmigiano-Reggiano, cinnamon, pepper, and salt. Stir in some of the reserved cooking water until it reaches a consistency to your liking. Taste for seasoning and adjust if necessary.


Leave a comment

Pesche Ripiene–Stuffed Peaches

09

Emilia Romagna

Hello again. Welcome back to my Regions Italy project, based on La Cucina—The Regional Cooking of Italy by Accademia Italiana della Cucina (The Italian Academy of Cuisine). This week on our journey, we stop in Emilia-Romagna, in northern Italy. The capital of Emilia-Romagna is the well-known city of Bologna, but it’s also home to Modena, which is best known as the place of origin of balsamic vinegar. The recipe I have for you today come, in fact, from that city of black gold (balsamic, that is).

The technical aspects of this recipe weren’t too bad, but there were a couple of points that made me scratch my head. The first thing was the bread. The original recipe called for the “bread of 1 roll soaked in milk and squeezed dry.” What kind of roll? How big? Crust included or just the crumb? How much milk? My conclusions are in the recipe below.

The second thing was in the instructions where it said to whip the egg whites and fold it into the mixture. Well, whip them to what stage? Soft peaks? Stiff peaks? Just until thickened? In the end, I went with soft peaks.

The headnote on this recipe says that in place of the almonds, you can use finely crushed amaretti, which are Italian almond cookies. I haven’t tried this alternative yet, but I’ll bet it’s even better than the original.

Pesche Ripiene

Stuffed Peaches

1 hero roll
½ cup milk
1 tablespoon unsalted butter
8 large ripe peaches
3 large eggs, separated
1 cup sugar
1 cup blanched almonds, finely ground, or 1¼ cup almond flour
Confectioners’ sugar

Remove the crumb from the hero and place it in a bowl. Pour the milk over it and let it soak about 5 minutes.(I used the crust as well, but only because it was really soft.)Place the bread in a mesh strainer and press it with a wooden spoon or rubber spatula and squeeze out as much milk as possible.Preheat the oven to 300 degrees F. Grease a large baking sheet or casserole with the butter.

Cut the peaches in half and remove the pits. Scoop out as much of the flesh as you can, leaving a thin layer, so that you get a shell. Depending on how ripe your peaches are, this may be more or less difficult. If the peaches are very ripe and mushy and you can easily scoop it out with a spoon, then just put the pulp in a bowl. If you have to use a paring knife and the flesh is still solid, place the flesh in a food processor or blender (a mini would be perfect here!). Process until it’s mostly pureed, then transfer it to a bowl.Whisk the egg yolks with the sugar until pale and thick, about 3 to 4 minutes. Add this to the peach pulp. Add the drained bread and almond flour. Mix well.Whip the egg whites until soft peaks form, about 4 to 5 minutes. Fold it into the peach mixture.Fill each peach shell with the filling and place them on the baking sheet. Bake until peaches are tender and filling is somewhat firm, about 30 to 45 minutes.

Let them cool slightly. Dust them with confectioners’ sugar and serve warm.


Leave a comment

Red Bean-Vegetable Chili

There are so many ways to make a vegetarian chili. Some people, of course, will argue and say that unless there’s meat in it, it can’t be chili, that it’s just a vegetable stew. Whatever. If it tastes like chili, then it’s chili. Or call it vegetable stew. It doesn’t really matter, as long as it tastes good. And this dish does.

It’s also another example of what can be done when you have a little of this and a little of that left over in your fridge and pantry. But trust me, this is worth going out and buying the ingredients for.

Enjoy! Continue reading


Leave a comment

Cannellini Ragout

Italian cuisine is known as rustic, hearty fare, but even its finer dishes tend to be comforting and satisfying. This recipe is a perfect example. It’s got the filling protein of creamy cannellini beans and the fresh tartness of tomatoes, but just a bit of wine gives it complexity and elevates it to an elegant dinner option. But it’s also perfect for everyday meals. A piece of toast made with rustic bread makes it a filling, flavor-filled lunch or dinner.

Enjoy!

Cannellini Ragout

Makes 4 servings.

3 tablespoons olive oil
1 large Spanish onion, finely chopped
4 large garlic cloves, minced
1 medium red, yellow, or orange bell pepper, finely chopped
2 teaspoons tomato paste
¼ cup white wine or vegetable broth
4 cups cooked cannellini (fresh cooked or canned, rinsed and drained)
Kosher salt
Freshly ground black pepper to taste
3 cups vegetable broth
1 cup chopped plum tomatoes or halved cherry tomatoes
¼ cup finely chopped fresh Italian parsley
4 slices rustic bread, toasted
¼ grated Parmigiano-Reggiano
2 tablespoons extra virgin olive oil

Heat the oil in a medium Dutch oven or saucepot. Add the onion and sauté over medium-high heat until they’ve softened, about 5 minutes. Add the garlic and sauté another minute. Add the bell peppers and continue sautéing until the peppers are soft, about 6 to 8 minutes.

Stir in the tomato paste. Stir until it’s well blended. Pour in the wine or broth and stir it in, scraping up the browned bits from the bottom of the pan.

Add the beans, salt, pepper, and the broth. Bring to a boil. Lower the heat to medium-low and let it simmer until the mixture has thickened, about 5 minutes. Add the tomatoes and cook another 3 to 4 minutes to soften them. Stir in the parsley and remove from the heat. Taste for seasoning and adjust if necessary.

Place a piece of toast in the bottom of each serving bowl. Place equal amounts of the beans on top of the toast. Sprinkle the Parmigiano, then drizzle the extra virgin olive oil over each.

Serve hot.


Leave a comment

Pear-Pignoli Salad with Cranberry Sauce Vinaigrette

Do you still have cranberry sauce left over after the holidays? I know some of you do. Admit it.  You’ll see lots of sites and professional chefs telling you that everything should be thrown out three days after the holiday. I have news for you—if you’ve stored it properly, that cranberry sauce is probably still good. The thing is, because of the sugar content, cranberry sauce has a long shelf life. It’s just like a jar of jam or preserves in your refrigerator. (Of course, if it smells or tastes funny, or if it has mold on it, throw it out.) For those of you who prefer the stuff that comes in cans (you can admit that, too, don’t be ashamed), you can use those up as well, so that they don’t sit in your pantry for another year.

There are many things you can do with leftover cranberry sauce. One way to use it up is to make a dressing with it, and I’ve done just that. I paired homemade cranberry sauce here with baby greens and Anjou pears. So that the cranberry doesn’t overwhelm the delicate ingredients, I strained the dressing.

So, why not start out with plain cranberry sauce (such as what comes in a can) instead of whole berry sauce, you ask. Because I think that whole berry sauce has so much more depth of flavor than flat cranberry sauce. Plus, chances are that if you have a significant amount left over, it’s probably the homemade kind, which is most likely going to be chunky.

You can adjust the recipe to any flavor profile you like. Enjoy!

Cranberry Sauce Vinaigrette

Makes ¾ cup dressing.

1 cup whole berry cranberry sauce
2 tablespoons balsamic vinegar
1 teaspoon stone-ground mustard
1 teaspoon sea salt
Freshly ground pepper to taste
3 tablespoons extra virgin olive oil

In a medium bowl, combine the cranberry sauce, balsamic vinegar, mustard, salt, pepper, and ¼ cup water. Drizzle in the oil and whisk together well. Using a rubber spatula, strain the dressing through a mesh strainer into another bowl. Taste for seasoning and adjust if you like.

Pear-Pignoli Salad with Cranberry Sauce Vinaigrette

Makes 4 servings.

2 Anjou pears (ripe but still firm)
6 oz. mixed baby greens
¼ cup pignoli (pine nuts), toasted
¼ cup Cranberry Sauce Vinaigrette
2 tablespoons black sesame seeds

Slice the pears about ¼ inch thick. You want them somewhat thin, but not so thin that they fall apart in the salad. Place them in a large bowl. Add the greens and pignoli and toss gently. Add the dressing and again toss gently. Transfer the salad to a serving platter and arrange neatly. Sprinkle the sesame seeds over the top.

Serve immediately.


Leave a comment

Red Lentil Pasta with Sauteed Mushrooms

Having grown up in a traditional Italian family, pasta was part of my natural landscape. But today, pasta comes in many varieties. I don’t mean just shapes—those have always been. I mean ingredients. And because so many people are carb conscious, and/or avoid wheat, pasta manufacturers have come out with pasta made from wheat flour alternatives. It is now made of quinoa, farro, corn, kamut, black bean flour, and other ingredients.

For this recipe, I found a beautiful red lentil pasta. It’s made with 100% red lentil flour in place of regular flour, so it’s completely gluten free. Its flavor is earthy and nutty, and it pairs very well with sautéed mushrooms. Unfortunately, like any brightly colored foods, they lose their pretty pinkish hue once cooked. I found this particular bag at Eataly in Manhattan, but you can find “alternative” flour pastas in large supermarkets, Italian markets, gourmet shops, and, of course, online.

Enjoy!

Red Lentil Pasta with Sauteed Mushrooms

1 tablespoon olive oil
8 oz. baby bella or cremini mushrooms
2 teaspoons kosher salt
8 oz. red lentil pasta
½ tablespoon salt
Freshly ground black pepper to taste
¼ cup grated or shredded parmesan cheese

Heat the oil in a wide skillet, preferably cast iron. Add the mushrooms and 2 teaspoons kosher salt and sauté over medium-high heat, stirring occasionally, until the mushrooms have browned. This will take anywhere from 20 to 30 minutes.Fill a medium saucepan three-quarters with water and bring it to a boil. Add the pasta and ½ tablespoon salt and cook, stirring often, until it’s al dente, about 10 minutes. Drain and transfer to a bowl.If the mushrooms have cooled off, reheat them briefly. Add them to the pasta and season with pepper. Mix in the parmesan. Serve hot.


Leave a comment

Brussels Sprouts-and-Red Onion Frittata

Every season brings with it its own special delicious crops. One of my favorite autumn vegetables is Brussels sprouts. Earthy, cabbage-y, and slightly bitter, Brussels sprouts have traditionally been underrated, and even reviled. Even the words “Brussels sprouts” can bring a look of revulsion to some people’s faces.

O ye, of little faith. You poor honeys just haven’t had them cooked right.

I have used Brussels sprouts in many dishes, but I had never made them in a frittata. Until now. I loved it.

Frittatas, in general, are very forgiving. You can add just about anything and it will taste good. Brussels sprouts are no exception. Paired with red onions, they make this frittata hearty, flavorful, and elegant enough to serve others.

Enjoy!

Brussels Sprouts-and-Red Onion Frittata

Makes 4 servings.

½ lb. Brussels sprouts, trimmed and halved
2 tablespoons olive oil
1 teaspoon kosher salt
1/3 cup finely chopped red onion

3 large eggs
1 tablespoon grated parmesan cheese
Freshly ground black pepper

Preheat the oven the 350 degrees F/176 degrees C.Place the Brussels sprouts in a medium bowl. Add 1 tablespoon of the oil and ½ teaspoon of the salt. Toss until all the sprouts are coated. Spread them out on a baking sheet and roast until nicely browned and tender when pierced with the tip of a knife.Beat the eggs in a medium bowl with the remaining salt, parmesan, and black pepper.

Heat the remaining oil in a small skillet. Add the onion and sauté until they’ve softened and just start to brown, about 2 minutes. Add the Brussels sprouts and spread them out evenly (try to face them cut side down for a nice presentation). Pour the eggs evenly over the onion and sprouts. Lower the heat to low and cover the pan. Cook until the underside of the frittata is browned, about 5 to 7 minutes. (You can check by lifting the frittata on one side with a spatula and peeking underneath.)

Place a plate that is wider than the skillet over the top and a carefully (using a dry kitchen towel or potholder!), flip the frittata over onto the plate. Then slide the frittata back into the skillet.Continue cooking a few more minutes, uncovered, until the frittata is cooked through and the underside has browned.

Remove it from the pan and cut into 4 wedges. Serve hot, warm, or cold.


Leave a comment

Sweet Potato Noodles with Roasted Broccoli and Tomato

Sweet potato noodles are made from sweet potato flour. When cooked, they have a chewy, firm texture and a vaguely sweet-ish flavor. Paired with broccoli, it makes a savory, fun meal. The tomato gives the dish a fresh dimension, and a splash of soy sauce at the end rounds out the flavors with a burst of salty sweetness.

You can find sweet potato noodles in Asian markets. They look similar to rice noodles with their lovely translucency. If the brand you choose has the noodles in coils or long ropes rather than sticks (like spaghetti), I suggest breaking them up because they can be really long and difficult to eat, and because they tend to cling to each other for dear life, you might end up with huge mouthfuls of noodles.

These noodles are, of course, gluten free, and vegan, so they’re perfect for anyone on a gluten-free diet, Paleo, Keto (a little, according to their site), etc. The whole family is covered here. They’re inexpensive as well. Give them a try sometime.

Sweet Potato Noodles with Roasted Broccoli and Tomato

Makes 4 servings.

1 small head broccoli, cut into florets
2 tablespoons olive oil
3 teaspoons kosher salt
6 ounces sweet potato noodles
½ cup chopped tomato
1 tablespoon soy sauce
Freshly ground black pepper to taste

Preheat the oven to 375 degrees F.

Toss the broccoli with 1 tablespoon of the oil and 2 teaspoons of the salt. Spread the florets out on a baking sheet and roast 10 minutes. Stir and roast another 10 minutes, or until the florets are tender and browned.Bring a medium pot of water to a boil. Add the noodles and simmer over medium heat, stirring occasionally, until they’re tender, about 5 to 7 minutes. Drain.In a medium bowl, combine the noodles with the broccoli, tomato, soy sauce, remaining oil, remaining salt, and black pepper. Mix well. Add more oil, if necessary (the noodles will want to clump together).Serve hot. Heat leftovers in a wok or pan with a little water in the bottom, covered. Enjoy!


Leave a comment

Vegetable-Bean Stew with Spaghetti Squash

Very often, my stews and chilis are built on whatever produce is in season and available at the farmers’ markets. I’ll be honest—I don’t get everything at farmers’ markets. I’d be constantly broke. But I’ll find one or two or three items that are in season, sometimes only briefly, and that look particularly good. In this case, I had some gorgeous greens from a couple of bunches of beets, beautiful red onions, and bright, fresh out-of-the-ground carrots. I gathered a few more vegetables and assembled this stew.

But the beautiful thing about vegetable stew is that it’s wide open to ingredients. You can use whatever vegetables you like, whatever beans you like, and whatever herbs and spices you like. Or omit any of those things.

I had the good fortune of having several cloves of garlic in the refrigerator that I had pan roasted. I chopped those up and added them. If you want to add an extra depth of flavor, you can pan roast a few cloves before you begin the stew.

Vegetable-Bean Stew with Spaghetti Squash

1 small spaghetti squash
2 teaspoons olive oil
1 cup chopped red onion
3 to 5 garlic cloves, chopped
2 tablespoons tomato paste
¼ cup red wine, broth, or water
2 cups chopped green pepper
2 cups chopped, seeded tomatoes
1 ½ cups chopped carrots
4 cups vegetable broth or water
3 cups beans of your choice (such as Great Northern, pinto, cannellini, etc.)
4 cups (cleaned) chopped greens (such as beet greens, kale, chard, etc.)
1 teaspoon kosher salt*
Freshly ground black pepper to taste
¼ cup freshly chopped herbs of your choice (basil, parsley, oregano, thyme, etc.)

Preheat the oven to 400 degrees F. Split the spaghetti squash in half lengthwise and scoop out the seeds and strings from the center. Place the halves face down on a baking sheet. Roast until the tip of a knife goes through the flesh easily, about 20 to 30 minutes. Remove them from the oven. When they’re cool enough to handle, use a fork to scrape out the flesh. Place it in a bowl and set it aside.Heat the oil in a large pot. Add the onion and sauté until translucent, about 3 o 4 minutes. Add the garlic and sauté until fragrant, 1 to 2 minutes.Add the tomato paste and stir it in until it’s well blended. Cook the mixture, stirring occasionally, for 2 to 3 minutes. When the bottom of the pot starts to get dark streaks, pour in the wine and stir it in. Scrape up the dark bits from the bottom of the pot.Add the green pepper, tomatoes, and carrots. Stir and cook 5 minutes. Pour in the broth and bring it to a boil. Lower the heat to medium-low and simmer, partially covered, until the vegetables are tender but still firm, about 10 to 13 minutes. Add the beans, greens, salt, and black pepper. Stir and cook another 5 minutes, or until the greens are tender. Stir in the herbs. Taste for seasoning and adjust, if necessary.*Salting is best done in stages. Add a little bit of salt whenever you add a new ingredient. This gives each item a chance to absorb the salt, and it builds layers of flavor. This kind of instruction is difficult to impart in a recipe, but I have faith in you, my dearest readers.