Shishito peppers are a hot culinary ingredient right now. And I mean “hot” in a trendy way, not the spicy way. They’re a mild chile pepper, small, elongated, and thin-walled. They’re sweet with a fruity note; however, every once in a while, you might actually get a hot one. There’s no way to recognize a hot one, though—it’s completely random.
Shishitos are easy to cook and work with, and are very versatile. I bought a bunch of them and tried them in various ways. Here I used them in a frittata for a delicious breakfast, lunch, or dinner. Give it a try.
Shishito Pepper and Garlic Frittata
Makes 4 servings.
5 to 6 shishito peppers 3 large eggs 1 teaspoon seasoning of your choice 1 teaspoon kosher salt 1 teaspoon olive oil 4 to 5 large garlic cloves, minced
Broil the peppers or grill them over an open flame until lightly charred. Scrape away any excessively charred skin. Cut off the stems and coarsely chop the peppers. Set aside.In a small bowl, beat the eggs together with seasonings and ½ teaspoon salt.
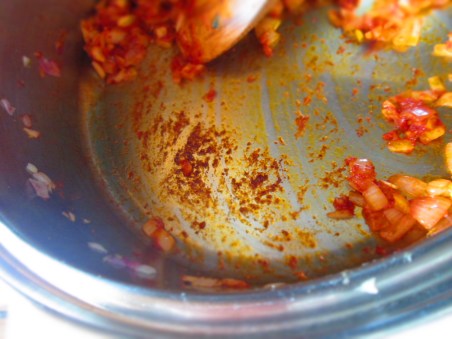
Heat the oil in a small skillet over medium heat. Add the garlic and heat just until fragrant, about 30 seconds. Don’t let the garlic burn.Add the chopped peppers and remaining salt and sauté a minute. Pour the eggs evenly over the peppers. Lower the heat to low and cover the pan.Cook until the underside of the frittata is browned, about 5 minutes. (You can check by lifting the frittata on one side with a spatula and peeking underneath.)
Place a plate that is wider than the skillet over the top and a carefully (using a dry kitchen towel or potholder!), flip the frittata over onto the plate. Then slide the frittata back into the skillet.Continue cooking a few more minutes, uncovered, until the frittata is cooked through and the underside has browned.
Remove it from the pan and cut into 4 wedges. Serve hot, warm, or cold.
All of my life, I never liked tomato soup. It always tasted like watered-down ketchup to me. Granted, my experience with tomato soup had been the canned variety, but I also had once or twice tried it in a restaurant or catered affair situation (I can’t remember which) and thought it was equally distasteful.
Then, I found a recipe for tomato soup using fresh tomatoes…and it changed my world. Now I knew what tomato soup was supposed to taste like. And I never looked back.
This is my recipe for fresh tomato soup. The ingredients are extremely simple and the focus is on the tomatoes. It’s best to make this in summer, when tomatoes are at their peak. It doesn’t much matter which variety you choose, as long as they’re ripe and fresh. Enjoy!Continue reading →
Very often, my stews and chilis are built on whatever produce is in season and available at the farmers’ markets. I’ll be honest—I don’t get everything at farmers’ markets. I’d be constantly broke. But I’ll find one or two or three items that are in season, sometimes only briefly, and that look particularly good. In this case, I had some gorgeous greens from a couple of bunches of beets, beautiful red onions, and bright, fresh out-of-the-ground carrots. I gathered a few more vegetables and assembled this stew.
But the beautiful thing about vegetable stew is that it’s wide open to ingredients. You can use whatever vegetables you like, whatever beans you like, and whatever herbs and spices you like. Or omit any of those things.
I had the good fortune of having several cloves of garlic in the refrigerator that I had pan roasted. I chopped those up and added them. If you want to add an extra depth of flavor, you can pan roast a few cloves before you begin the stew.
Vegetable-Bean Stew with Spaghetti Squash
1 small spaghetti squash 2 teaspoons olive oil 1 cup chopped red onion 3 to 5 garlic cloves, chopped 2 tablespoons tomato paste ¼ cup red wine, broth, or water 2 cups chopped green pepper 2 cups chopped, seeded tomatoes 1 ½ cups chopped carrots 4 cups vegetable broth or water 3 cups beans of your choice (such as Great Northern, pinto, cannellini, etc.) 4 cups (cleaned) chopped greens (such as beet greens, kale, chard, etc.) 1 teaspoon kosher salt* Freshly ground black pepper to taste ¼ cup freshly chopped herbs of your choice (basil, parsley, oregano, thyme, etc.)
Preheat the oven to 400 degrees F. Split the spaghetti squash in half lengthwise and scoop out the seeds and strings from the center. Place the halves face down on a baking sheet. Roast until the tip of a knife goes through the flesh easily, about 20 to 30 minutes. Remove them from the oven. When they’re cool enough to handle, use a fork to scrape out the flesh. Place it in a bowl and set it aside.Heat the oil in a large pot. Add the onion and sauté until translucent, about 3 o 4 minutes. Add the garlic and sauté until fragrant, 1 to 2 minutes.Add the tomato paste and stir it in until it’s well blended. Cook the mixture, stirring occasionally, for 2 to 3 minutes. When the bottom of the pot starts to get dark streaks, pour in the wine and stir it in. Scrape up the dark bits from the bottom of the pot.Add the green pepper, tomatoes, and carrots. Stir and cook 5 minutes. Pour in the broth and bring it to a boil. Lower the heat to medium-low and simmer, partially covered, until the vegetables are tender but still firm, about 10 to 13 minutes. Add the beans, greens, salt, and black pepper. Stir and cook another 5 minutes, or until the greens are tender. Stir in the herbs. Taste for seasoning and adjust, if necessary.*Salting is best done in stages. Add a little bit of salt whenever you add a new ingredient. This gives each item a chance to absorb the salt, and it builds layers of flavor. This kind of instruction is difficult to impart in a recipe, but I have faith in you, my dearest readers.
Homemade milks are a beautiful thing. They are fresh and light in a way that no store-bought milk can be, no matter how good the quality of a brand may be. Your own milk also will not contain unnecessary ingredients. The best part is, they’re not difficult to make.
The latest thing right now is oat milk, and it’s probably the easiest of all homemade milks to make. You just dump all the ingredients in a blender and go. If you have a Vitamix, or other high-powered blender, now’s a great time to use it!
Oat milk tends to be a little flat in its purest form, so many people add a sweetener to it. I chose to add honey, but you can add whatever you like, or omit it altogether. I also chose to add a pinch of salt to enhance the flavor of the milk.Continue reading →
What is it about chocolate-covered strawberries that makes them the perfect St. Valentine’s Day delicacy?
Chocolate is the perfect treat for any special occasion, because it, itself, is special. But it’s particularly popular for Valentine’s Day because, as you may know, it’s an aphrodisiac.
You can cover many things in chocolate but why strawberries? Well, just look at them. They’re red (which represents love and passion), they’re sweet, and they’re luscious-looking.
And, finally, the combination is so incredibly delicious and decadent.
And they’re not as fattening as you might think. If you use dark chocolate, it’s only 57 calories for half an ounce of chocolate and one large strawberry (not including toppings).
Best of all, they’re not as difficult to make as they might seem. In fact, apart from any toppings you put on them, the recipe requires only two ingredients…wait for it…can you guess? Strawberries and chocolate!
Make some for your sweetie, or anyone you care about. Happy Valentine’s Day!
Chocolate-Covered Strawberries
12 large strawberries 4 oz. good-quality dark chocolate Colored sugar, chopped nuts, or decorating items (crushed candy, jimmies, sprinkles, crushed white chocolate, etc.), optional
Line a sheet pan with wax or parchment paper and set aside. (I used a cooling rack as well, but it isn’t necessary.)
Wash the strawberries (preferably using a vegetable wash), and set them on a towel. Pat them gently to absorb excess water, then let them sit to fully dry. Do not remove the husks.
Place the chocolate in the top part of a double boiler (or in a non-aluminum bowl set over a pot). Bring an inch or 2 of water to a boil in the bottom pot, then lower the heat to a simmer. Place the chocolate over the simmering water and let it melt. Stir it gently once in a while. When the chocolate has all melted, give it a gentle stir and turn off the heat.
Using the husks to help you, dip a strawberry into the chocolate and rotate it to cover it all. Let the excess chocolate drip off back into the pot. Rest the strawberry on the wax or parchment paper. Coat a few more strawberries and decorate them (before the chocolate hardens). Continue coating and decorating the rest of the strawberries.
Store tightly sealed in the refrigerator up to 3 days.
Celery root, also known as celeriac or knob celery, is one of those vegetables that confounds many people. What is it? Is it really the root of the celery plant? What do you do with it? What does it taste like?
Celery root is related to celery, but it’s a different variety. Whereas celery is cultivated for its stalks and leaves, celeriac is cultivated for the root. Its flavor is definitely celery-like, only deeper and earthier. It’s kind of off-putting in its appearance—big, bulbous, knobby, and usually dirt-encrusted—and is not used as commonly as other root vegetables. But like so many overlooked vegetables, it’s rising in popularity.
As to what you can do with it, many things. You roast them, saute them, gratinee them, use them in soups and stews, and, as in this recipe below, puree them for a smooth, silky bisque.
Celery root bisque is often thickened with potatoes, but I’ve chosen instead to use oats, a trick I learned in culinary school. Oats not only increases the soups nutrition factor, but also makes it less starchy.
Speaking of nutrition, celery root contains vitamin C, vitamin K, vitamin B-6, potassium, phosphorus, and fiber. It’s been shown to be beneficial for bone health, heart health, and lowering the risk of diabetes.
Enjoy!
Celery Root Bisque with Oats
Makes 6 to 8 servings.
2 large celery root knobs 2 tablespoons olive oil 4 cups chopped celery ½ cup chopped shallots 1 tablespoon kosher salt 5 cups vegetable broth 1/3 cup rolled oats ½ cup parsley* 2 tablespoons fresh thyme* Freshly ground pepper to taste
*Don’t worry about chopping the herbs or if you have some stems. They’re going to be pureed.
Peel the celery root with a knife or vegetable peeler. Cut up the roots into cubes (you should get about 10 cups).Heat the oil in a large soup pot or Dutch oven. Add the celery and shallots and ½ teaspoon of the salt and sauté until softened, about 5 or 6 minutes.Add the celery root and 1 teaspoon salt and stir. Pour in the broth and add oats. Bring to a boil; lower the heat to medium-low, and simmer, covered, until the celery root is tender, about 40 minutes. Stir occasionally.Stir in the parsley and thyme and remaining salt.Transfer the soup in batches to a blender and puree until smooth. Pour each batch into a bowl. When all the batches are in the bowl, stir it to blend. Add pepper and stir. Taste the soup for seasoning and add more salt and pepper, if desired.If you’ve made the soup ahead of time, pour it back into the pot and heat gently over medium-low heat before serving.
Keep it stored covered in the refrigerator up to 5 days.
This is my first post in a while. I took a hiatus for few weeks because I found myself hosting Thanksgiving dinner for the first time in many years.
I used to host Thanksgiving at my house years ago because my family and my then-partner’s family both were very unyielding in allowing us to divide our time. So, our solution was to do Thanksgiving dinner at our house and have both families. We did this for several years, and I don’t think that either family was thrilled about it. The reasons for that are both simple and complex, but what it came down to was that it made the holiday stressful for both of us.
After my partner and I broke up, the Thanksgiving meal shifted to my parents’ house, and it’s been there for the past decade.
But early this year, my father passed away, and my mother, understandably, no longer wanted to do any holidays. It fell on me to do it.
It was a bit more difficult for me to deal with it this time around because a) I’m a decade older than the last time I did it, and b) my job situation is different, and I wasn’t able to take off the same amount of time that I used to years ago.
Having said that, I was able to take off the Tuesday and Wednesday before Thanksgiving Day, and my current partner flew in to help me. This was tremendously helpful to me, because I truly wouldn’t have been able to get anything done otherwise.
I actually starting prepping my house about a month before. No, really. That’s how long it took me to put things away, organize, and move things around to optimize the space.
The one good thing about all this was that I was so busy prepping, cooking, and serving/cleaning that I didn’t have a whole lot of time to dwell on the fact that it was the first Thanksgiving without my father. I know my mother was depressed, and I felt bad that I couldn’t spend any time comforting her. But I know others did, and I’m glad. It was early on in my preparations, that the emotions hit me, and now, after it’s all over, it’s hitting me again. It’s been strange and surreal not seeing him sitting there at the table with us.
Anyway, my recipe this week is one that comes from the utilitarian in me, and my desire to not waste food and not take for granted the bounty that we’re fortunate to have in this country.
I call this dish Leftover-Thanksgiving-Stuff Chili. It’s exactly what it sounds like: a bunch of stuff I had leftover from Thanksgiving dinner, plus a couple of other things. The nice things is, you can make your own leftover chili with whatever you have in the fridge, or you can follow this recipe, because you know what? It came out great. It’s full of flavor, and because some of the individual elements were made as separate recipes with their own ingredients, the flavors of the chili are layered and complex.
I’ve said this before, but it bears saying again—use leftover cranberry sauce in chili. Its sweet and tart taste adds a great dimension to the dish.
(By the way, the reason you see olives in the photos is because the marinated peppers that I used had olives thrown in there. It was part of the antipasto that I served at dinner. When I say I use everything, I mean it!)
A couple of tips: If you have any beer or wine leftover, use that to deglaze the pot after the tomato paste cooks in, or add it later for a more pronounced flavor. Also, although I’ve listed salt as one of the last items, add the salt a little at a time as you add ingredients, starting with the onions. This ensures that you coax out the maximum flavor from each individual ingredient. Chefs do this regularly, but you will rarely see it written in a recipe because it makes the recipe cumbersome to instruct adding a quantity of salt at each step. But you should do it. 🙂
So, here’s my utilitarian chili. Enjoy!
Leftover-Thanksgiving-Stuff Chili
1 tablespoon olive oil 1 cup chopped yellow onion 1/3 cup chopped red onion 2-3 large garlic cloves, minced 1½ cups chopped green bell pepper 1 tablespoon tomato paste
2 teaspoons chili powder 2 cups broth (you can make part of this beer or wine) 1½ cups chopped tomatoes 2 celery ribs, chopped 1 cup cranberry sauce ½ cup chopped roasted peppers (optional)
3 cups cooked beans (pinto, Roman, Navy, any kind you like)
3 teaspoons kosher salt ½ cup chopped parsley Freshly ground black pepper
Heat the oil in a medium-large sauce pot. Add the onions and sauté over medium-high heat until they’re soft and translucent, about 5 minutes.Add the garlic and sauté another minute. Add the green pepper and sauté until it softens, about 3 or 4 minutes.Add the tomato paste and stir it in well. Mix in the chili powder. Cook, stirring, for about 2 minutes. Deglaze the pot with broth (and or beer/wine). Scrape the bottom of the pot with a wooden spoon to get up any browned bits. Bring it to a boil. Add the remaining ingredients, except the parsley. Mix well. Bring it back to a boil, then lower the heat to medium-low, partially cover, and let it simmer for about 15 minutes, stirring occasionally.Check for seasoning and add more salt and pepper, as desired. Stir in the parsley and serve.
If you’ve ever had roasted tomatoes, you know about the incredibly sweet, smoky flavor they have. Roasting any vegetable renders its sugars, and results in heightened flavors and vivid colors. The flavor of roasted tomatoes is deep and intense, and goes well with so many dishes.
The word confit is French and means “to preserve.” It’s usually used in relation to meats—as in duck confit, chicken confit, etc.—and it means to cook the meat slowly in its own juices (or other meat juices), along with salt and seasonings. The meat is then shredded and packed in a container and covered with fat to preserve it. This method was created for long-term storage before refrigeration was invented.
But fruits and vegetables can be confited as well. It’s extremely easy to make a tomato confit. All you need to do is mix the tomatoes with some olive oil and some seasonings and put them in the oven and walk away. They roast low and slow, and when they’re done, they’re literally bursting with flavor.
You can put some tomato confit on pieces of toast, drizzle it with olive oil, and sprinkle the tops with parmesan cheese for a great canape or snack. You can use them on focaccia or in a sandwich, or just served by themselves.
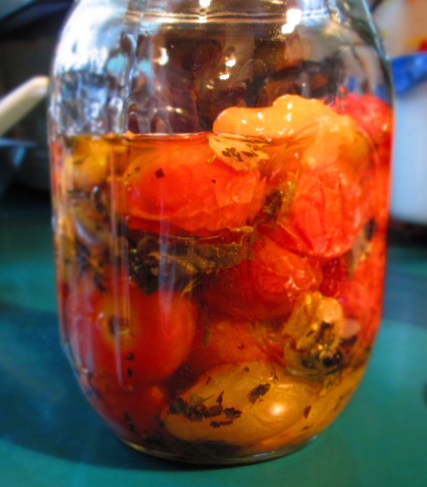
Enjoy!Cherry Tomato Confit
Makes 1½ cups.
2 cups cherry and/or pear tomatoes ¼ cup olive oil, plus more for the jar 1 teaspoon kosher salt 1 teaspoon peppercorns Herbs of your choice, fresh or dry (basil, oregano, thyme, rosemary, bay leaf, etc.) 2 or 3 large garlic cloves, smashed
Preheat the oven to 250 degrees F.
In a medium bowl combine all the ingredients and mix.Spread the tomatoes and herbs out on a small-medium baking sheet. (You can line it with foil or parchment, if you like.)Bake for 1 hour. Stir the tomatoes, then bake for another 1½ hours. The tomatoes should be wrinkled and easily burst when poked with the tip of a knife. Some tomatoes may burst while in the oven, and some may brown a bit. This is not only okay, it’s deliciously desirable.Transfer everything to a clean, pint-size jar with a tight-fitting lid. Pour in any oil and juices from the pan. Pack in it gently. Cover the tomatoes with oil. Seal. Tomatoes will keep up to a week in the refrigerator.
As we’re coming into the fall season—and I say that lightly because we’ve been having higher-than-normal temperatures for this time of year—we’re beginning to see the first offerings of the autumn harvests. A little.
Anyway, at my farmers’ market, I spotted cipolline, which are a specific kind of onion and very popular in Italian cuisine. I usually buy a batch and make cipolline in agrodolce (sweet and sour cipolline) for Thanksgiving. But since I spotted these way too early for the holidays, but couldn’t resist buying them, I decided to experiment with my recipe a little. The difference here is booze. I wanted to see what a little alcohol would do to the mixture.
The question was, what type of alcohol did I want to add? I debated between bourbon, vodka, and a liqueur. Ultimately, I went with apricot brandy. It gave the onions a sweet but—not surprising—boozy edge. In short, they’re really good. Give it a try.
Cipolline in Agrodolce (Sweet and Sour Cipolline Onions)
1 pound cipolline onions, outer skin removed 2 tablespoons sugar ½ cup apple cider vinegar ½ cup apricot brandy ½ teaspoon kosher salt ½ teaspoon peppercorns 1 bay leaf ½ teaspoon oregano
Bring a medium pot of water to a boil. Add the onions and lower the heat. Simmer for about a minute or two and drain. When the onions are cool enough to handle, trim them and peel off the tough outer layer.
Combine the sugar and ¼ cup water in a medium pot. Bring it to a boil; lower the heat and simmer until thickened, about 10 minutes.
Add the vinegar and bring to a boil again. Simmer until thickened.Add one cup water, the cipolline, and the remaining ingredients. Bring to a boil. Simmer about 45 minutes.
Remove from the heat and let them cool. Transfer everything to a jar or sealable bowl and refrigerate.
The squash family has many variations. There are the well-known types, such as butternuts, sweet dumplings, kabocha, spaghetti, zucchini, pattypan, and numerous others. But there are so many lesser know varieties, some you would never see except when they appear in neighbors’ gardens.
Giant pear squash
If you visit farmers’ markets, you can find some other squash varieties, but you won’t generally find them in most stores. However, every once in a while, an unusual type will show up in my local produce market. And that’s exactly what happened with the giant pear squash.
Giant pear squash is so called because…well, take a look at it. It’s aptly named. (Yes, it really is as big as it looks in the photo. The photo is not distorted in any way.) It has a very mild flesh, somewhat similar to yellow summer squash. It can easily be used in any dish that requires a mild squash, or as a substitute for zucchini.
You want to cut out the spongy core of the giant pear squash. Not because it’s inedible, but because it contains seeds that are too hard to eat. They kind of look like chulpe, a Peruvian dried corn (see photos below).


 In a small bowl, beat the eggs together with seasonings and ½ teaspoon salt.
 Add the chopped peppers and remaining salt and sauté a minute.
  Pour the eggs evenly over the peppers. Lower the heat to low and cover the pan.
 Cook until the underside of the frittata is browned, about 5 minutes. (You can check by lifting the frittata on one side with a spatula and peeking underneath.)
 Continue cooking a few more minutes, uncovered, until the frittata is cooked through and the underside has browned.


 Add one cup water, the cipolline, and the remaining ingredients. Bring to a boil. Simmer about 45 minutes.


