I’m on noodle kick. If you read my blog last week, you know that I wrote about noodles then as well. That blog was about the mung bean noodles that I found in an Asian market. Well, in that same market, I found black rice noodles, and, as usual, I couldn’t resist trying them.
A New Superfood
Black foods are not only striking to look at, but they’re typically high in antioxidants because of they’re high levels of pigments. Black rice is high in Vitamin E, which helps the immune system and protects cells from free radical damage. According to a study from the Louisiana State University Agricultural Center, black rice contains more anthocyanin antioxidants than blueberries, making it an even healthier choice than brown rice. As a result, black rice is considered one of the new superfoods. And let’s not overlook the fact that these noodles are gluten free! Here’s more about it at Livestrong.com.
The unfortunate part of using black rice noodles is that once they’re cooked, they’re no longer black but a dark purple. But that’s okay—they’re still pretty to look at. And they still stand out beautifully against white beans and vegetables, which is exactly what I did with this recipe.Continue reading →
Mung bean noodles are noodles that are made from dried, ground mung beans. Mung beans have been consumed since antiquity but are unfamiliar outside of Indian and Asian communities. They are an important part of Ayurvedic cuisine, and are popular for sprouting. (Many of the bean sprouts that come with your salad or in your Asian take-out come from mung beans).
Mung beans are a high source of protein—about 3 grams per tablespoon, or 14 grams per cup. They’re also rich in manganese, potassium, magnesium, folate, copper, zinc and some B vitamins. They’re low on the glycemic index, and high in antioxidants. They’re considered a good food in the battle against heart disease, cancer, diabetes, inflammation, and obesity.
Mung beans can be found in Indian and Asian markets, but are slowly starting to find their way onto supermarket shelves as well. You can get mung bean noodles in Asian markets. The logical conclusion would be to use them in a dish with Asian flavors, right? However, I chose to go Italian style with these, and it worked out beautifully. I simply made them the way I would make a dish of traditional Italian pasta—with olive oil, garlic, and vegetables.
Mung Bean Noodles
Like many non-wheat noodles, these will not come out al dente, like traditional pasta. Mung bean noodles come out soft and somewhat sticky, so the eating experience will be different than what you get from eating traditional pasta, but it’s pleasant and delicious with a slightly nutty flavor. I like to add a little extra virgin olive oil at the end not only for the extra flavor boost but also to counteract the stickiness of the noodles.
I hope you enjoy them.
Italian-Style Mung Bean Noodles
Makes 2 servings.
1 small head broccoli, cut into florets 2 tablespoons + 2 teaspoons olive oil ½ teaspoon kosher salt Freshly ground black pepper to taste 6 to 8 ounces mung bean noodles 2 large garlic cloves, minced 1 teaspoon paprika 2 tablespoons grated cheese 2 teaspoons extra virgin olive oil
Preheat the oven to 350 F. Spread the broccoli out on a baking sheet. Toss with 2 tablespoons olive oil, salt, and pepper. Roast for 10 minutes. Stir and continue roasting until tender when pierced with a knife and browned, about another 10 to 15 minutes.
Bring a medium pot of water to a boil. Add the mung bean noodles and cook, stirring occasionally until tender, about 5 minutes. Drain.
Split the noodles between 2 bowls, and add broccoli to both, and mix well.
Heat the remaining olive oil in a small pan. Add the garlic and sauté just until it becomes fragrant and starts to color.
Add the paprika, swirl it around, and immediately pour equally over the two the bowls of noodles and broccoli.
Sprinkle grated cheese over the top, then the extra virgin olive oil, and serve.
This week in honor of last week’s episode of The Walking Dead, I offer you Warm Sorghum Salad.
Okay, the truth is, I already had this blog post and recipe prepared but it seemed like an appropriate time to post it.
Many people don’t know what sorghum is. It’s a grain that originated in Africa and that’s been used in this country for years as fodder—except in the South, where it’s been a fairly popular grain. Also in the South, sorghum molasses often takes the place of regular molasses, honey, maple syrup, and corn syrup. In short, it’s a liquid sweetener that’s used in baked goods, as well for drizzling on biscuits, pancakes, and toast.
Sorghum is gluten free and inexpensive. But it’s also very use friendly. It’s a diverse grain that can be used in many different dishes. Here’s my Warm Sorghum Salad. It’s great to bring to dinner in the fall and winter, but also to barbecues and picnics in the warmer seasons. And the kale makes it a well-rounded, healthy dish. Enjoy!
Warm Sorghum Salad
Makes 6 servings
1 cup sorghum grain 1 tablespoon olive oil ½ cup minced shallot 1 teaspoon kosher salt ½ lb. mushrooms (preferably a combination of white and baby bella), thinly sliced 1 tablespoon apple cider vinegar 4 packed cups chopped kale Fresh pepper ½ small lemon
Dressing ¼ cup extra virgin olive oil 1 teaspoon balsamic vinegar 1 teaspoon Dijon mustard Freshly ground black pepper to taste
Place the sorghum in a mesh strainer and rinse it under running water for a minute or two. Place it in a small pot along with 3 cups water and bring to a boil. Lower the heat and simmer, partially covered, until tender, about 30 to 40 minutes. Drain well.
Meanwhile, heat the oil in a wide skillet. Add the shallot, ¼ teaspoon salt, and saute until soft and translucent, 2 or 3 minutes. Add the mushrooms and 1/4 teaspoon salt and saute until the water they release dries up and mushrooms brown.When you see browned bits in the pan, deglaze with the apple cider vinegar (add it to the pan and scrape up the brown bits with a wooden spoon).
Add the kale and another ½ teaspoon salt and cover; cook until kale is tender.While that’s cooking, make the dressing and set aside.
When the sorghum is cooked, add it to the pan with the kale and pepper and mix.Pour in the dressing and mix well. Taste for seasoning and adjust if needed. Squeeze the lemon over it and stir.
I’ve been roasting cauliflower a lot lately because it’s a very versatile vegetable. Once roasted, you can use it in a variety of dishes, and this is one of them.
Spinach Fettuccine nests
Even if you aren’t a fan of cauliflower, I guarantee that you will like it roasted. Roasting brings out both a sweetness and a smokiness, not to mention a fabulous umami flavor. You can certainly start from scratch and roast the cauliflower specifically for this purpose, but I love the idea of roasting a whole head and having it in the refrigerator to use for the whole week. Then, when you’re ready to make dinner, take some out and add it to whatever you’re making. It will taste great. (You can refer to my blog on Creamy Roasted Cauliflower Bisque on how to roast the cauliflower.)
On this particular evening, I made Spinach Fettuccine with Roasted Cauliflower-Almond Sauce. Pasta with cauliflower and nuts (particularly pine nuts, or pignoli) is a typical Italian dish, and is especially popular in Sicily. My version calls for the roasted cauliflower and toasted almonds. The spinach fettuccine that I had came in the form of “nests,” but you can use any kind or brand of spinach fettuccine.Continue reading →
My pantry is stuffed to the gills with all sorts of items that the average cook with raise an eyebrow to. In fact, I’ll bet I have a few items in there that the average cook has possibly not even heard of, let alone used. If you were my neighbor and needed something for a recipe you were cooking or baking, chances are I’d have it. Anything at all. Need some flour? What kind? All-purpose? Whole wheat? Pastry? Spelt? Soy? Buckwheat? Barley? Teff? Oat? Fava bean?
Need rice? Currently, I’ve got brown, basmati, brown basmati, jasmin, Thai black, rosematta, glutinous Thai, and Japanese short grain.
Looking for grains? Choose from white and red quinoa, buckwheat, amaranth, sorghum, millet, and teff.
So, what am I saying here? That I am constantly looking for ways to use up all of that stuff! And so here is what I came up with to use both amaranth and some mixed dal I had. I could’ve just made a soup, but I wanted to do something different. This is what I came up with—Amaranth-Dal Patties. If you’re not familiar with amaranth, they’re tiny little grains that are gluten-free and high in iron and lysine. Here’s a link for more information.
Amaranth
You can season the patties with whatever herbs or spices you like, and/or dress them with any kind of sauce, from raita to salsa to piri piri (just make sure to pair the seasonings and dressing appropriately—you wouldn’t want to use garam masala as a seasoning and then dip them in Asian soy dipping sauce!). You can also substitute the flour for something that is gluten-free.Continue reading →
Hi there. It was homemade vegetable stock day here at Chez Roberti, so I wanted to offer a quick and easy way to make your own. Just follow along on the infographic below and you’ll be all set.
A note on salt: Traditionally, salt is not used in stock because it’s supposed to act as a base to support other flavors. By not adding salt, you control the salt content in a recipe later on. However, if you’re going to use this stock as a basic soup broth, you can add some kosher salt, if you want.
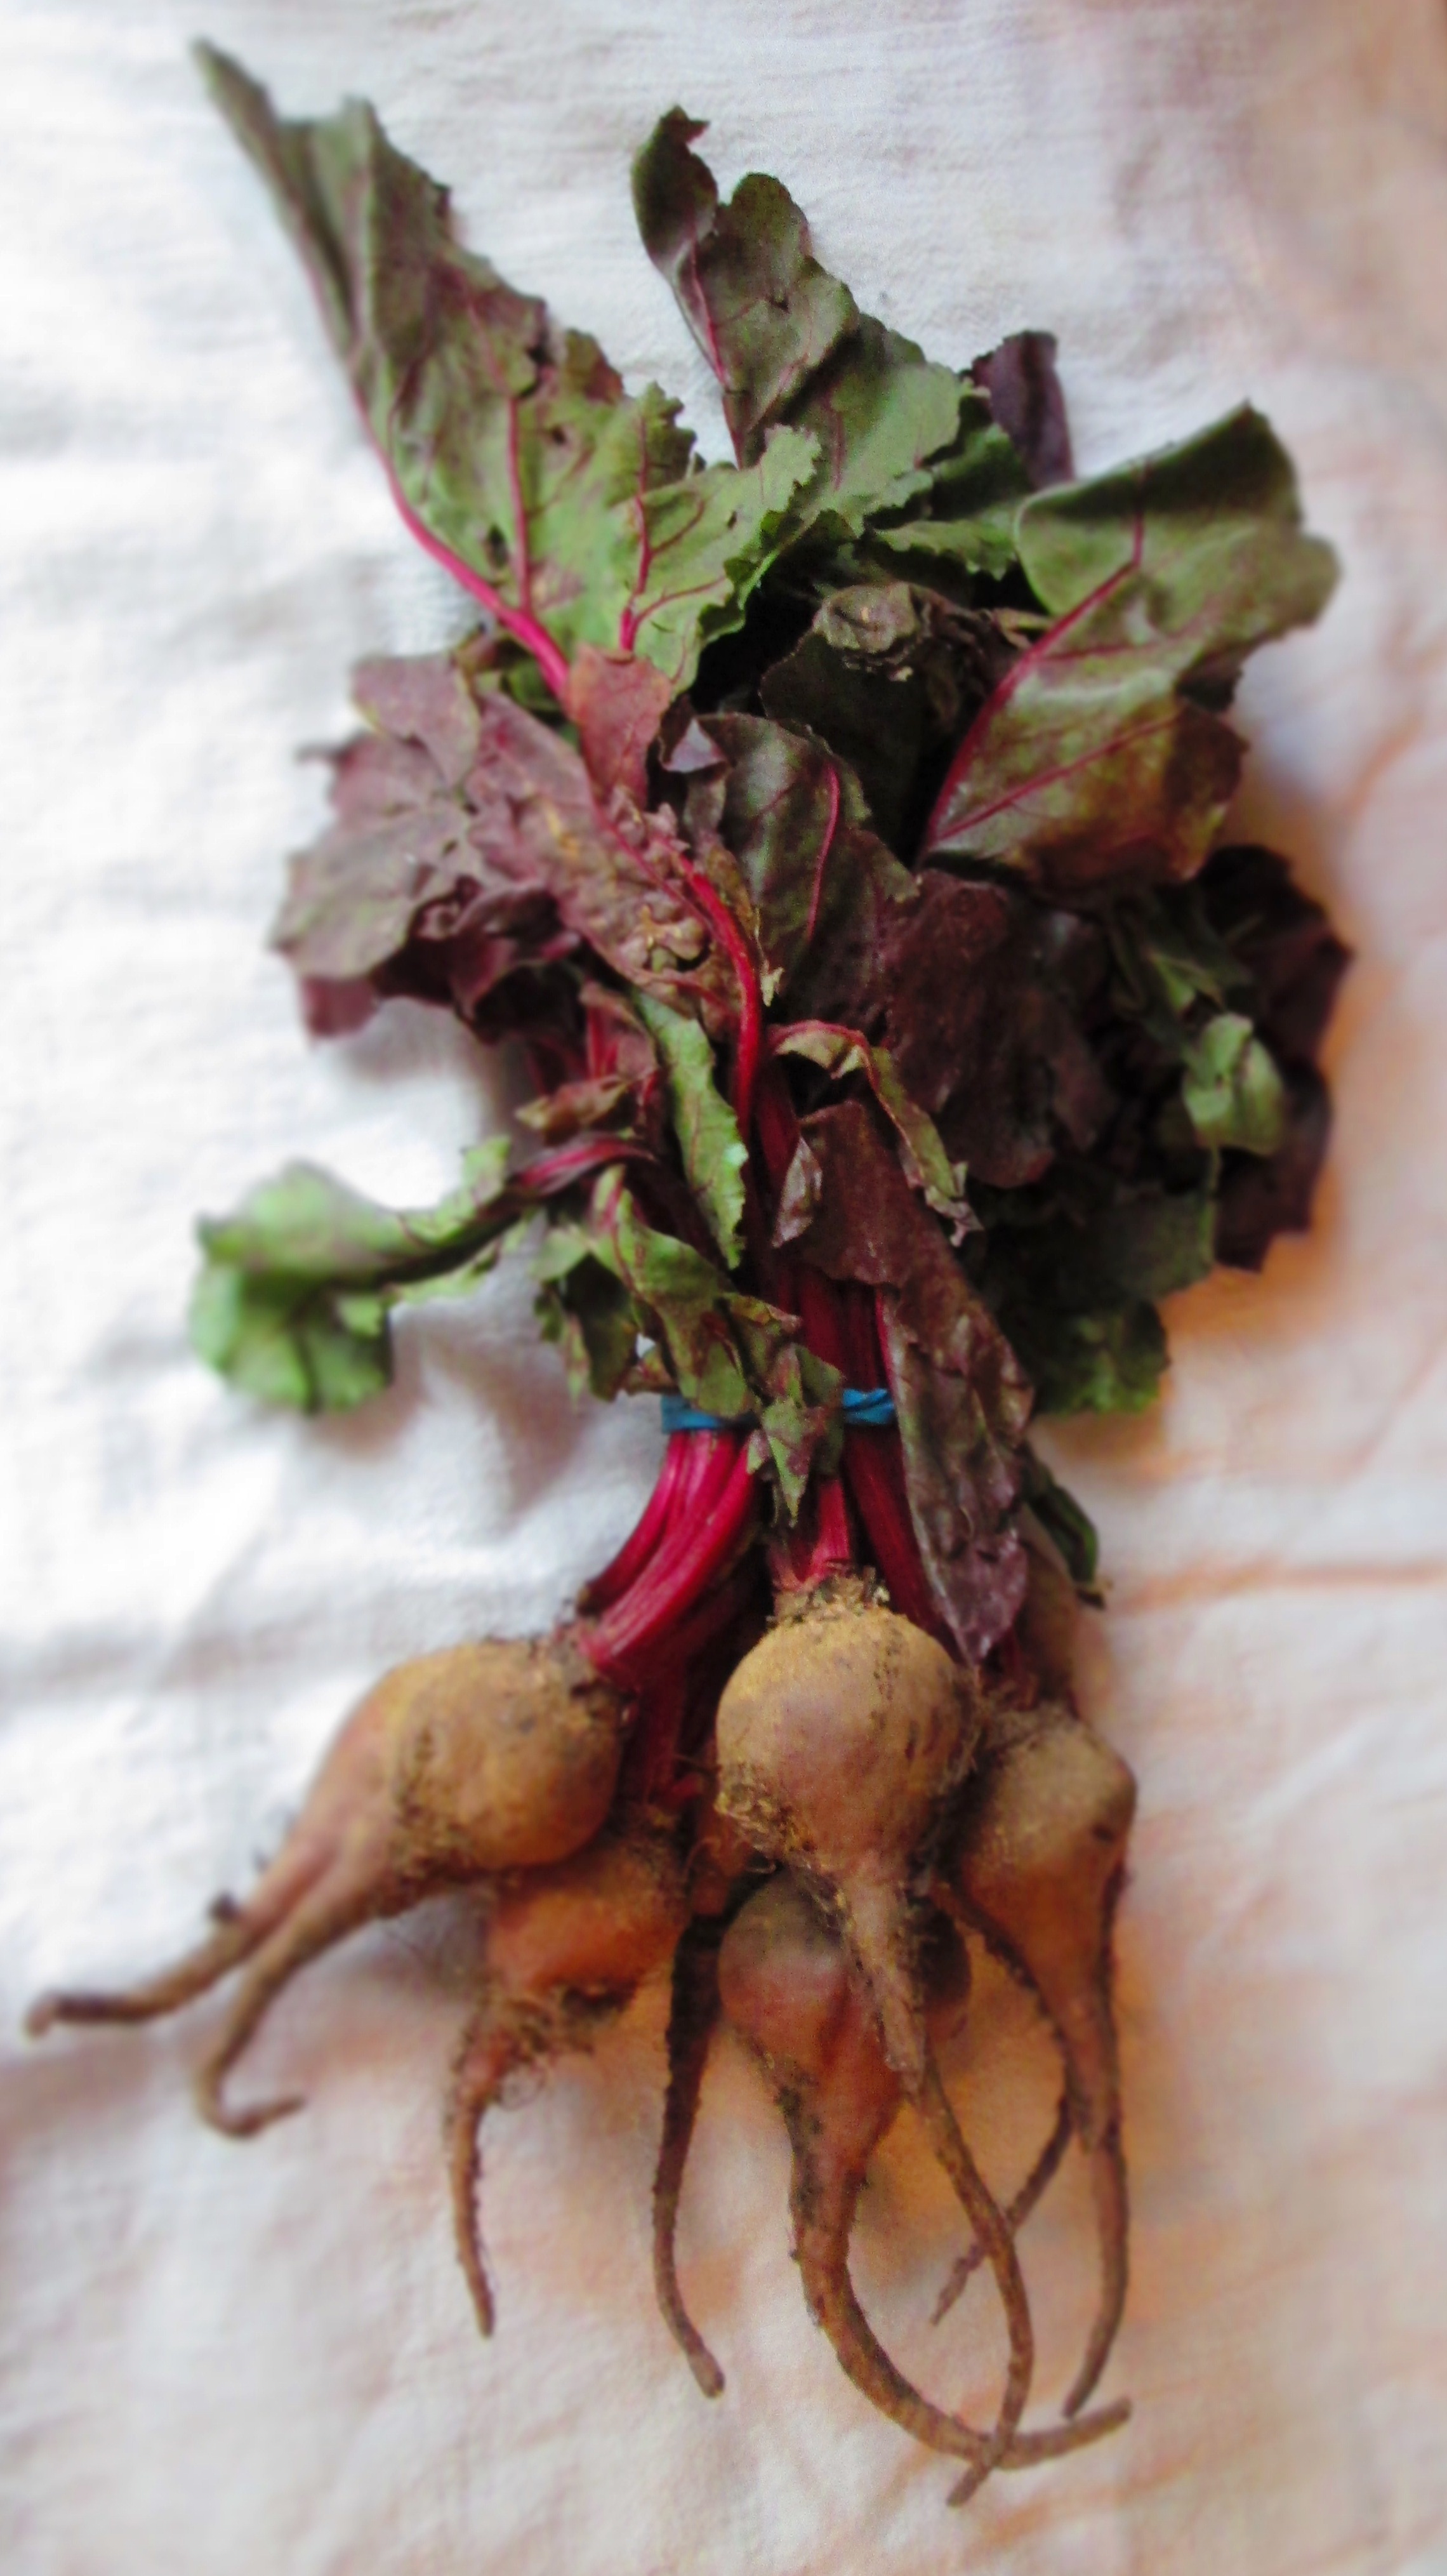
Once again, I was lured by the Siren’s song of the farmers’ market. I picked up some lettuce, some carrots, some cipolline onions. But what caught my eye this week was the box of baby beets. Gigantic red globes can be found anywhere, but baby beets are not quite as easily found. At least not for me. So I pounced on them.
When I was doing my internship at the James Beard House, I worked with different chefs each week. One week, I worked with the crew from Blackberry Farm in North Carolina. They did a plate of roasted baby beets that were like sparkling jewels. And the memory of those little gems is what inspired me to make this recipe.
Cauliflower steak is a mainstay of many vegetarian and vegan restaurants. I think it’s because once you’ve worked your way through a big slab of cauliflower, you find yourself full and satisfied. Don’t get me wrong, I’m not claiming that a cauliflower steak gives the same feeling of satisfaction that of a regular steak or that it’s a comparable substitute in any way, but for vegetarians, it’s a hearty and delicious option.
Yeah, that would be MY bar. It’s a cart in the corner of my dining room loaded up with various alcoholic delights. Don’t judge me.
Anyway, we hit a little cool snap here last week on the East Coast and suddenly people with gardens found themselves having to make some quick decisions about their remaining vegetables. My parents still had a garden full of tomatoes that had to be taken in.
There’s no better opportunity to make fried green tomatoes.
Although fried green tomatoes are associated with the American South, according to an article on Smithsonian.com and this article from Bon Appetit, they’re actually from the North and Midwest, possibly of Ashkenazi Jewish origins. But the use of cornmeal is probably a Southern contribution to the dish, and I think that the flavor and texture of the cornmeal are what makes the tomatoes so tasty and unique.
Fried green tomatoes are really easy to make and can be flavored with whatever spices you like.
Enjoy!
Fried Green Tomatoes
1½ pounds green tomatoes 1 medium egg 2 teaspoons milk (any kind) ¾ cup cornmeal 1 teaspoon garlic powder
1 teaspoon paprika
1 teaspoon kosher salt freshly ground pepper to taste Coconut oil
Line a large plate with paper towels and place it by the stove.
Slice the tomatoes into ½-inch-thick slices.Beat the egg with the milk in a medium bowl. Combine the cornmeal, garlic powder, paprika, salt, and pepper on platter. Place a few of the tomato slices in the egg and coat both sides. Then put them in the cornmeal and coat both sides.Heat about ½ inch oil. Gently shake off excess cornmeal from the tomato slices and place them in the oil. Fry, flipping them over once, until golden brown on both sides, about 3 or 4 minutes per side. Transfer to the paper towels.
Repeat with the remaining tomatoes. Replenish the oil in the pan as needed.
Serve with a creamy dressing, sour cream, or salsa.
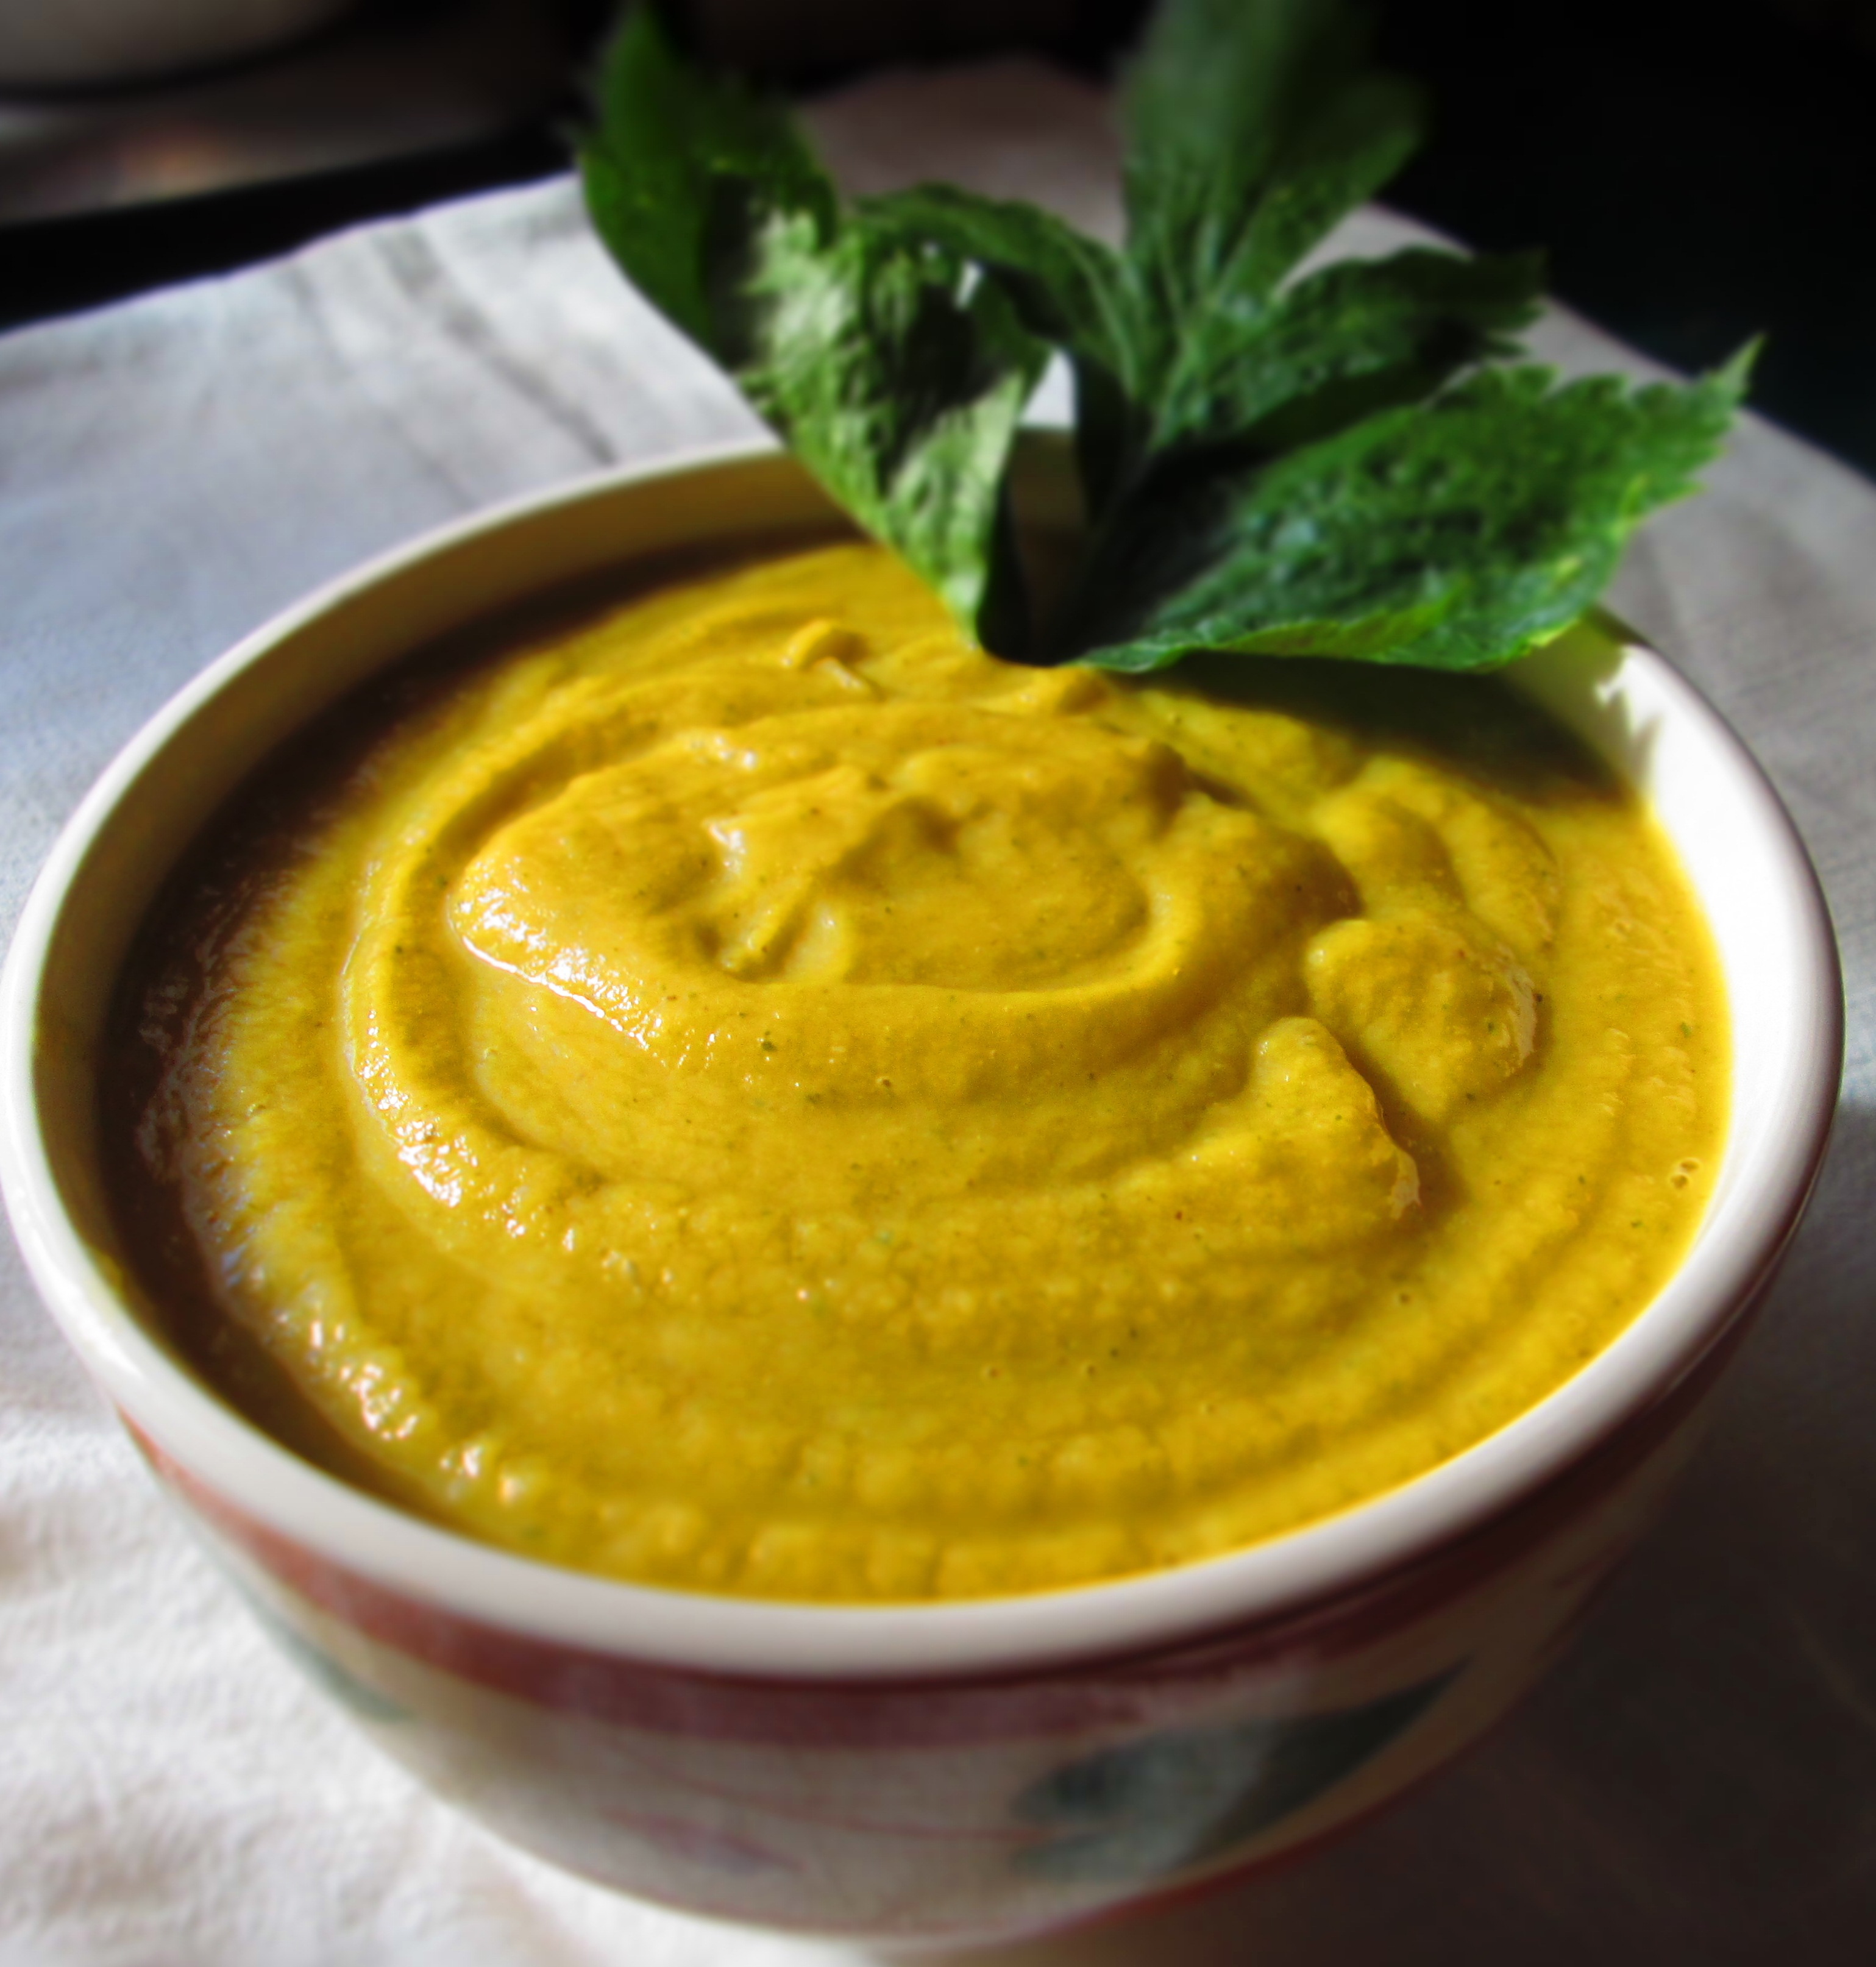
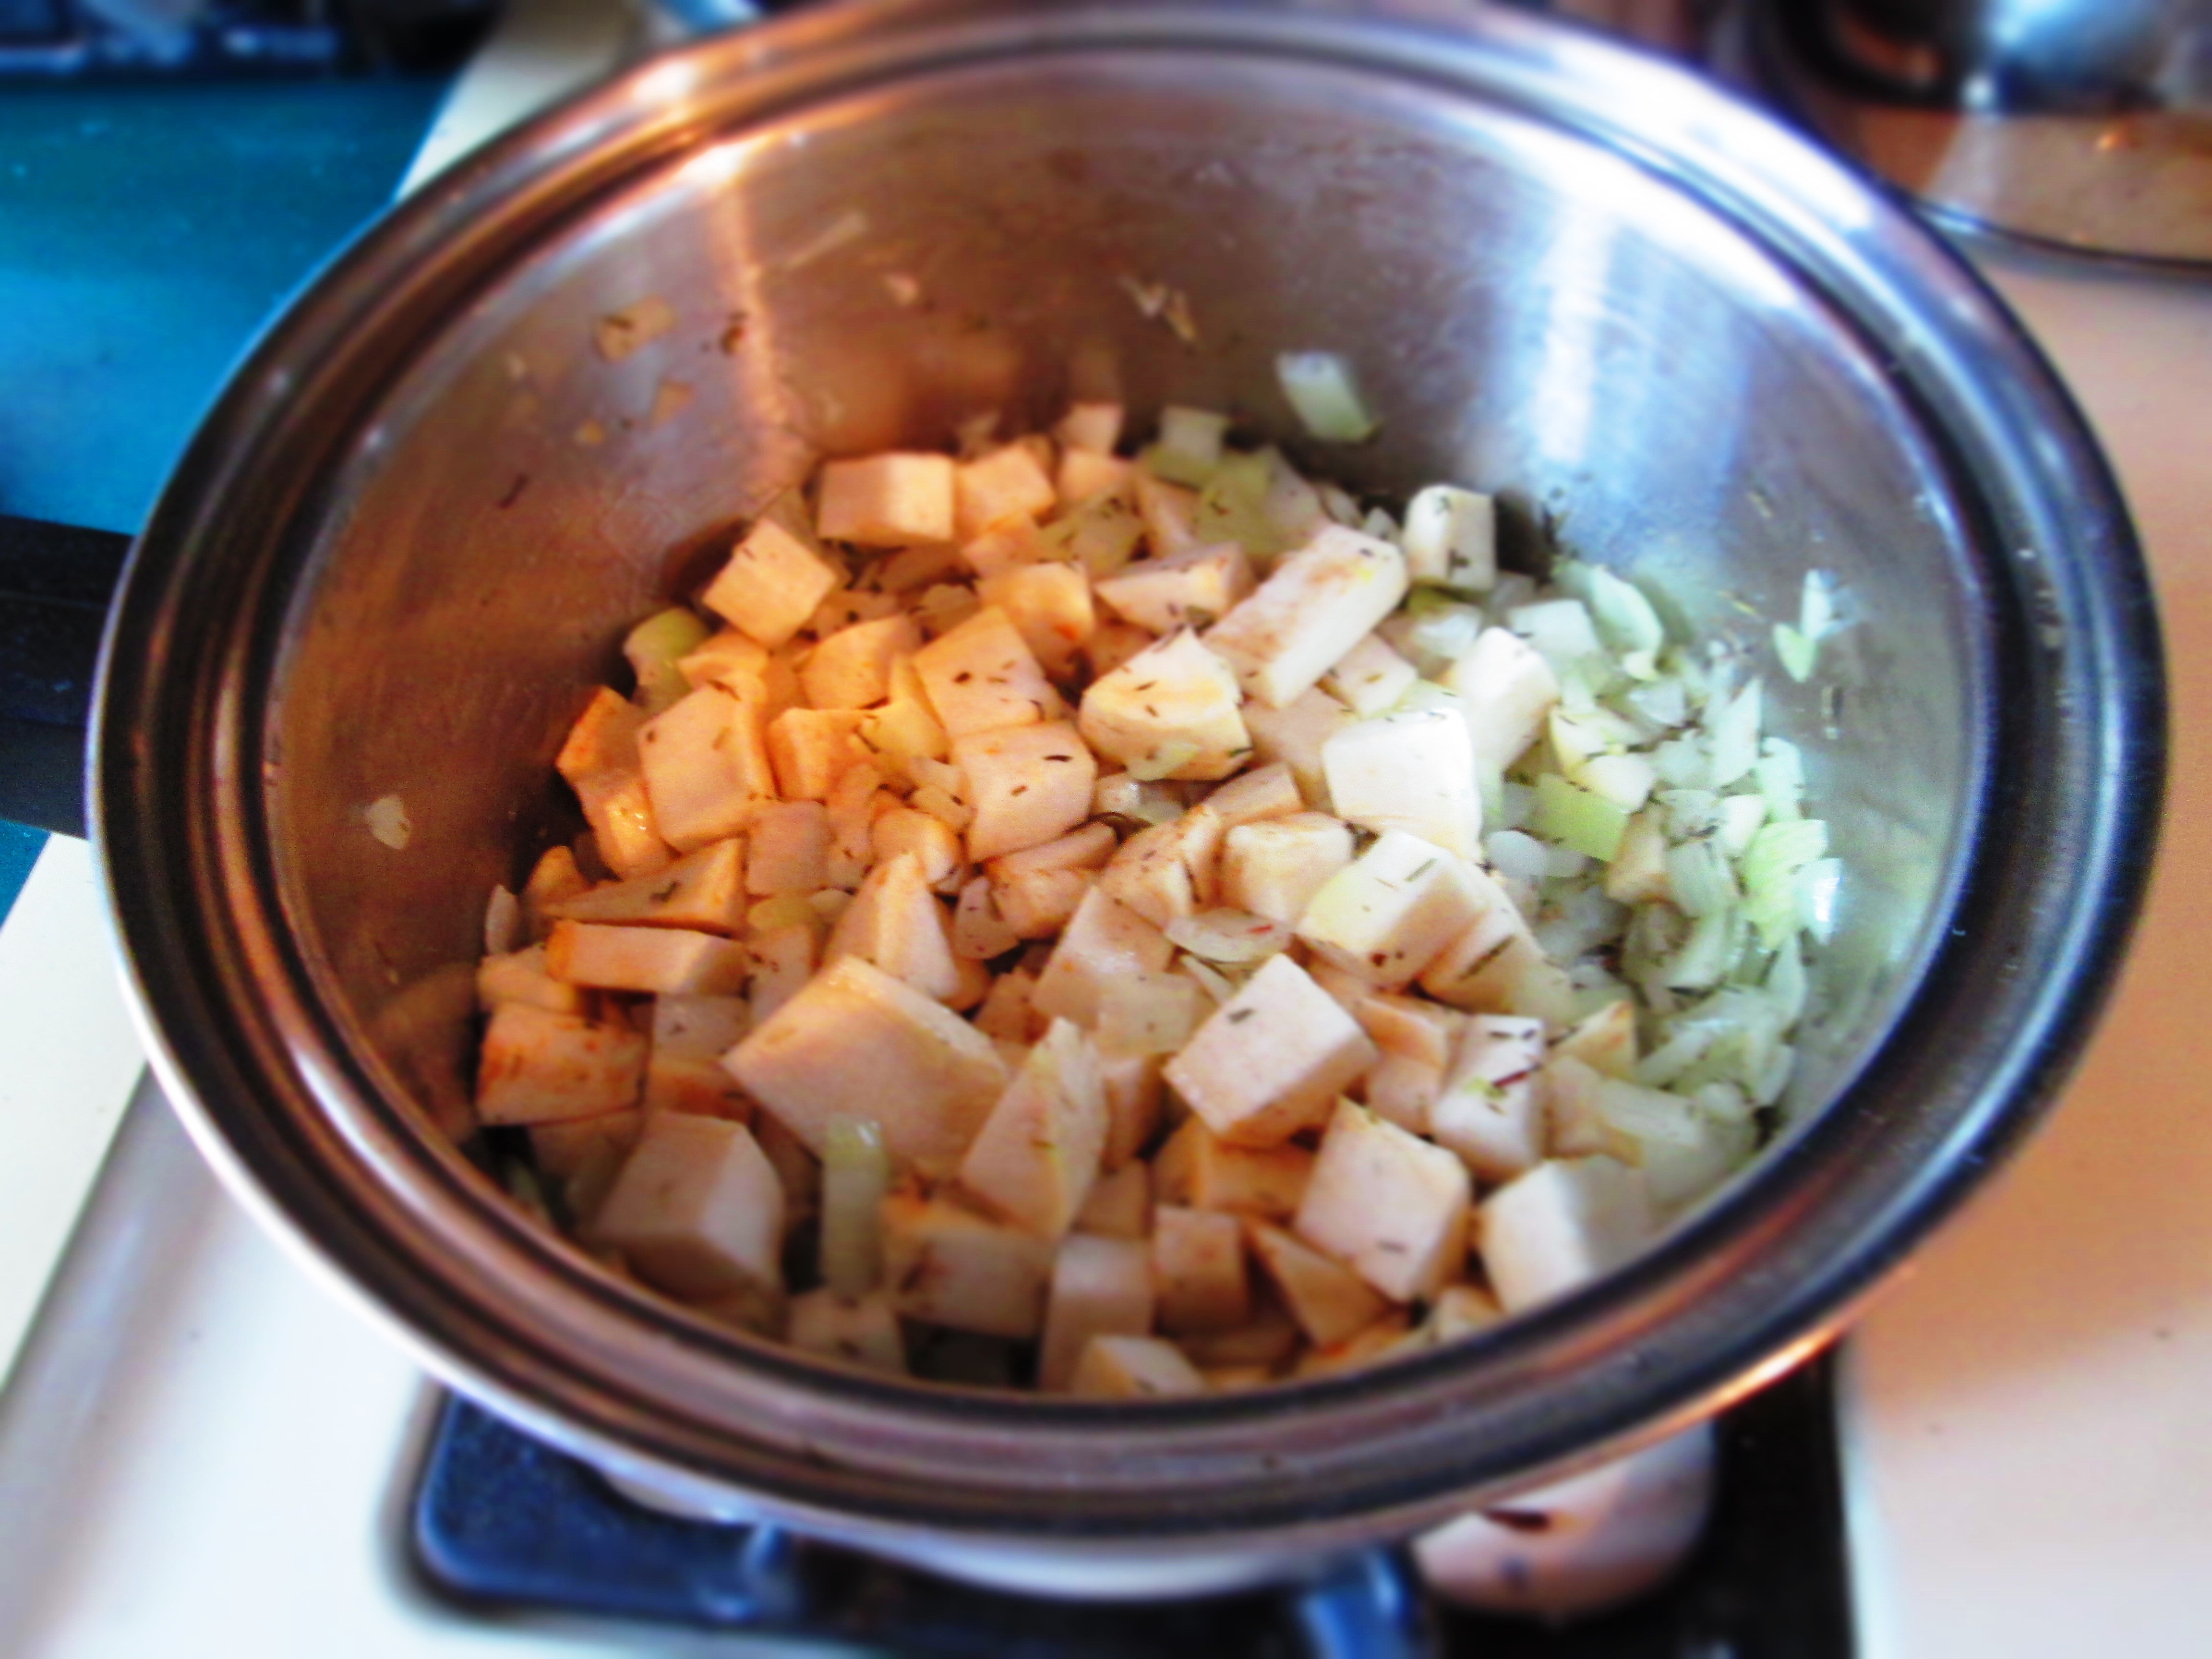
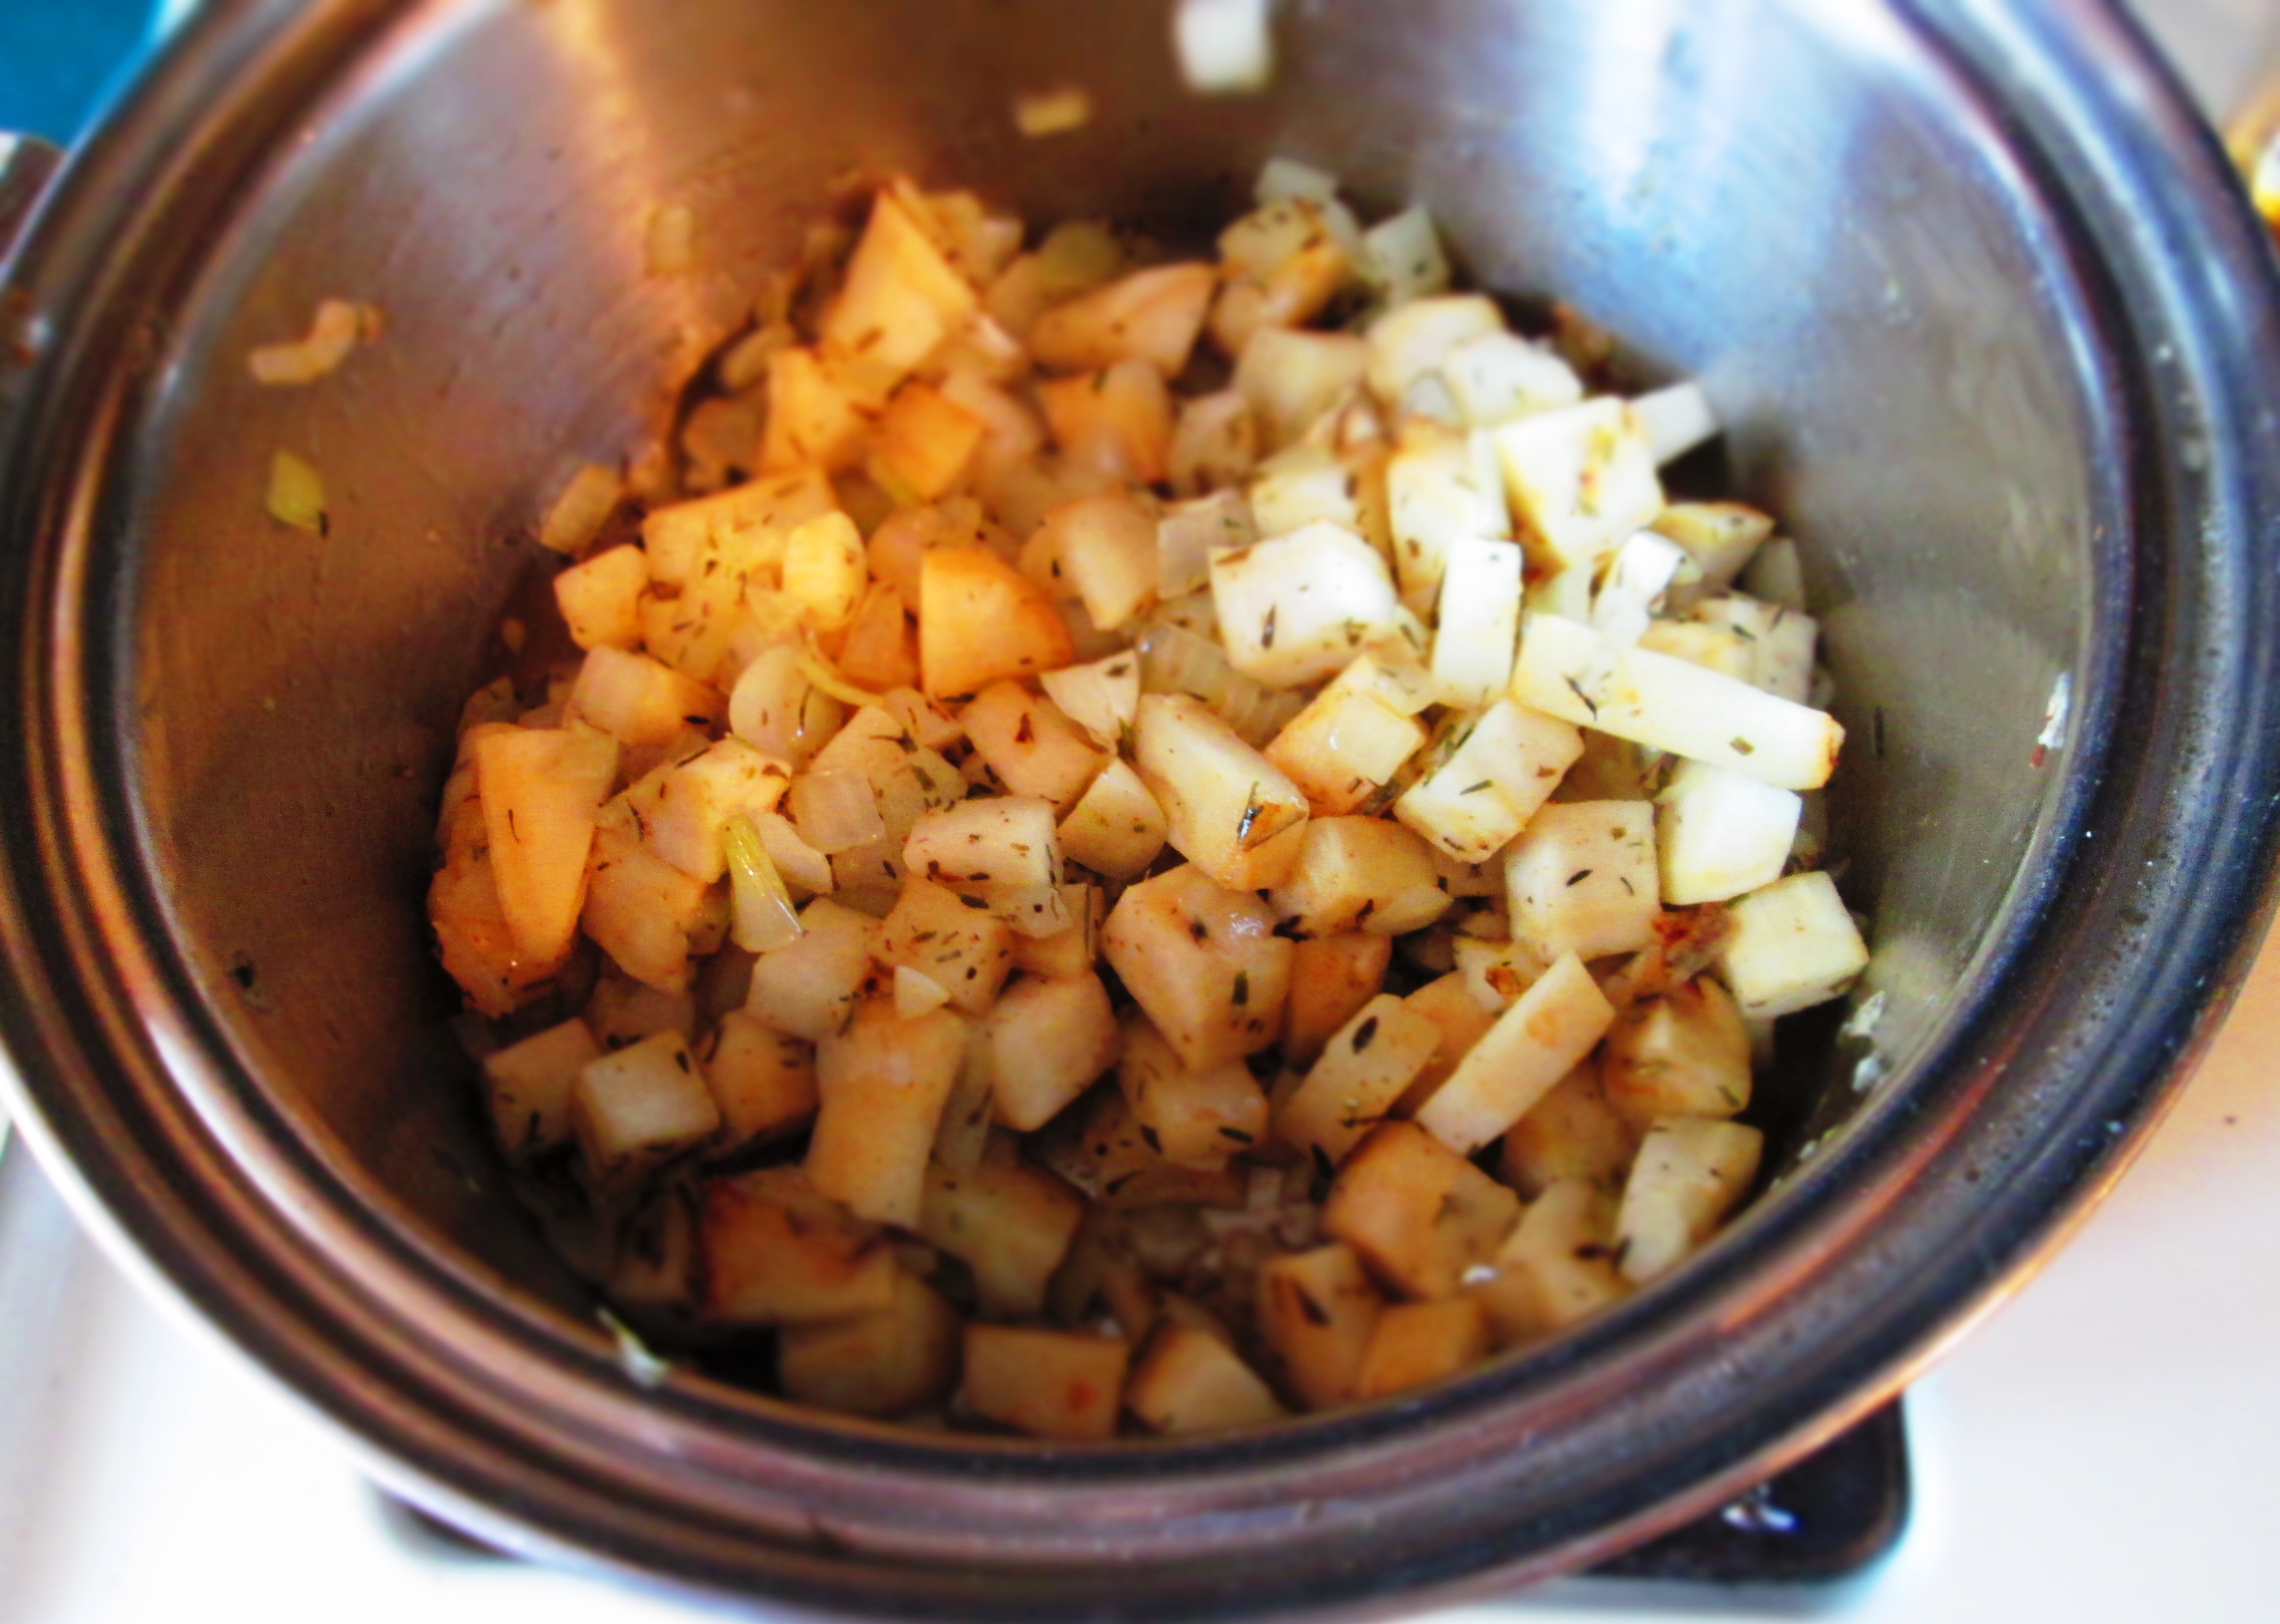
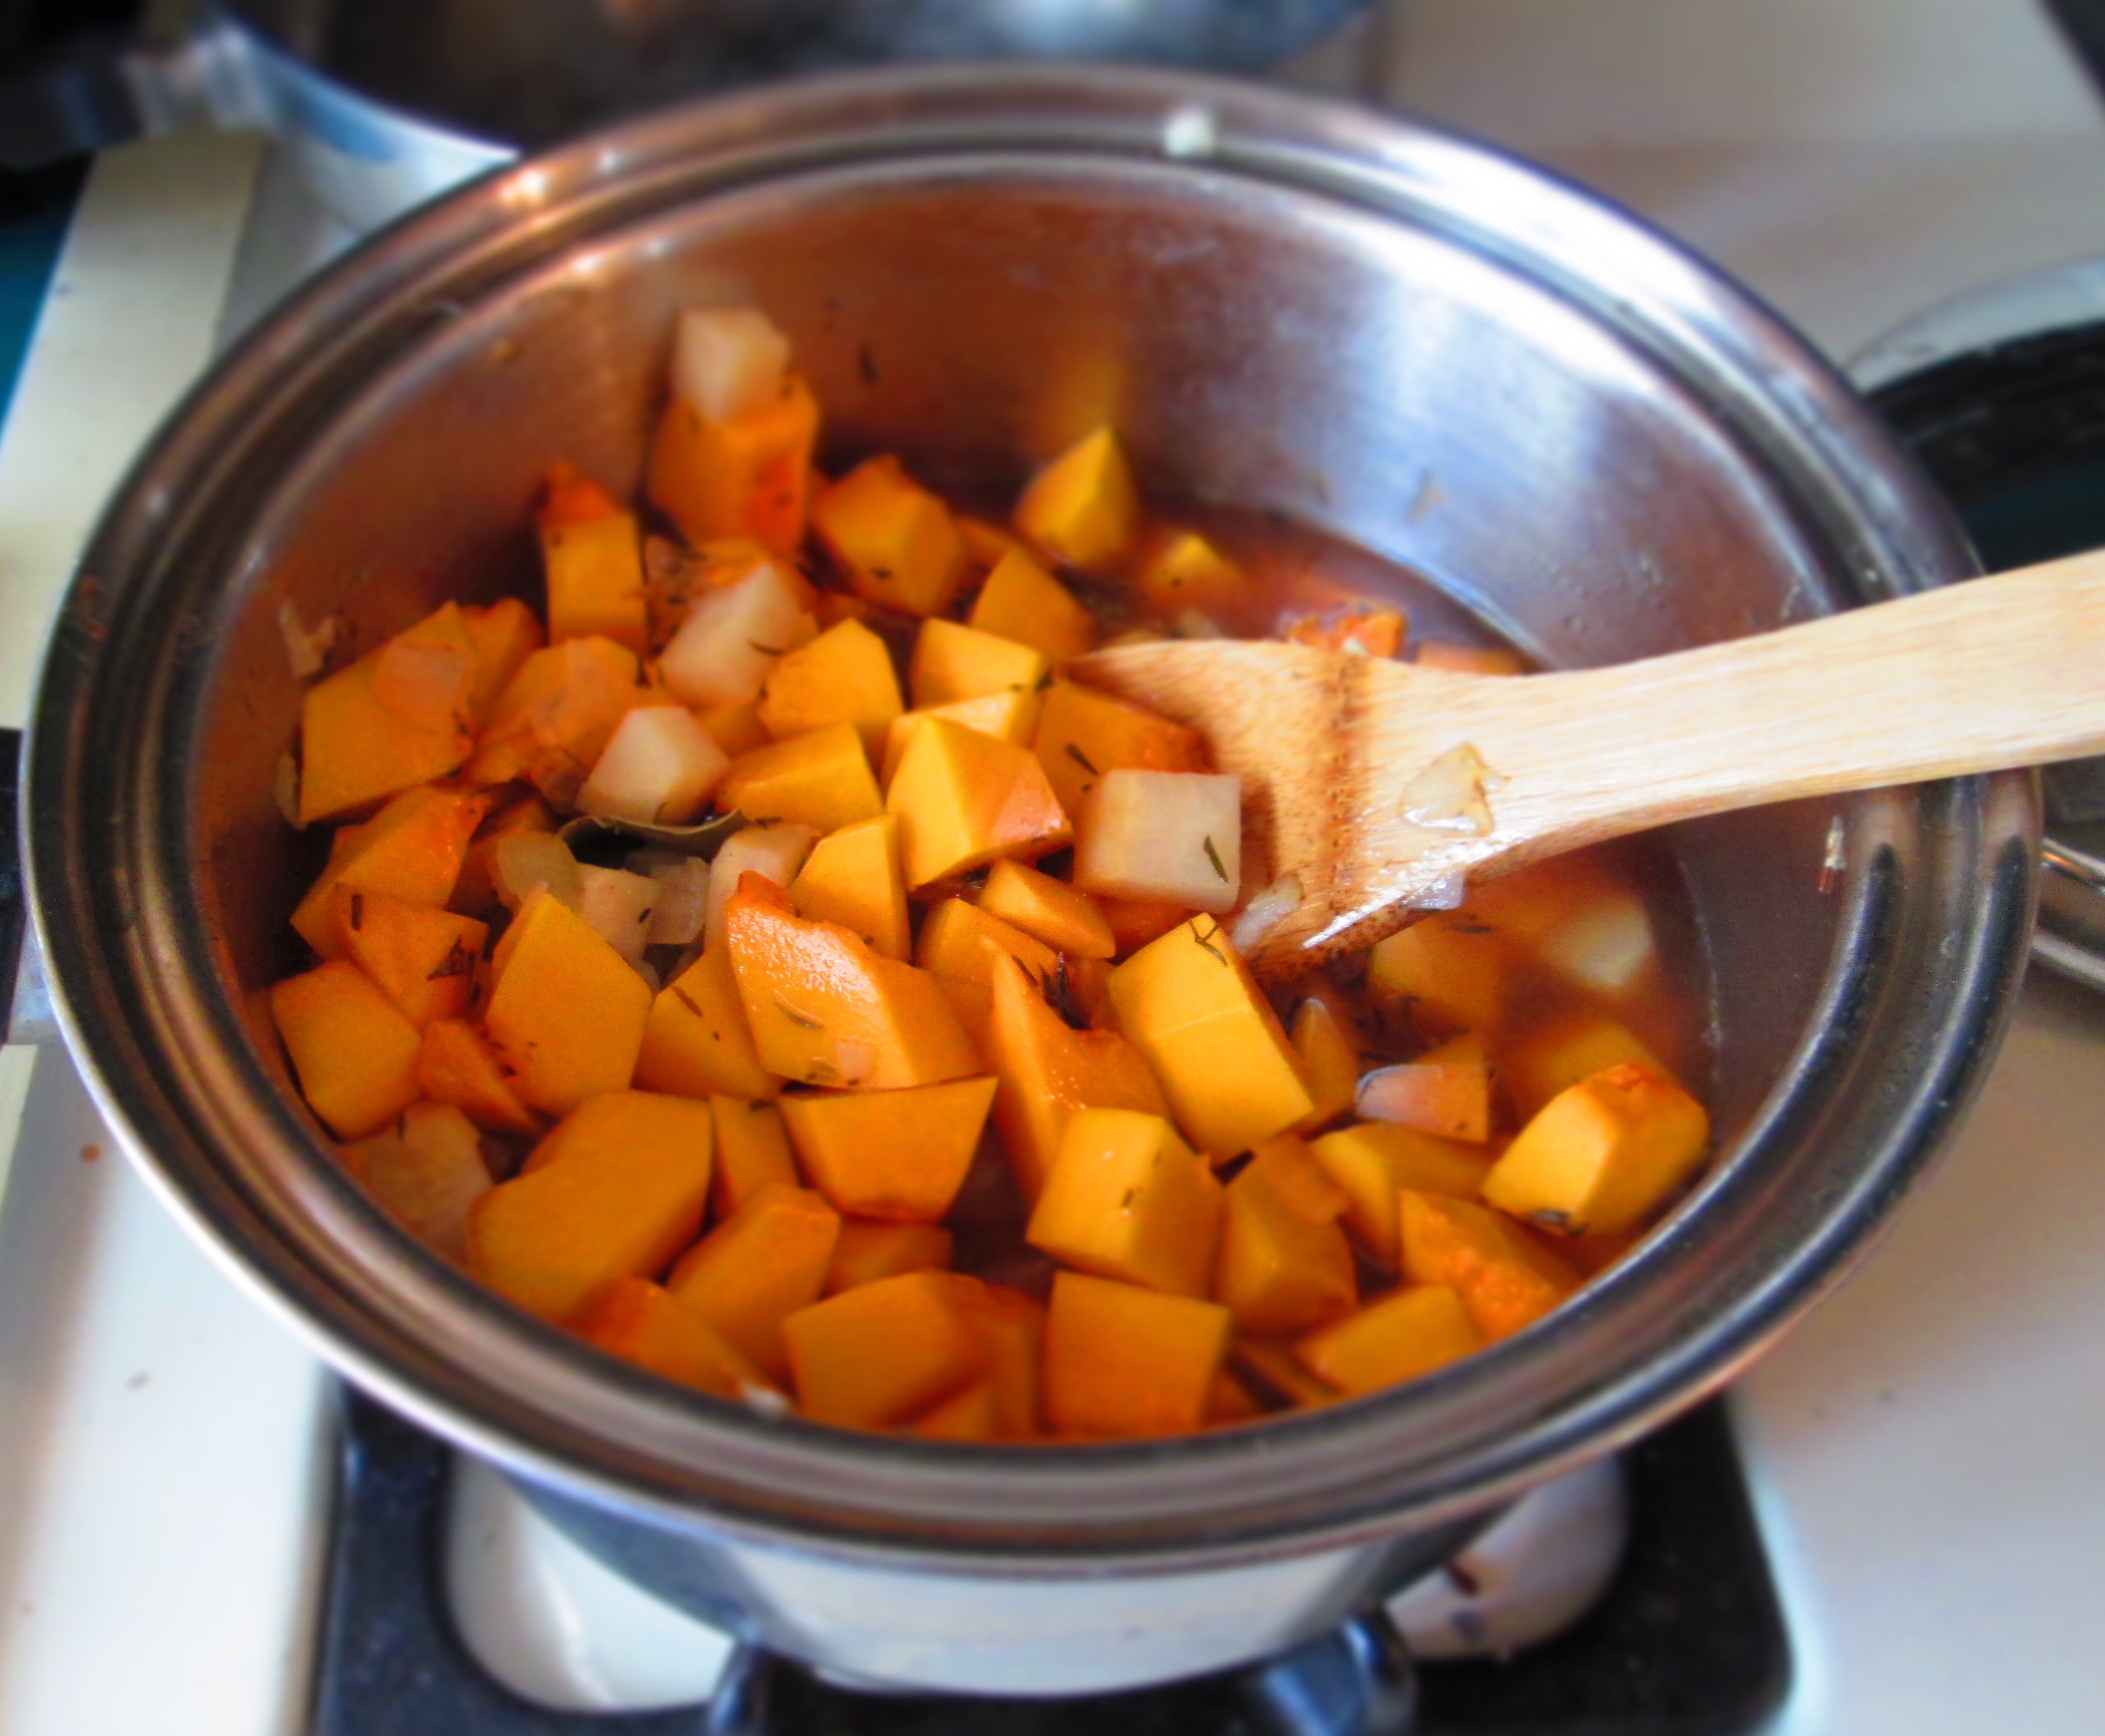
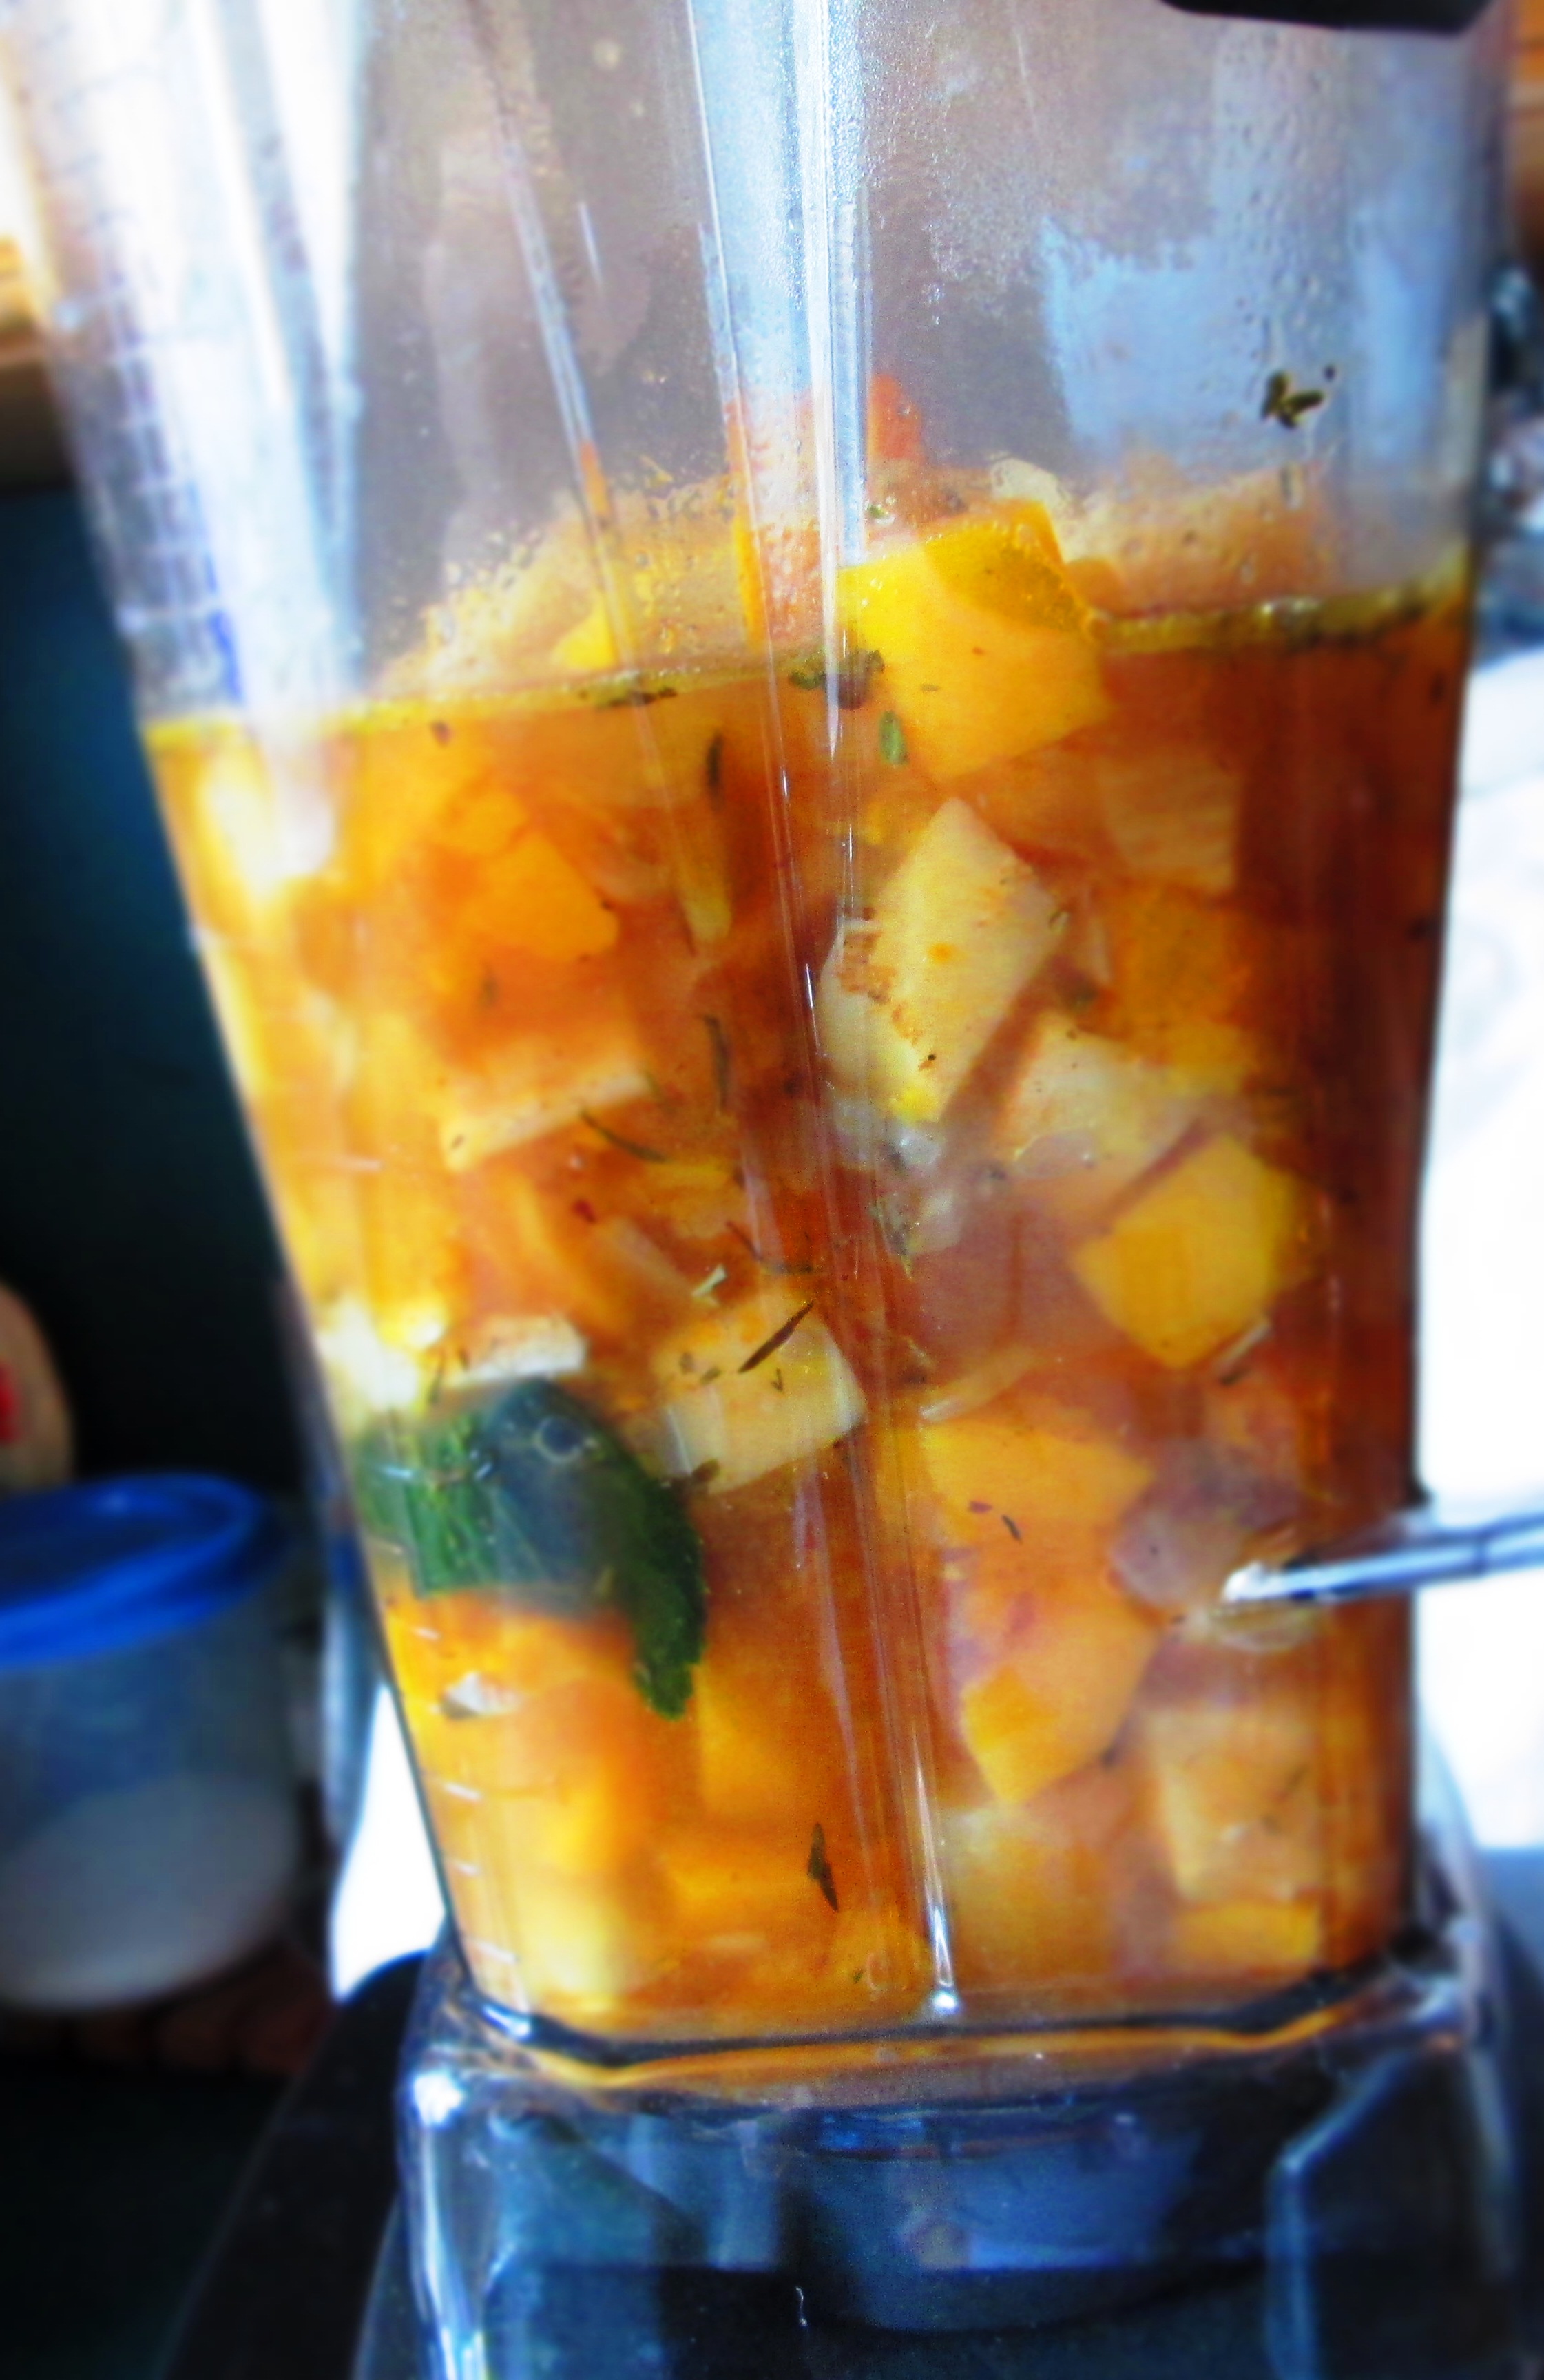
My parents’ garden comes up with great stuff every year. This season, they got butternut squash, and I took a cute little one for myself. The farmers’ market had great-looking parsnips, so I decided to make parsnip-butternut soup.
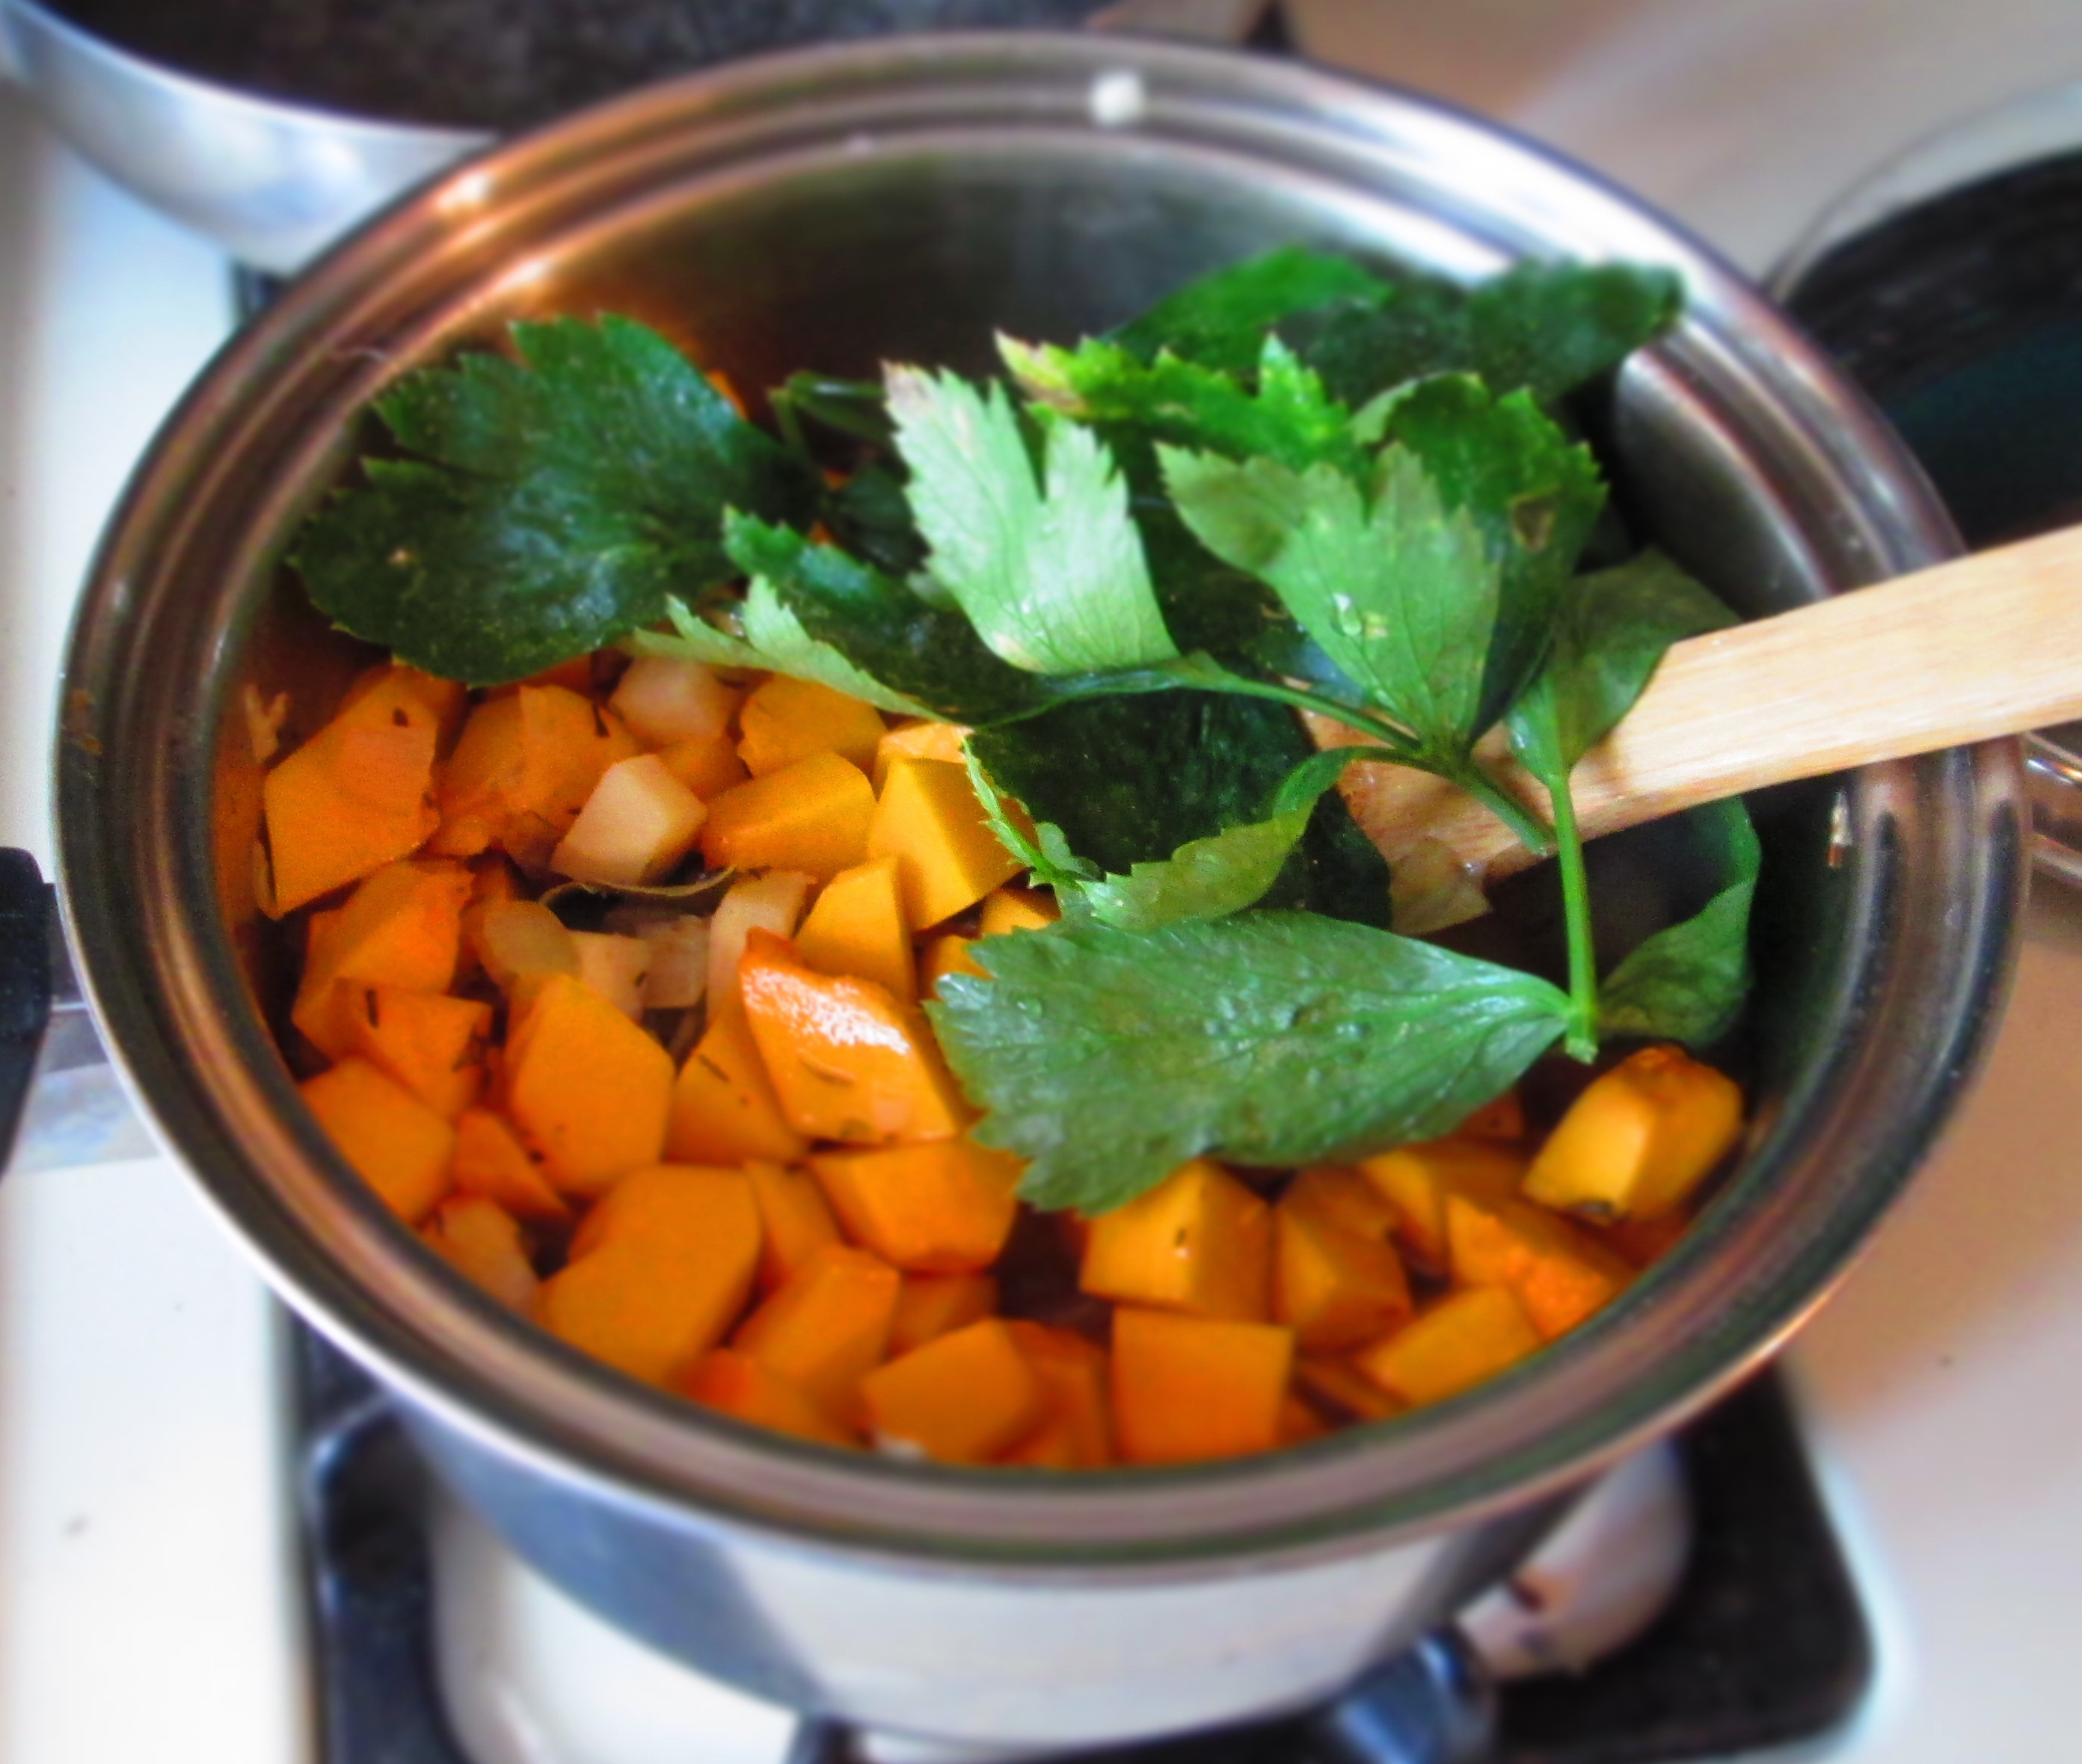
Because it’s October and I don’t have any fresh herbs left my garden, I turned to my dried herbs. You can use whatever dried herbs you have on hand or particularly like for soup. I used thyme and savory.
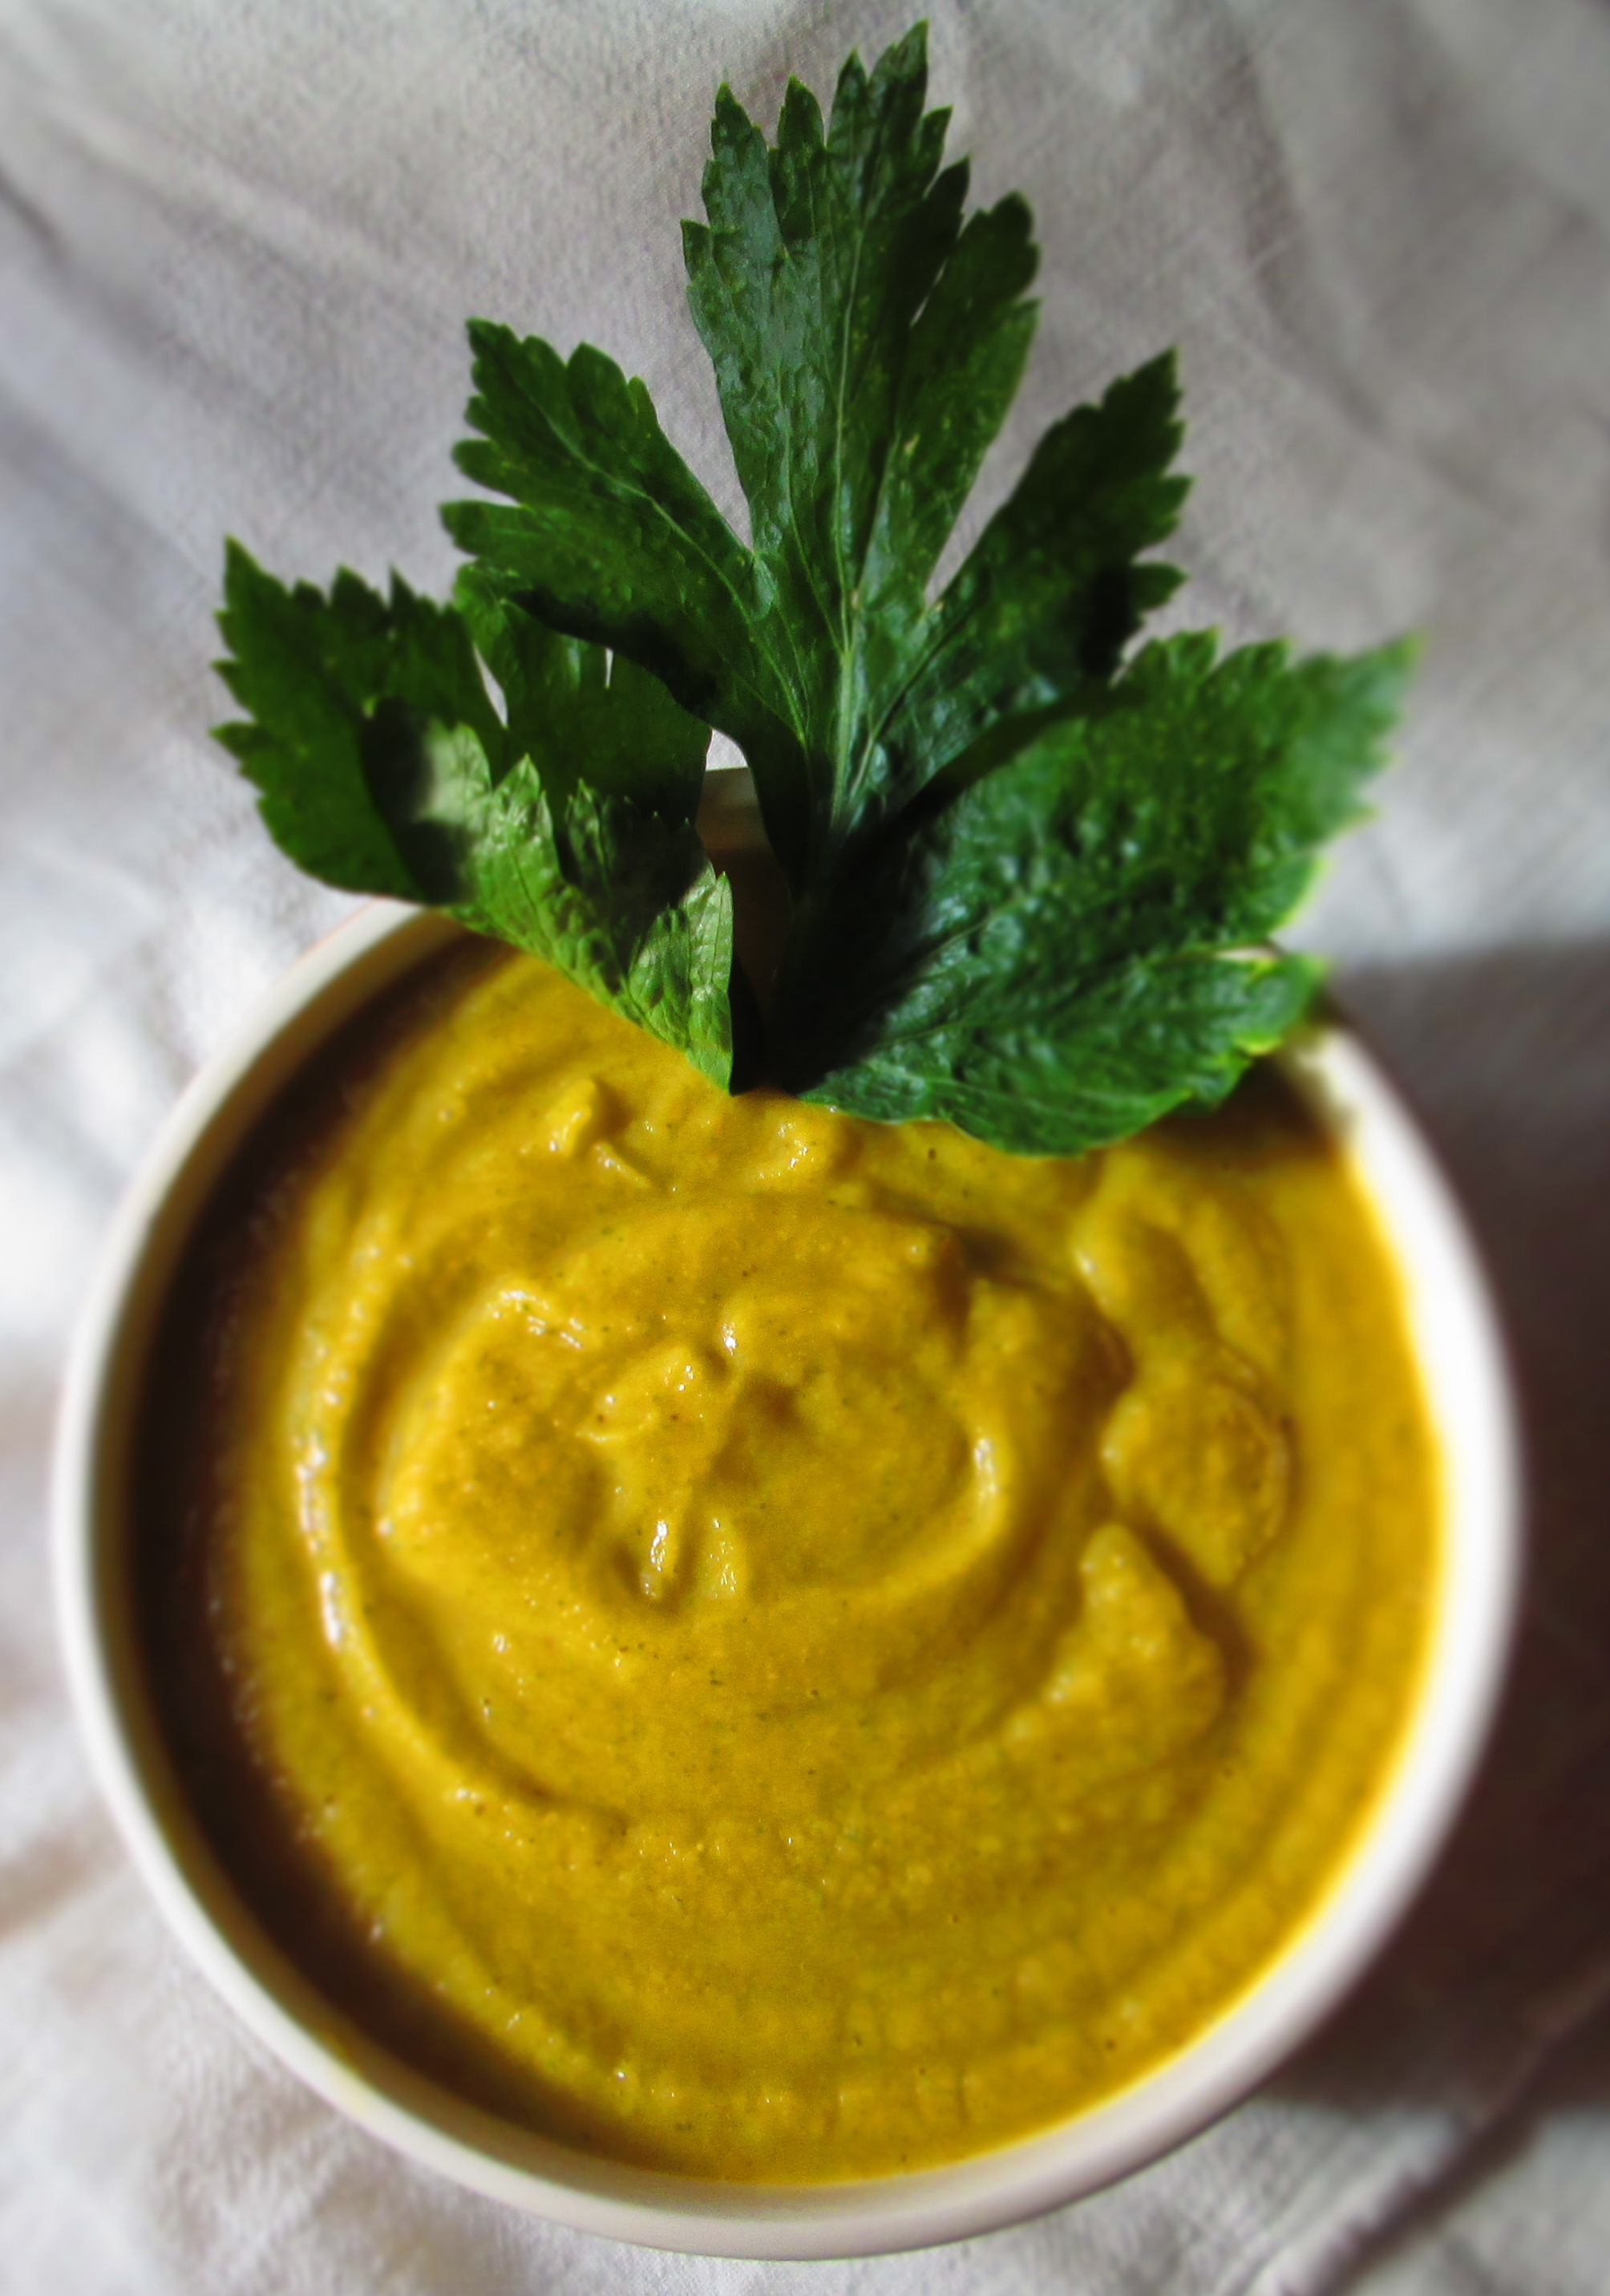
Also growing in my parents’ garden is celery. But it’s a kind of wild celery—in fact, it’s probably lovage, a relative of celery that has big leaves and small, thin stalks. I put some of these leaves into the soup and pureed everything together. It unexpectedly turned my soup green, so it kind of looks like split-pea soup. If I hadn’t done that, I would have ended up with something that looks more like typical butternut squash soup.
Regardless, it’s delicious. The parsnips give the soup an earthy tone, while the squash sweetens it up. It was just what I needed on a brisk autumn day. You can have it with croutons or chopped walnuts or little cooked cubes of butternut.
Give it a try. Enjoy!
Parsnip-Butternut Soup
Makes 4 servings.
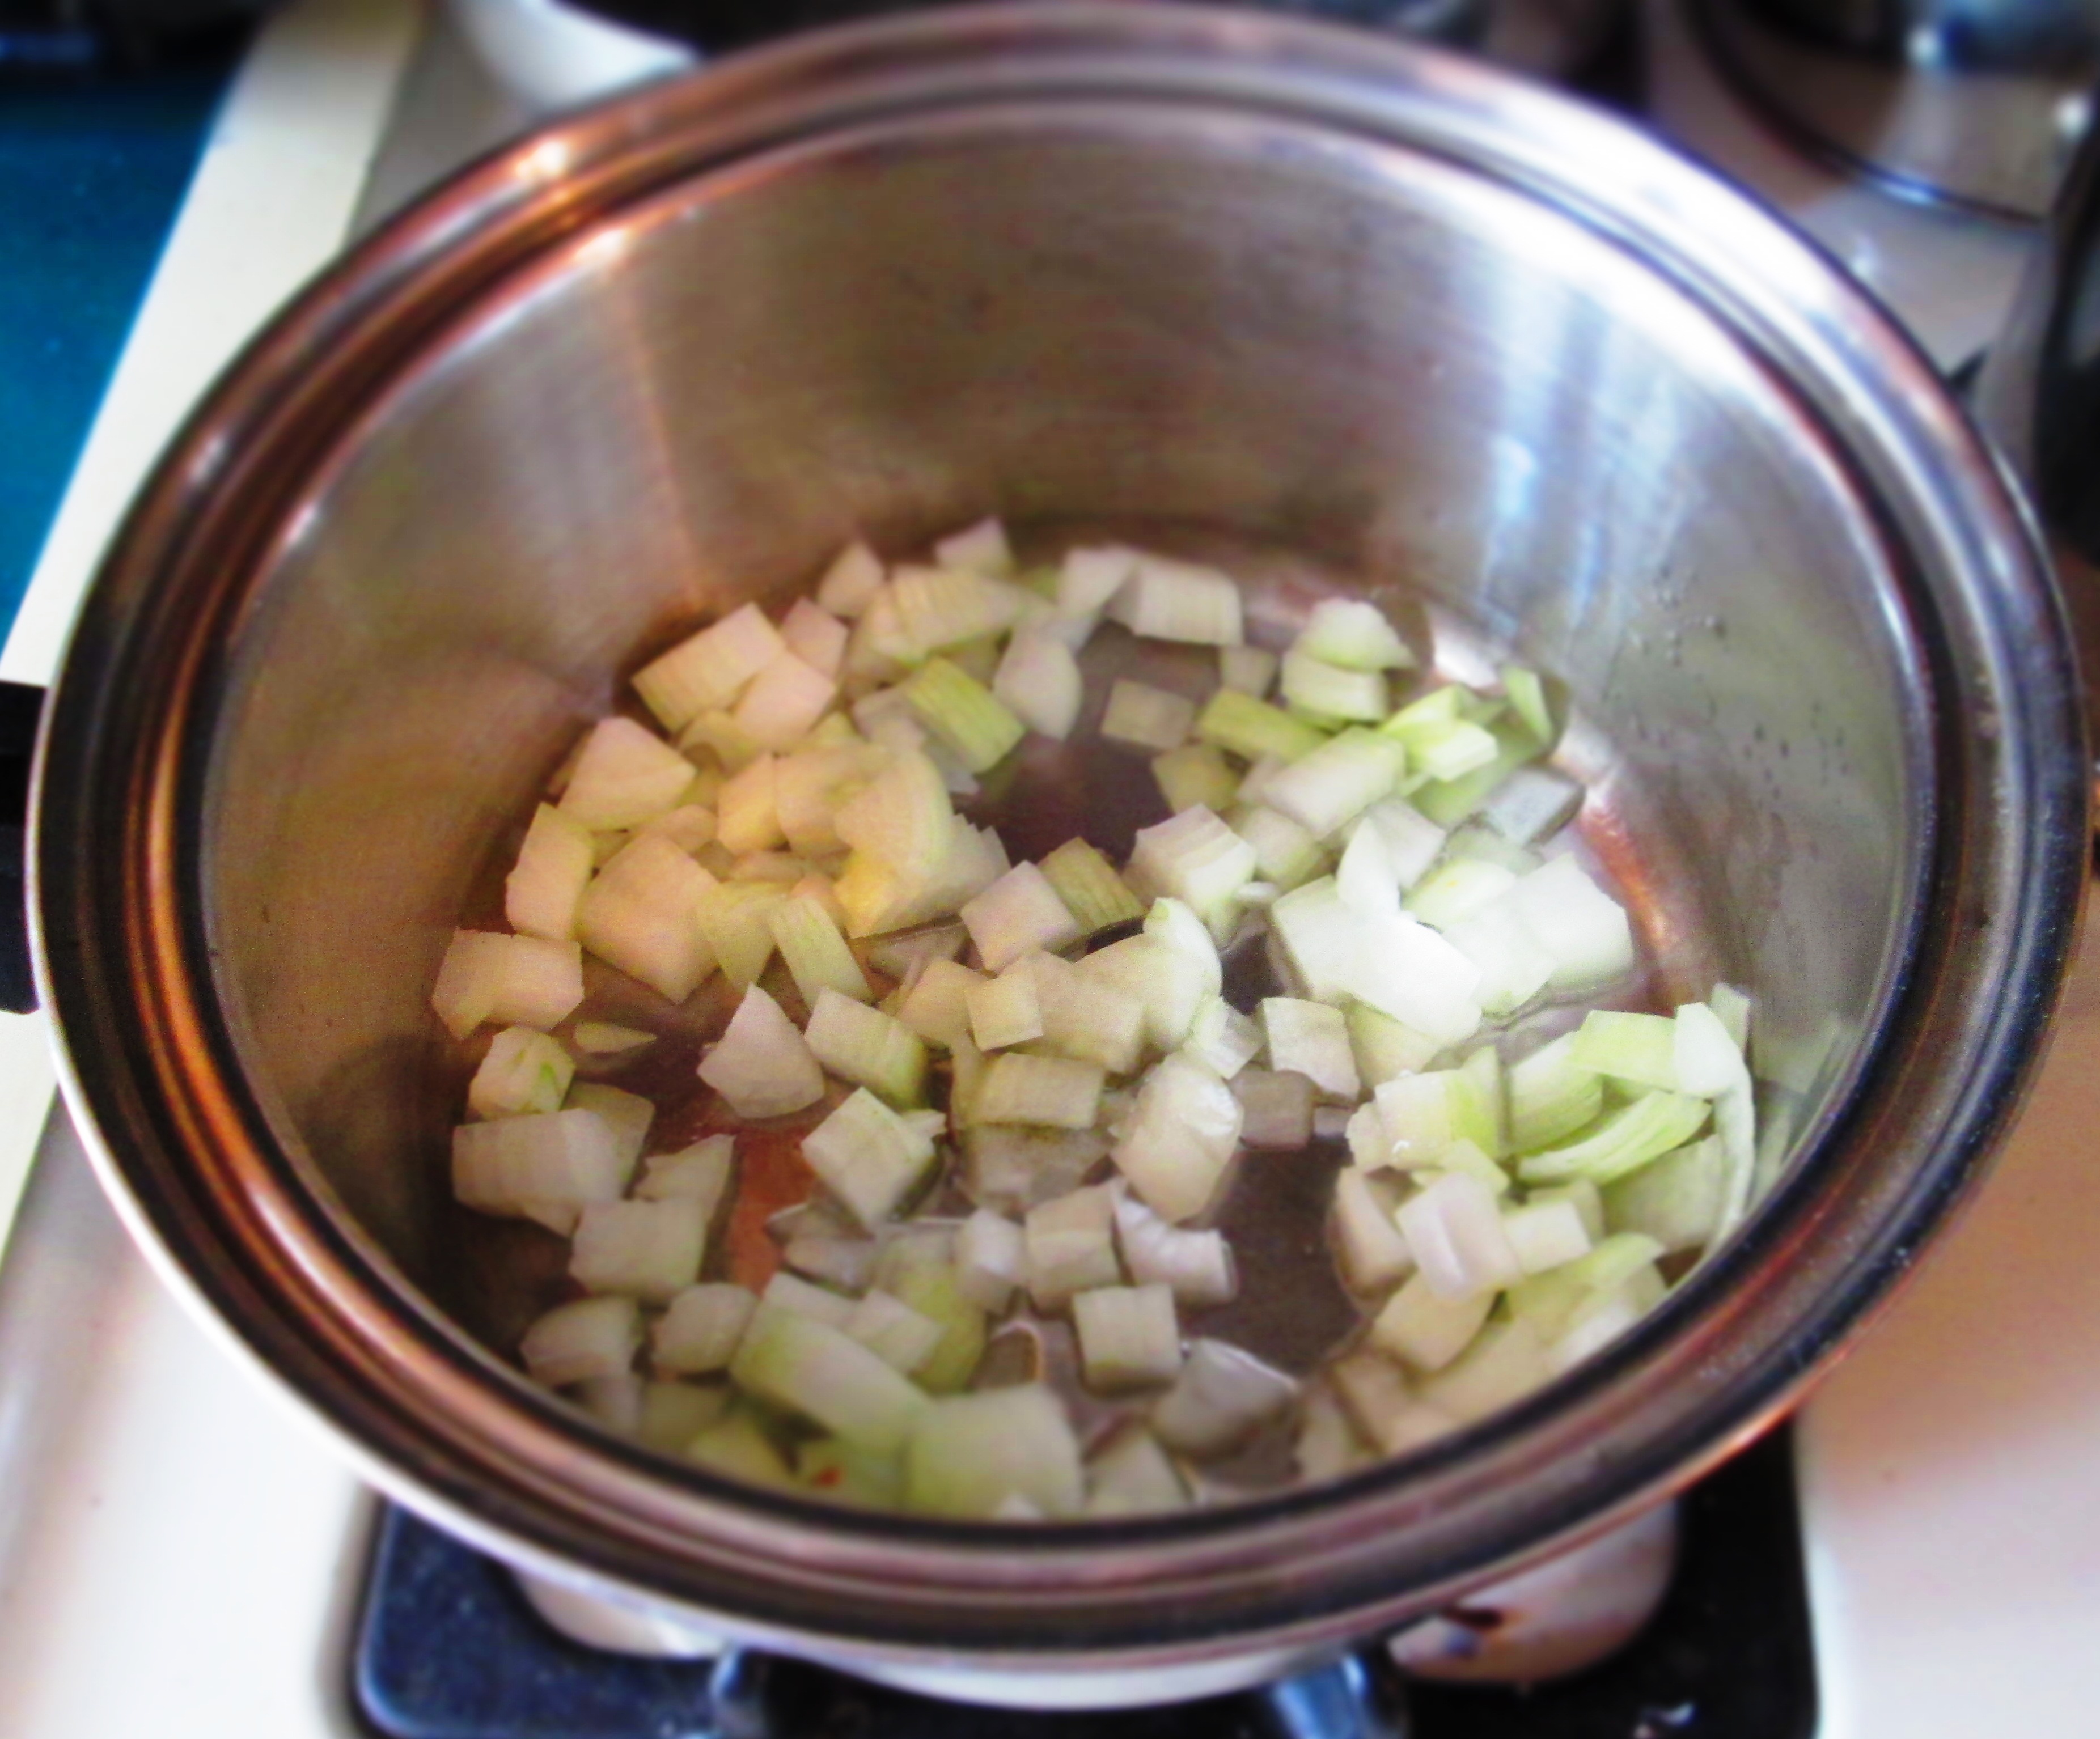
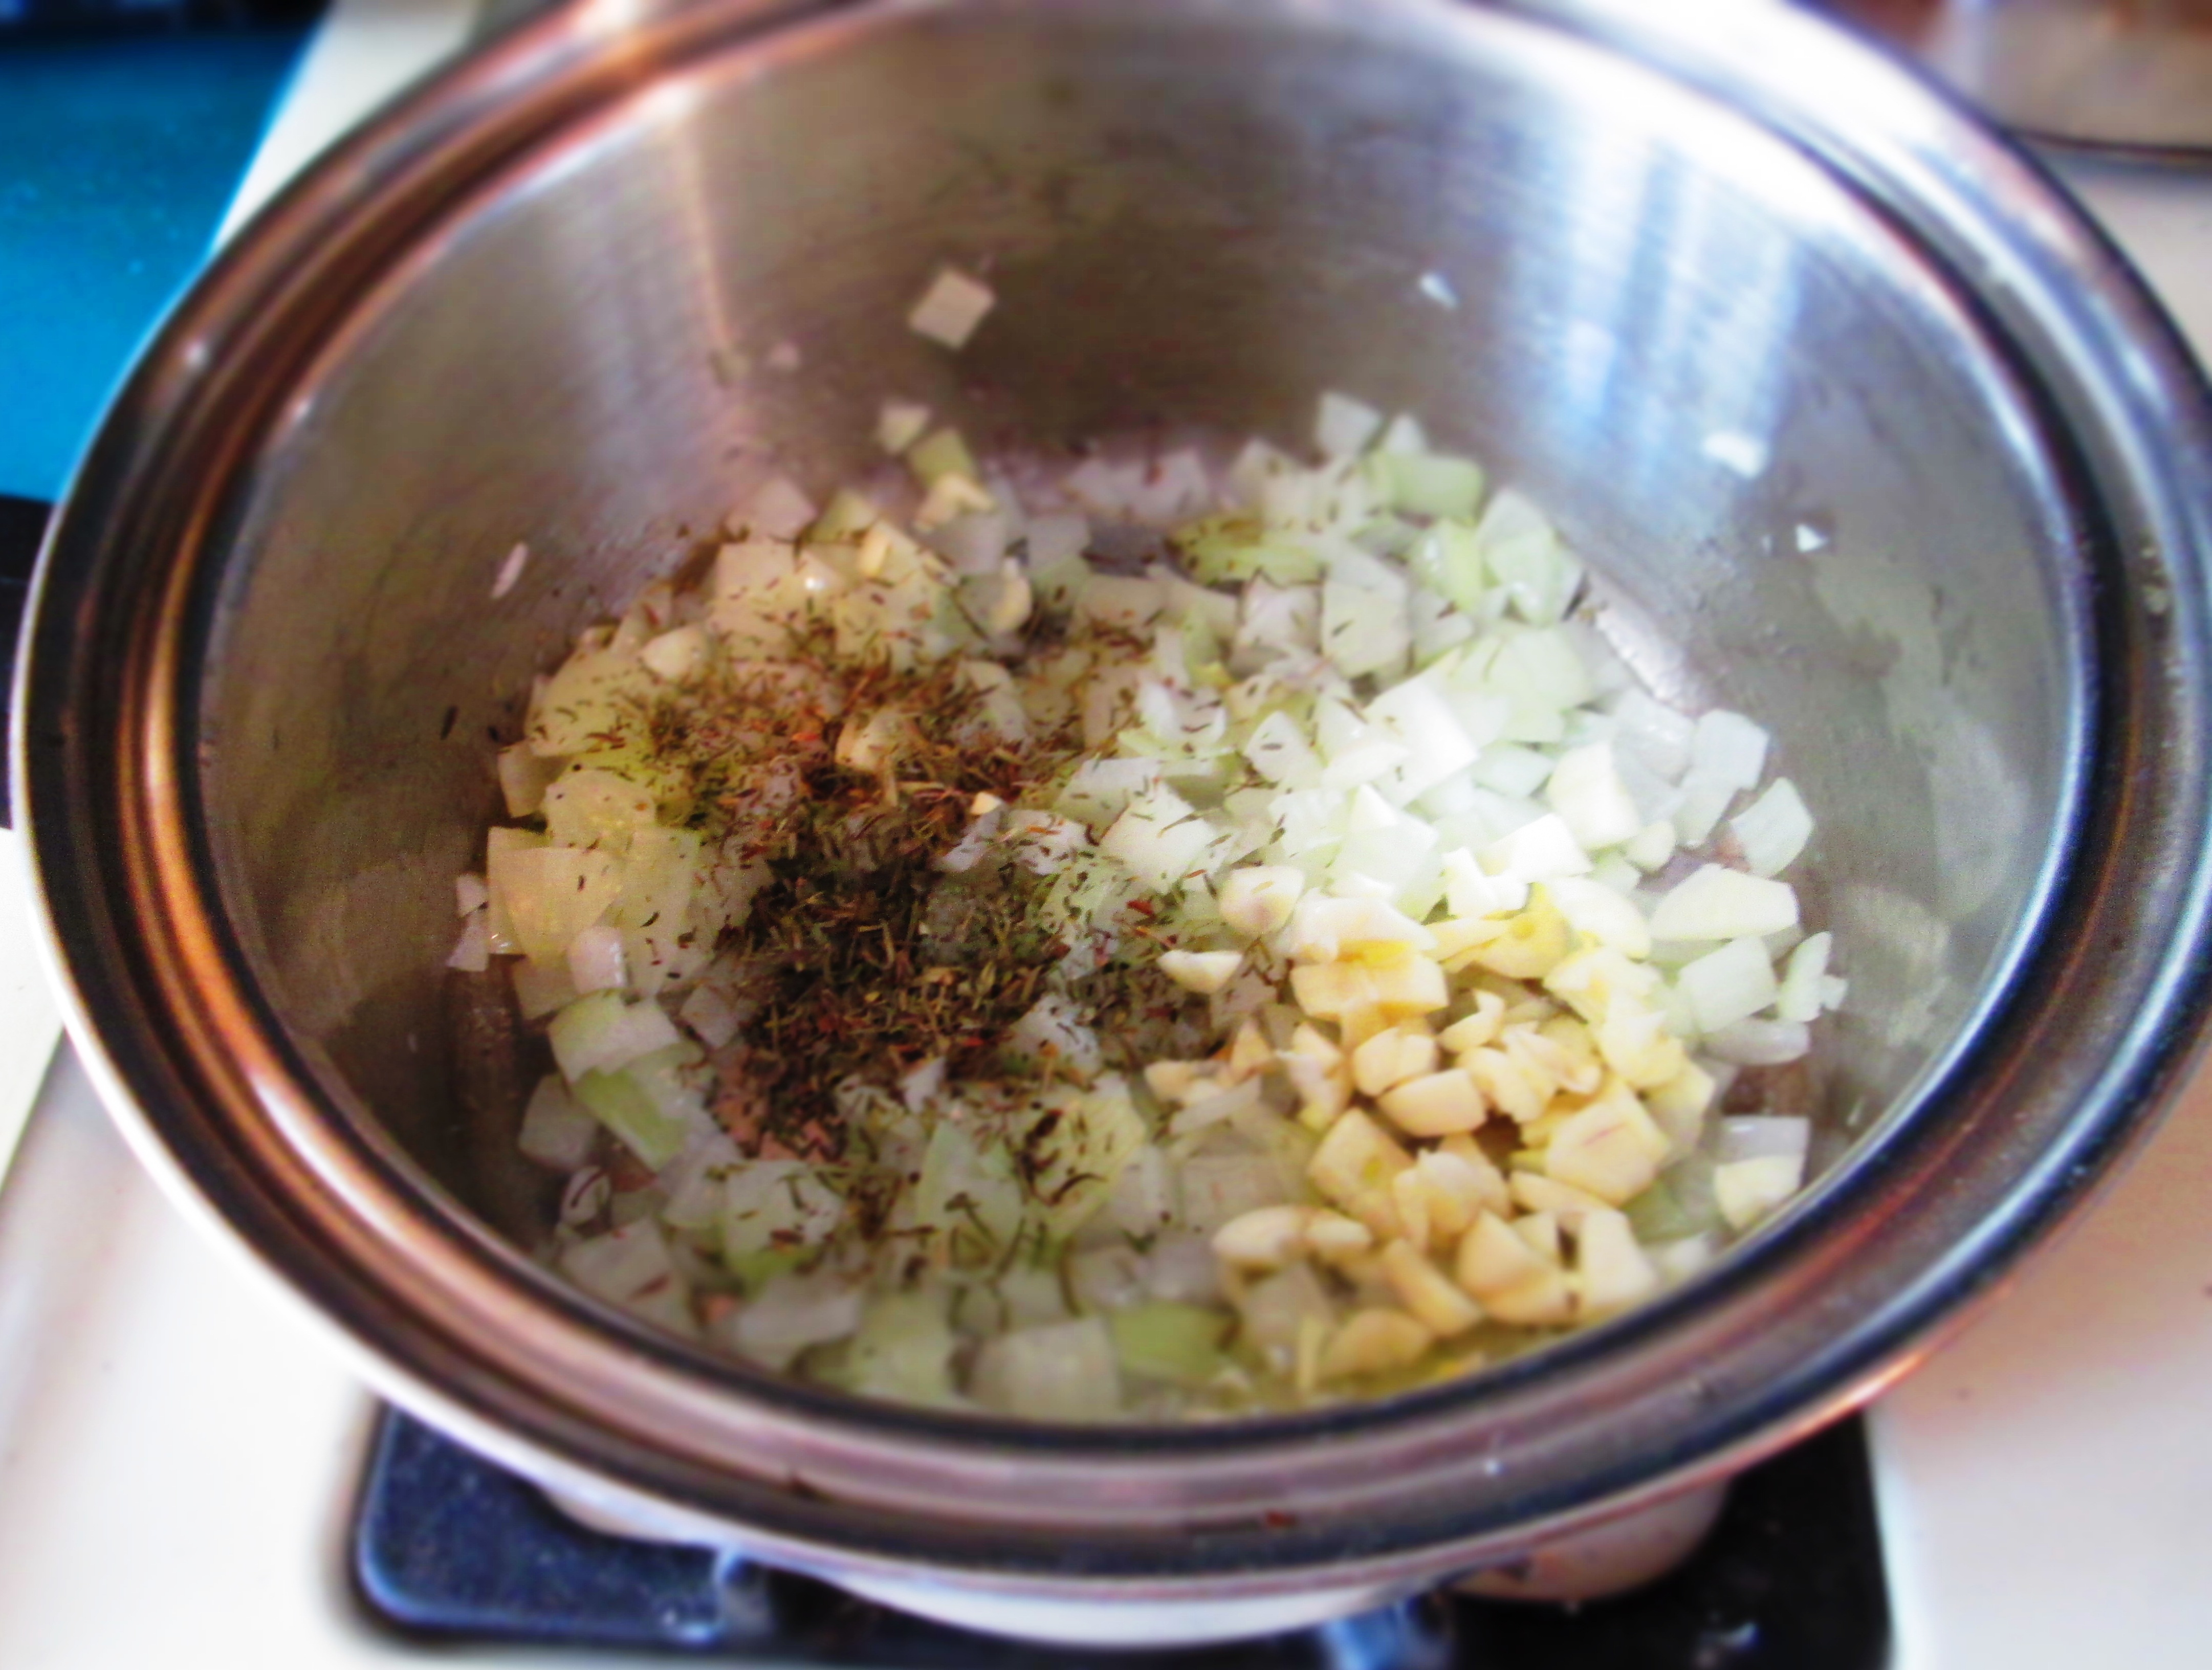
1 teaspoon olive oil 1 small onion, chopped ½ teaspoon kosher salt 3 large garlic cloves, coarsely chopped 1 bay leaf 1 teaspoon dried spices (see instructions) 1 teaspoon garlic salt 2 cups cut-up parsnip (from 1 large parsnip) 2 cups vegetable broth 2 cups cut-up butternut squash (from 1 small squash) Fresh herbs, if available Black pepper to taste
Heat the olive oil in a medium saucepan. Add the onion and salt and cook until translucent.Add the garlic, bay leaf, dried spices (I used 1/2 teaspoon each thyme and savory), and garlic salt. Stir and continue cooking another 2 minutes.Add parsnips and saute, stirring often, until parsnips starts browning.Add broth. Bring to a boil.Add squash and any fresh herbs you want. Lower the heat and simmer, partially covered, until the vegetables are tender when pierced with a knife. Add black pepper.Transfer to a blender and puree. Taste for seasoning and adjust if needed.Serve hot.


 Sprinkle grated cheese over the top, then the extra virgin olive oil, and serve.


 When you see browned bits in the pan, deglaze with the apple cider vinegar (add it to the pan and scrape up the brown bits with a wooden spoon).
 While that’s cooking, make the dressing and set aside.
 Pour in the dressing and mix well. Taste for seasoning and adjust if needed. Squeeze the lemon over it and stir.